
How to Specify a Default Start Screen Layout for Users in Windows 8.1
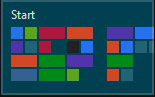
A Start screen layout includes pinned items (files, folders, apps, programs, and drives), and how app tiles are organized and named.
This tutorial will show you how to specify a custom Start screen layout to be the default for specific or all users that cannot be changed in the Pro and Enterprise editions of Windows 8.1 and Windows RT 8.1.
You must be signed in as an administrator to be able to do the steps in this tutorial.
This tutorial will show you how to specify a custom Start screen layout to be the default for specific or all users that cannot be changed in the Pro and Enterprise editions of Windows 8.1 and Windows RT 8.1.
You must be signed in as an administrator to be able to do the steps in this tutorial.
For more information, see also: Customize Windows 8.1 Start Screens by Using Group Policy
Even though the Microsoft article from the link above says this quote below, this also works just fine in Windows 8.1 Pro Update.
Even though the Microsoft article from the link above says this quote below, this also works just fine in Windows 8.1 Pro Update.
Start screen control is supported in the Windows 8.1 Enterprise operating system, the Windows RT 8.1 operating system with sideloading enabled, and in all editions of the Windows Server 2012 R2 operating system. Start screen control is not supported in the Windows 8.1 Pro operating system and the Windows 8.1 operating system.
When you specify a default Start screen layout, the user(s) will no longer be able to customize their Start screen anymore.
Affected Start screen customizations:
Affected Start screen customizations:
- Drag and drop tiles to arrange apps on Start screen.
- Name or rename groups of apps on Start screen.
- Resize app tiles on Start screen.
- The ability to "Pin to Start" anything from anywhere.
- "Unpin from Start" by selecting (press and hold or right click) an app in Start and Apps view.
- "Pin to taskbar" or "Unpin from taskbar" by selecting (press and hold or right click) a desktop app in Start and Apps view. You will still be able to "Pin/unpin to/from taskbar" desktop apps from File Explorer.
- "Uninstall" app by selecting (press and hold or right click) an app in Start and Apps view. You will still be able to uninstall desktop apps in Programs and Features.
- "Turn live tile on/off" by selecting (press and hold or right click) an app in Start and Apps view.
Here's How:
1. If you have not already, you will need to prepare a Start screen layout for export.
A) Create a new user account that you will use to customize the Start screen layout.
B) Sign in to the user account that you created.
C) Customize the Start screen as you want users to see it by using the following techniques:
- Start Screen - Pin or Unpin App, Folder, or Drive in Windows 8
- Apps - Turn Live Tiles On or Off in Windows 8
- Start Screen Apps - Organize into Groups
- Start Screen - Name or Rename a Group of Apps in Windows 8
Be sure to only have anything pinned to the Start screen that all users have access to. If a user does not have a modern app installed that is pinned to this custom Start screen, then that app will not display for that user.
2. When finished, you'll need to export the Start screen layout as an .xml file. This .xml file is called the Start layout file, and is what's used to specify this default Start screen layout from step 1 for users.
A) Open a command prompt.
B) In the command prompt, copy and paste the command below, press Enter, and close the command prompt when it's finished.
Code:
powershell export-startlayout –path %UserProfile%\Desktop\Default_Start_Screen_Layout.xml -as xml
C) You will now have a Default_Start_Screen_Layout.xml file exported to the desktop of this user account. If you like, you can rename this .xml file anything you like without spaces.
D) Move the Default_Start_Screen_Layout.xml file to a location where you would like to use and keep it saved at. For example, the "C:\Users\Public\Documents" folder.
-path is a required parameter that specifies the path and file name for the export file. You can specify a local path or a UNC path (for example, \\FileServer01\StartLayouts\StartLayoutMarketing.xml).
The file must be accessible on the local computer when a user signs in (the user must have at least Read-only access). If the .xml file is not available, the Start screen layout is not deployed during that session, and the user can make changes to the Start screen.
If you plan to deploy a GPO that customizes Start screen layouts for domain users, store the .xml file in shared network storage that all of the users can access.
-as xml saves the layout in the .xml file format that the Start Screen Layout policy settings require.
3. Sign in to an administrator account, and open the all users, specific users or groups, or all users except administrators Local Group Policy Editor for how you want this policy applied.
4. In the left pane, click/tap on to expand User Configuration, Administrative Templates, and open Start Menu and Taskbar. (see screenshot below)

5. In the right pane of Start Menu and Taskbar, double click/tap on Start Screen Layout to edit it. (see screenshot above)
6. Do step 7 or 8 below for what you would like to do.
7. To No Longer Specify a Start Screen Layout for Users
NOTE: This is the default setting, and will allow users to be able customize their Start screen layout how they like.
A) Select (dot) Disabled or Not Configured, click/tap on OK, and go to step 9 below. (see screenshot below step 8C)
NOTE: Not Configured is the default setting.
8. To Specify a Start Screen Layout for Users
A) If you have Windows 8.1 Enterprise and disable Start Screen Layout policy settings that have been in effect, you must update the Last Modified date on the .xml file before continuing on to step 8B to enable the policy settings again.
- Open a command prompt.
- In the command prompt, type the command below, press Enter, and close the command prompt when it's finished.
For example:
Code:
powershell (ls "C:\Users\Public\Documents\Default_Start_Screen_Layout.xml".LastWriteTime = Get-Date
B) Select (dot) Enabled. (see screenshot below)
C) In the Start Layout File field under Options, type the full path of the .xml file location from step 2D above, click/tap on OK, and go to step 9 below. (see screenshot below)

9. You can now close the Local Group Policy Editor window if you like.
10. The next time the users sign in, the GPO will import the new Start screen layout.
That's it,
Shawn
Attachments
Last edited:
