How to Turn "Public Folder Sharing" On or Off for Networks in Windows 8
This tutorial will show you how to turn "Public folder sharing" on or off to allow access of all files in the Public folders to everyone who uses your Windows 8 PC or everyone on your network, including homegroup members.
When turned off, only users signed in locally with an account on the computer are able to access files in the Public folders, and not anyone from the network.
You must be signed in as an administrator to be able to do the steps in this tutorial.
When turned off, only users signed in locally with an account on the computer are able to access files in the Public folders, and not anyone from the network.
You must be signed in as an administrator to be able to do the steps in this tutorial.
- The Public Documents, Public Downloads, Public Music, Public Pictures, and Public Videos folders are located in the C:\Users\Public folder.
- The Public folders are also included in the Documents, Music, Pictures, and Videos libraries by default to access from.
- When you share your Public folders, other people can open and view the files stored there just as if they were stored on their own PCs. Any changes they make will change the files on your PC.
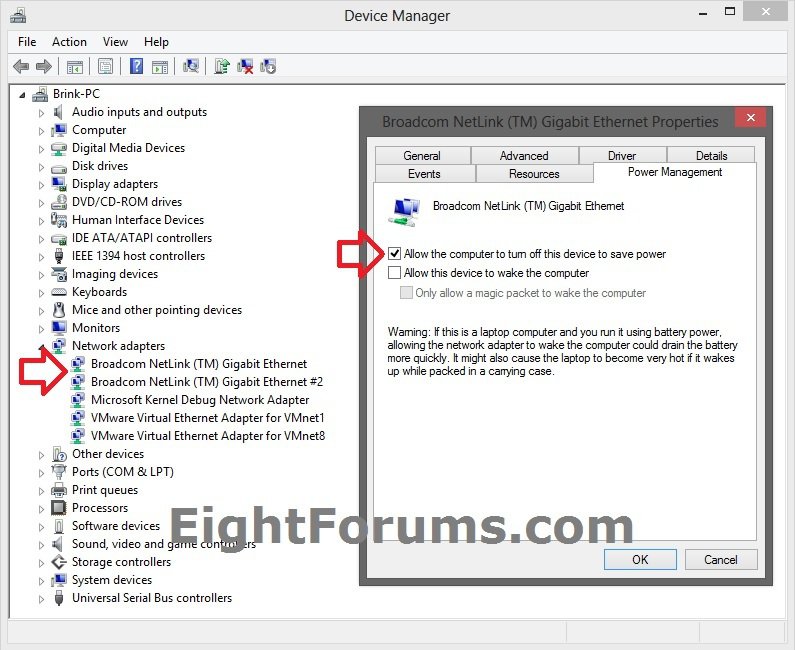
If you find that you lose connection to your shares from a network location randomly, then go into Device Manager (devmgmt.msc) on the PC that is the source of the shares. For each network adapter, uncheck the Allow the computer to turn off this device to save power option in the Power Management tab, and click/tap on OK.
The network adapter may be getting put to sleep, and breaking the network connection of the shares.

The network adapter may be getting put to sleep, and breaking the network connection of the shares.

Here's How:
1. Do step 2 or 3 below for how you would like to open the Network and Sharing Center.
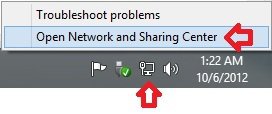
2. On the desktop, right click on the Network system icon in the taskbar notification area, click/tap on Open Network and Sharing Center, and go to step 4 below. (see screenshot below)
OR
3. Open the Control Panel (icons view), click/tap on the Network and Sharing Center icon, and go to step 4 below.
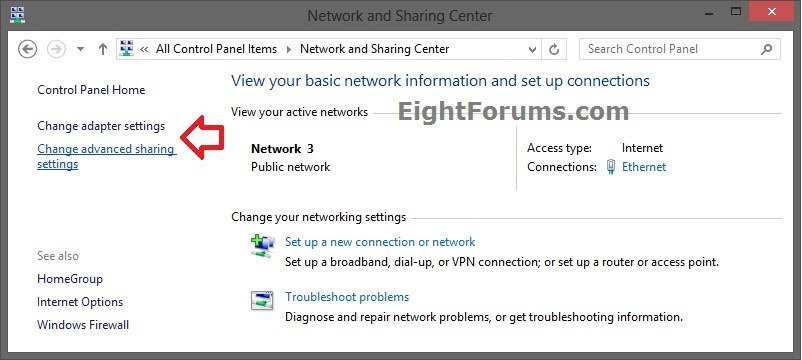
4. In the left pane of Network and Sharing Center, click/tap on the Change advanced sharing settings link. (see screenshot below)
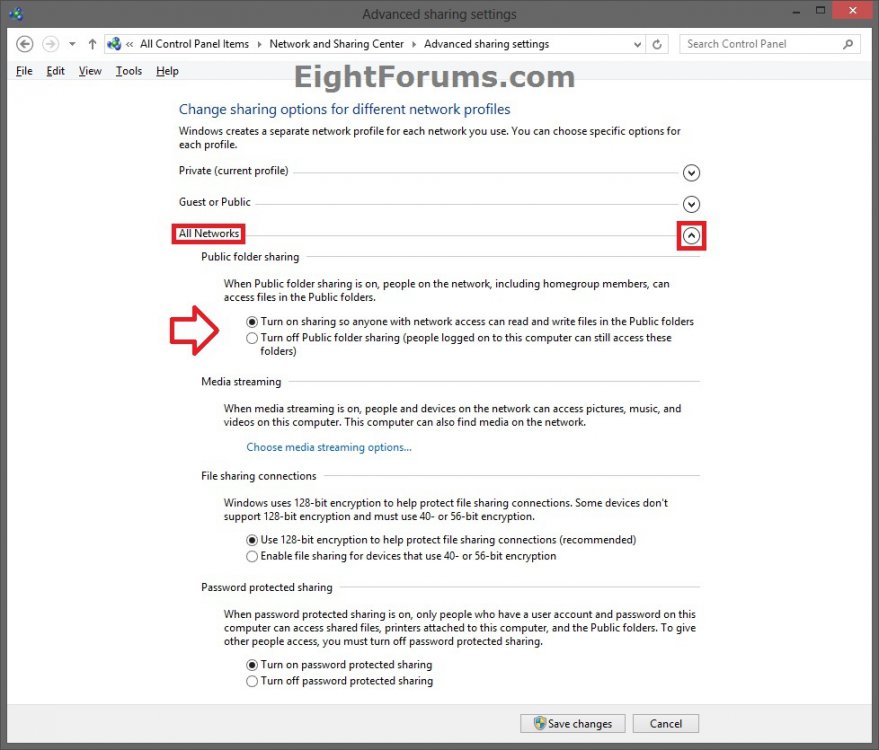
5. Click/tap on the
6. To Turn On "Public folder sharing" for Networks in Windows 8
A) Click/tap on (dot) Turn on sharing so anyone with network access can read and write files in the Public folders. (see screenshot below step 5)
B) If you have not already, turn on file and printer sharing for your current network profile (ex: private).
C) If you like, you could also turn on password protected sharing so only people who have a user account and password on your Windows 8 PC can access shared files, attached printers, and Public folders on your PC.
D) Go to step 8 below.
7. To Turn Off "Public folder sharing" for Networks in Windows 8
NOTE: This is the default setting.
A) Click/tap on (dot) Turn off Public folder sharing, and go to step 8 below. (see screenshot below step 5)
8. Click/tap on Save changes. (see screenshot below step 5)
9. If prompted by UAC, then click/tap on Yes.
10. You can now close the Network and Sharing Center window if you like. (see screenshot below step 4)
That's it,
Shawn
Related Tutorials
- How to Set Network Location to be Public or Private in Windows 8
- How to Turn Network Discovery On or Off in Windows 8
- How to Turn "File and Printer Sharing" On or Off for Networks in Windows 8
- How to Turn "Password Protected Sharing" On or Off in Windows 8
- How to Change the File Sharing Connections Encryption Settings in Windows 8
- How to "Share with" and "Stop Sharing" Files and Folders on a Network or Shared PC in Windows 8
- How to Change Homegroup Sharing Settings in Windows 8
- How to Add or Remove "Share with" Context Menu Item in Windows 7 and Windows 8
- How to Create a Shared Folders Shortcut in Vista, Windows 7, and Windows 8
Attachments
Last edited:


