How to Setup "Windows 8 To Go" on a USB Flash Drive or USB Disk in any Windows 7 and Windows 8
This tutorial will show you how to manually setup Windows 8 To Go from any Windows 7 or Windows 8 (except Windows 8 RT) to be able to install and run Windows 8 from a USB flash drive or external USB disk. The procedure for the USB stick is discussed in Chapter A, the procedure for the USB attached disk is shown in Chapter B.
You should expect the whole process to take about 3 hours elapsed time if you do not have the WAIK on your system and about 1 hour if the WAIK is installed on your system.
If you install on a stick, it is very important to choose a fast USB stick of at least 16GB size. For the USB attached disk it is preferable to use a USB3 attachment, but USB2 should also work. In addition, you need a program to create a virtual CD and the Windows 8 .iso. The rest is done in Command Prompt.
For more information and details about Windows To Go workspaces, see: Windows To Go: Feature Overview
Those of you who have an Enterprise edition of Windows 8, you can also explore this option which is built into the Enterprise edition.
How to Create a "Windows To Go" Workspace on a USB Flash Drive in Windows 8 Enterprise
How to Create a "Windows To Go" Workspace on a USB Flash Drive in Windows 8 Enterprise
It is highly recommended to use a USB 3.0 flash drive or disk. Otherwise it will run like a snail from it.
Chapter A - Installation on a stick
Step 1 - Check the speed of your USB stick
To measure the speed of your stick I recommend Atto Disk Benchmark. It will produce a benchmark result like this picture.
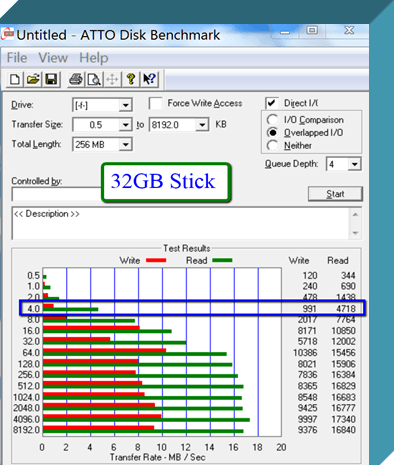
It is the example of a 32GB USB2 stick that is not very fast. Especially the 4K read/write speeds are pretty slow. It is important to focus on the 4K size because that is the blocksize that the system uses most of the time. The large blocksizes are unimportant.
Loading the system (appr. 600MB to 1GB) at boot time will take over 3 minutes at a read speed of 4.7MB/sec. But, since there are also other activities going on at this time, the boot is even longer.A stick with characteristics like this one is not recommended.
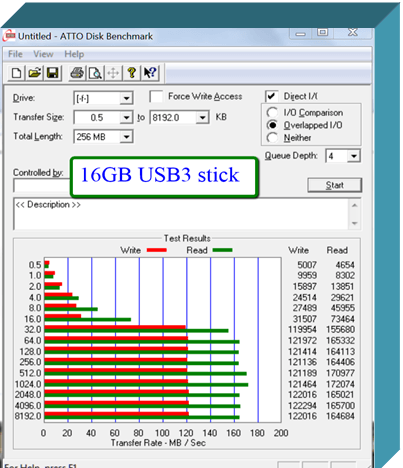
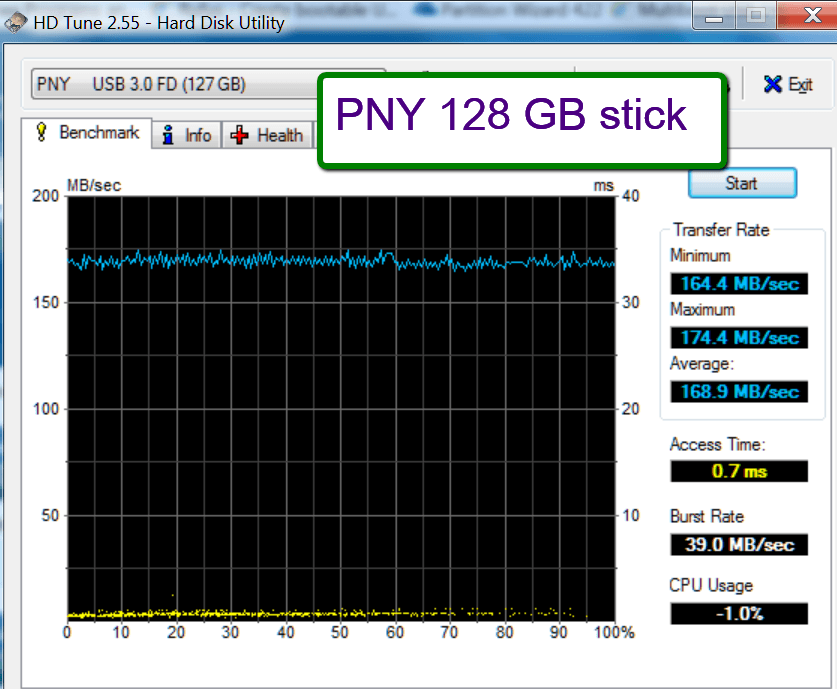
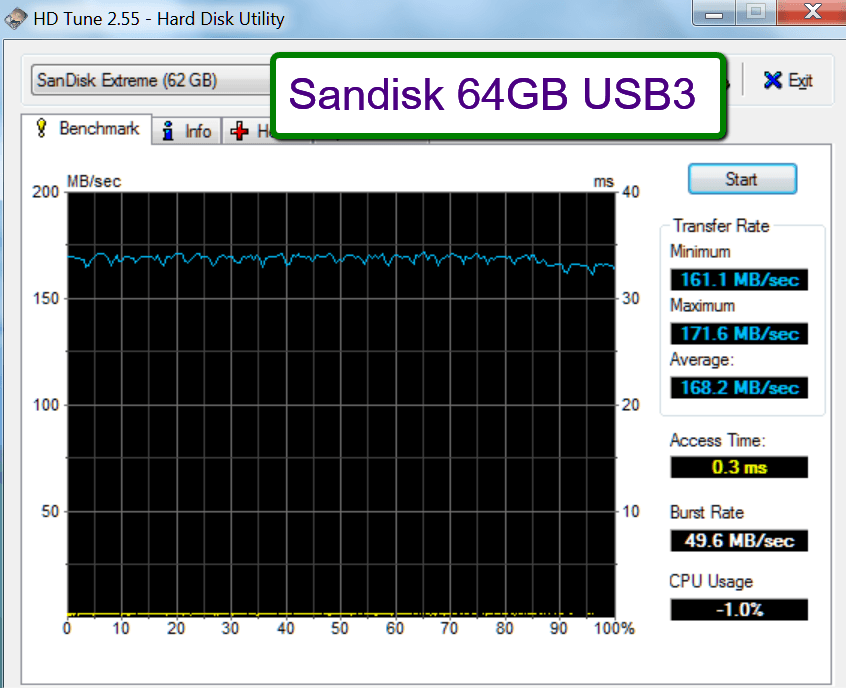
This is a USB3 stick which runs Windows 8 fluently. The initial system setup still takes a bit more time than on a fast disk, but it is not really out of the ordinary.
On this stick I have loaded the 64bit Windows 8 and I am very pleased with both the boot time and the execution of programs and system facilities.
Step 2 - Download the WAIK and extract the imagex file
If you do not have the WAIK (Windows Automated Installation Kit) on your system, then you have to download from this Microsoft site. This will be a bit lengthy because the WAIK is 1.7GB - figure a 2-hour download.
When you are done downloading the KB3AIK_EN.iso file, mount this .iso, open and run the StartCD.exe file to install WAIK on your system.
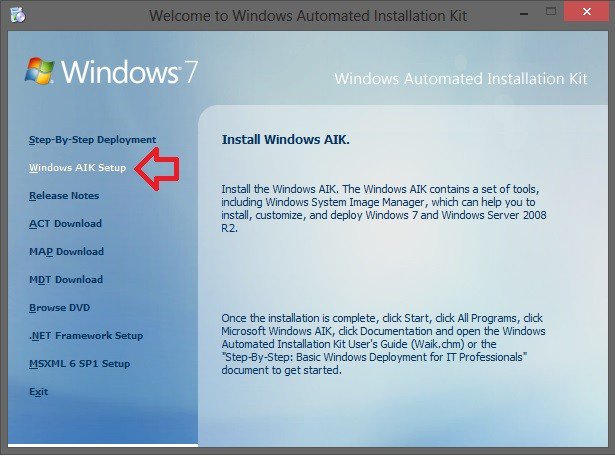
Then you have to copy the imagex.exe. You find that in C:\Program Files\Windows AIK\Tools. There is a 32bit version and a 64bit version.
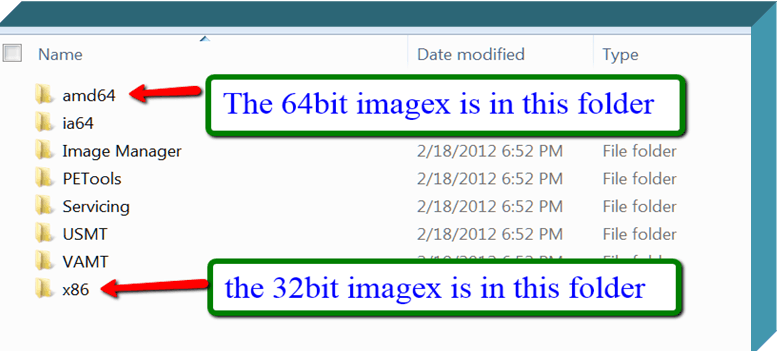
You choose 32bit when you install a 32bit version of Windows 8 on your stick - 64bit when you install the 64bit version. Copy the one that corresponds to your Windows 8 .iso to the desktop. You can copy it to any other folder, but then you have to change the path in the installation command that we will run later in Command Prompt.
I have tried both the 32bit version (on the slow USB2 stick) and the 64bit version (on the fast USB3 stick). Both work as far as I can tell although there is a significant difference in performance.
Step 3 - Mount the Win8 .iso in a virtual BD ROM
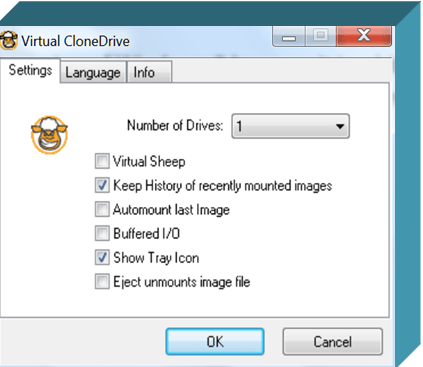
We first have to create a virtual BD ROM with theVirtual Clone Drive Program. Download, install and run this program. It is very simple. When you start the program, you get this window. Just click OK and you are done.
You then go to Computer and you find your BD ROM.
Note: If you are working in Windows 8, you can mount the .iso directly from File Explorer. Just right click on the .iso and you will find a mount option. See: ISO Images - Mount or Unmount
To mount the .iso in the BD ROM, follow the instructions in the next picture. Make sure you remember the drive letter of the BD ROM (in my case 'H:') because you will need that later.
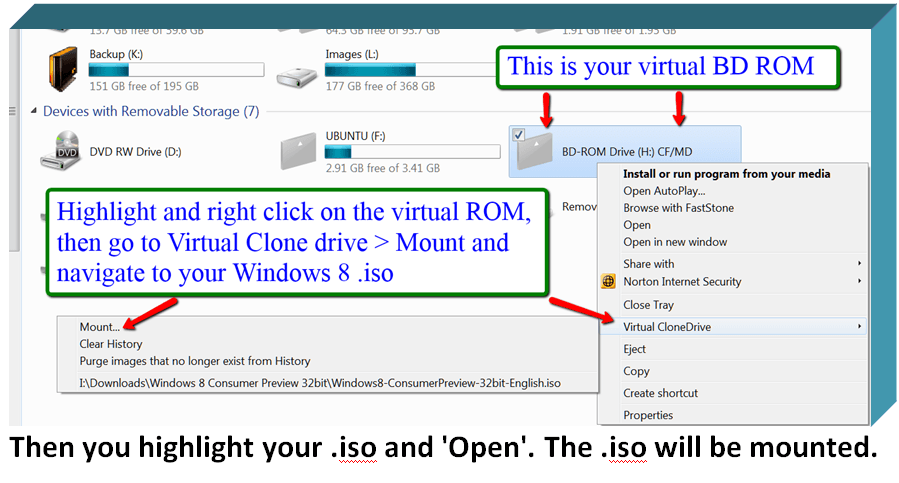
Step 4 - Prepare your USB stick
We now have to define a primary active partition on the USB stick. For that we open an elevated Command Prompt (run as administrator). Type or paste each of the following commands (one by one) and hit Enter after each command.
Diskpart
List disk
Select disk n (where n is the number that was given for your stick in List disk)
Clean
Create partition primary
Format fs=ntfs quick
Assign
Active
Exit
Your stick is now ready for the installation of Windows 8.
Step 5 - Install Windows 8 on the stick
This is very easy now with a command in Command Prompt. It may take a little while to transfer the whole system, so be patient. The Command is:
"C:\Users\Your Name\Desktop\imagex.exe" /apply H:\sources\install.wim 1 F:\
Your Name is the name of your system. H: is the letter of my BD ROM (step 3). If your BD ROM has another letter, you have to change that accordingly. F: is the drive letter of my stick (step 4). Here you also have to replace it if your stick is on another letter.
As last step you have to run a command to install the boot files. If you are installing on a Windows 7 system, use this command. You have to be aware that this installs a Win7 BCD which works but is slower than the Win8 UEFI BCD.
bcdboot F:\windows /s F:
If you are installing on a Windows 8 system, use this command below. This is the preferred BCD because it is faster for boot and shutdown. You can rerun this command in a Win8 system even if you already installed the Win7 BCD in a Win7 system. It will 'upgrade' the BCD to the Win8 (UEFI) level.
bcdboot F:\windows /s F: /f ALL
Here again F: is the letter for my stick which you may have to adjust.
Step 6 - Run Windows 8 from your USB stick
You are done with the installation and can now run Windows 8 off your stick. For that you have to change the boot sequence in the BIOS pointing at the USB stick as first boot device.
I run the stick version on my laptop and have made the USB #1 in the boot sequence. That way it loads Windows 8 from the stick when the stick is plugged in and Windows 7 from the SSD when there is no Windows 8 stick.
As I said earlier, a USB stick is no SSD - although the technology is similar. So be patient, especially with the initial setup where the system has to do a lot of write operations which are slow on a stick. But once the system is in full swing, it is quite some fun.
Warning: In Windows 7, I usually keep my bootmgr on the C: partition. With that setup I had some problems running Windows 8 from the stick. Each time it would corrupt my bootmgr. I then created a separate 400MB partition and moved the bootmgr there. That seems to cure the problem.
Chapter B - Installation on a USB attached disk
The procedure is very similar to what I described for the USB stick with a few exceptions.
Step 1 - Check the speed of the USB attached disk
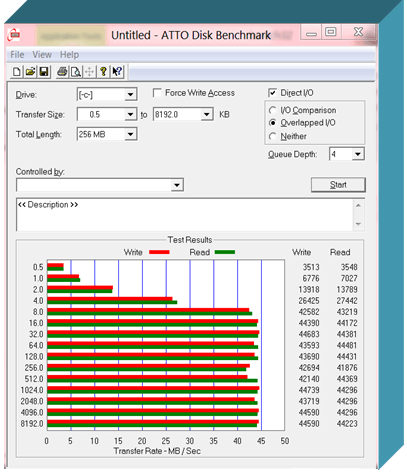
This is the HDD I run in a USB3 open enclosure. It is a 5400RPM disk that I had recovered from my laptop when I installed the SSD.
The R/W speeds at the 4K blocksize are very similar to my USB3 stick. The R/W speed at the bigger blocksizes is slower because the disk can only spin so fast.
Performance wise it felt slower than the performance on the USB3 stick but was still very acceptable.
Step 2 - Download the WAIK and extract the imagex file
This step is exactly the same as described for the stick.
Step 3 - Mount the Win8 .iso in a virtual BD ROM
This step is exactly the same as described for the stick. Make sure you apply the correct device letters for the BD ROM and the HDD.
Step 4 - Prepare your USB disk
Here I went a different route. I used Partition Wizardon my Windows 7 system to define a primary active partition on the HDD. That is easier than working with Command Prompt on a multi partition disk.
Note: There have been reports of problems when using Partition Wizard - although I did not encounter any problems myself. The report was that the final system did not boot. In such a case you might want to go back and use Command Prompt as the safer method.
Step 5 - Install Windows 8 on the disk
That is again the same procedure as for the stick. I did the installation step on my Windows 7 system but copied the BCD on my Windows 8 in Virtual Box.
Step 6 - Run Windows 8 from your USB disk
Change the boot sequence in the BIOS to boot from USB and off you go. The setup of Windows 8 took appr. 20 minutes (in the USB3 enclosure). During that setup, there is one reboot where you have to change the boot sequence again - else the system will boot into the first boot device it finds which is probably your default OS. When that was done, operation was as one would expect from a slow HDD.
I then tried it on my desktop in an eSata enclosure. The system first made some automatic adjustments for the different hardware. Then it ran flawlessly. The performance was about the same as from the USB3 enclosure. But both are slower than my USB3 stick.
If you have a USB disk with 20 to 25GB of free space lying around, it is certainly an alternative to run the Windows 8 CP from that. If nothing else, it is a lot of fun making the installation and seeing that it works.
Related Tutorials
- How to Create a "Windows To Go" Workspace on a USB Flash Drive in Windows 8 Enterprise
- How to Enable or Disable Store on Windows To Go Workspaces
- How to Hide or Unhide Drives from Host Computer on "Windows To Go" Workspace
- How to Create a Bootable USB or DVD with a Windows 8 ISO
- How to Mount or Unmount ISO images in Windows 8
- How to Enable or Disable Hibernate in "Windows To Go" Workspace
- How to Enable or Disable Sleep in "Windows To Go" Workspace
- Enable or Disable Always Automatically Boot PC from USB Drive in Windows To Go Startup Options
- How to Create a Windows To Go Startup Options Shortcut in Windows 8 and 8.1
Attachments
Last edited by a moderator:

