Tip
If you are installing Windows 8/10 from a USB flash drive in UEFI Boot Mode, then you need to have a UEFI Boot Mode compatible Windows 8/10 USB flash drive.
Here is more info:
UEFI Boot Mode (installing using the
GPT partition style) and
Legacy BIOS Boot Mode (installing using the
MBR partition style). ->
link
Note: Windows 8/10 64-bit installation media is compatible with UEFI Secure Boot enabled.
Gigabyte motherboard with UEFI firmware. How to install Windows 8/10 64-bit in UEFI Boot Mode.
Select the following settings (
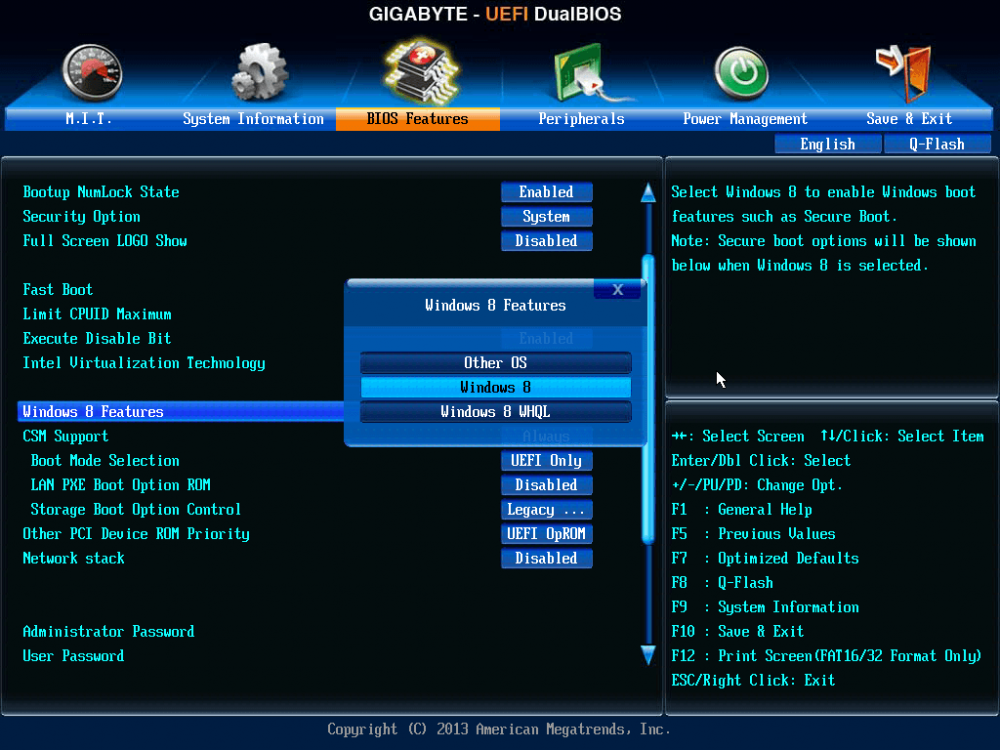
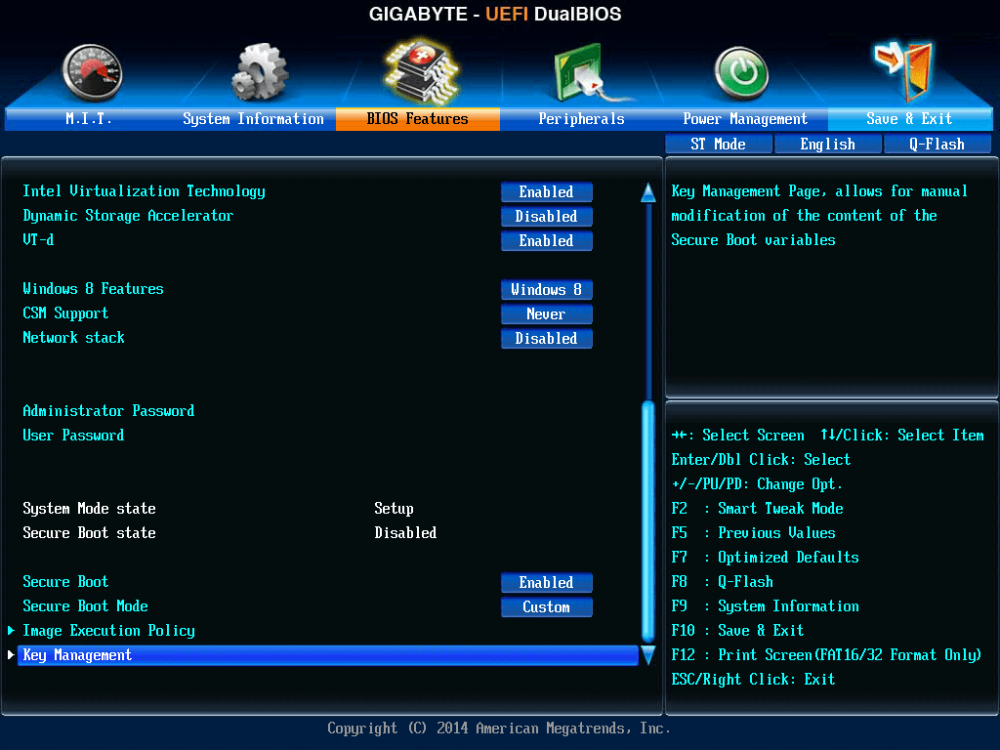
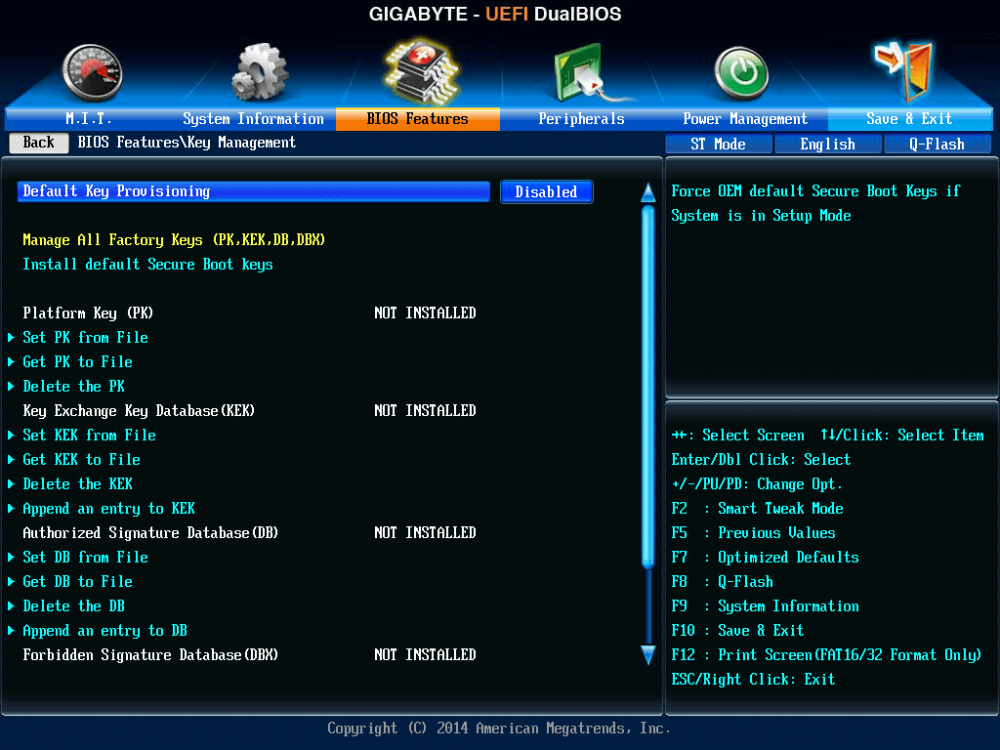
marked with red color) in the Gigabyte UEFI firmware, if you want to install Windows 8/10 64-bit in UEFI Boot Mode.
Windows 8/10 Features
Allows you to select the operating system to be installed.
- Other OS (Default)
-
Windows 8/10
- Windows 8/10 WHQL
CSM Support
Enables or disables UEFI CSM (Compatibility Support Module) to support a legacy PC boot process.
- Enabled - Enables UEFI CSM. (Default)
-
Disabled - Disables UEFI CSM and supports UEFI BIOS boot process only.
This item is configurable only when
Windows 8/10 Features is set to
Windows 8/10 or
Windows 8/10 WHQL.
LAN PXE Boot Option ROM
Allows you to select whether to enable the legacy option ROM for the LAN controller. (Default: Disabled)
This item is configurable only when
CSM Support is set to
Enabled.
Storage Boot Option Control
Allows you to select whether to enable the UEFI or legacy option ROM for the storage device controller.
- Disabled - Disables option ROM.
- UEFI Only - Enables UEFI option ROM only.
- Legacy Only - Enables legacy option ROM only. (Default)
This item is configurable only when
CSM Support is set to
Enabled.
Other PCI Device ROM Priority
Allows you to select whether to enable the UEFI or Legacy option ROM for the PCI device controller other than the LAN, storage device, and graphics controllers.
- Disabled - Disables option ROM.
- UEFI Only - Enables UEFI option ROM only. (Default)
- Legacy Only - Enables legacy option ROM only.
This item is configurable only when
CSM Support is set to
Enabled.
Network Stack
Disables or enables booting from the network to install a GPT format OS, such as installing the OS from the Windows Deployment Services server. (Default: Disabled)
Secure Boot
Enables or disables Secure Boot function.
-
Enabled - Enables Secure Boot.
- Disabled - Disables Secure Boot.
This item is configurable only when
Windows 8/10 Features is set to
Windows 8/10 or
Windows 8/10 WHQL.
Secure Boot Mode
Define the Secure Boot mode.
-
Standard
- Custom
This item is configurable only when
Windows 8/10 Features is set to
Windows 8/10 or
Windows 8/10 WHQL.
 Note:
Note: You do not need to change the boot order of drives in your UEFI firmware settings.
- Connect your Windows 8/10 64-bit USB flash drive (
Note: FAT32 file system) or insert your Windows 8/10 64-bit DVD.
- Restart the computer.
- Press the correct key to enter the boot menu (for example, Asus F8 and Gigabyte F12).
- Select to boot from the "
UEFI: USB/DVD device name".
After the Windows 8/10 64-bit installation is completed, you can check if
Secure Boot option is enabled in the UEFI firmware. Run the following command as administrator from the command prompt.
powershell confirm-SecureBootUEFI
The result should be
True.
Microsoft designed Secure Boot to protect the computer from low-level exploits and rootkits and bootloaders. A security process shared between the operating system and Unified Extensible Firmware Interface (UEFI, replacing the BIOS), Secure Boot requires all the applications that are running during the booting process to be pre-signed with valid digital certificates. This way, the system knows all the files being loaded before Windows 8/10 loads and gets to the login screen have not been tampered with.
If a bootloader has infected your computer and it tries to load during the boot-up sequence, Secure Boot will be able to undo all the changes and thwart the attack. Having Secure Boot means it is that much harder for attackers to try to compromise the start up sequence.


