How to Create a "Language Settings" Shortcut in Windows 8
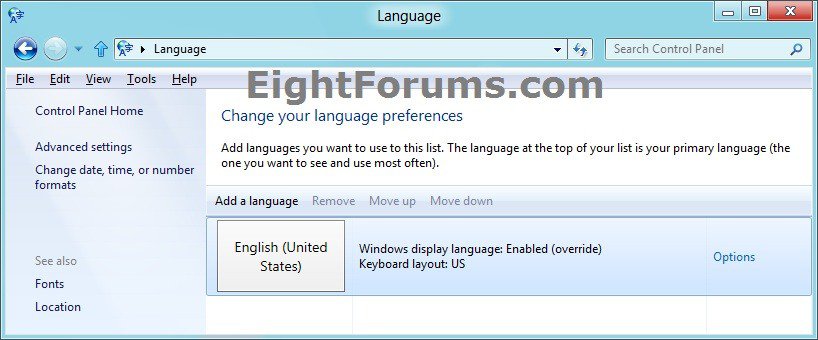
This will show how to create or download a shortcut that will open directly to the Language settings in Windows 8, Windows RT, Windows 8.1, and Windows RT 8.1.
EXAMPLE: Language Settings in Windows 8
OPTION ONE
To Download the "Language Settings" Shortcut
1. Click on the Download button below to download the ZIP file below.
Language_Settings.zip
2. Save the .zip file to the desktop.
3. Open the .zip file and extract (drag and drop) the Language Settings shortcut to the desktop.
4. For the first time that you run the shortcut, uncheck the Always ask before opening this file box, and click on Open to unblock the shortcut.
5. If you like, you can Pin to Taskbar on desktop, Pin to Start screen, add to Quick Launch, assign a keyboard shortcut to it, or move this shortcut to where you like for easy use.
6. When done, you can delete the downloaded .zip file on the desktop if you like, or save it to use again.
OPTION TWO
To Manually Create the "Language Settings" Shortcut
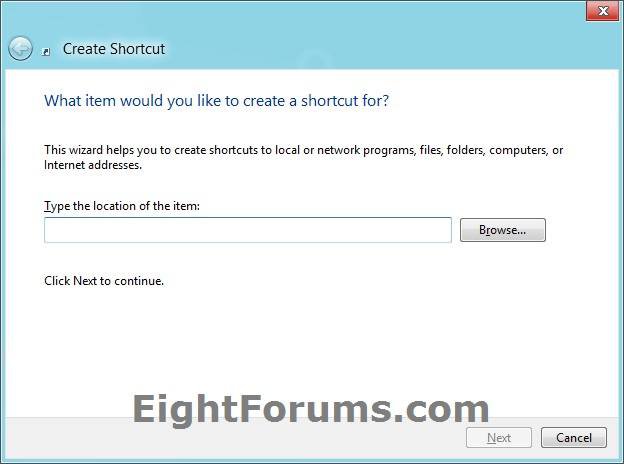
1. Right click on a empty area on desktop, and click on New and Shortcut.
2. Copy and paste the command below into the location area, and click on the Next button. (see screenshot below)
%WinDir%\explorer.exe shell:::{BF782CC9-5A52-4A17-806C-2A894FFEEAC5}
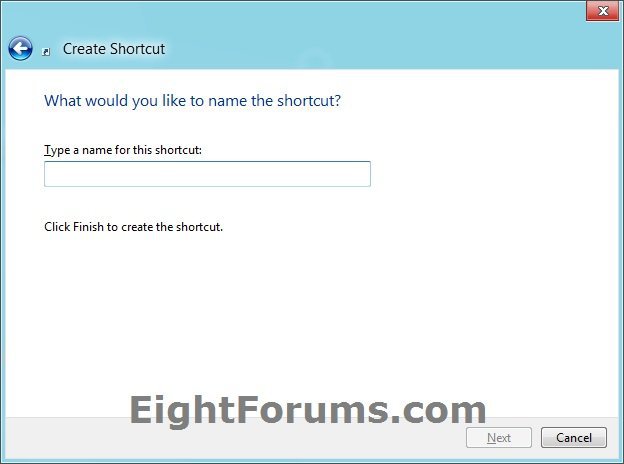
3. Type Language Settings for the name, and click on the Finish button. (see screenshot below)
NOTE: You can name this shortcut anything you would like though.
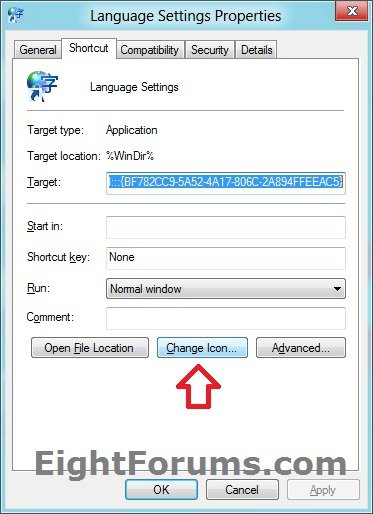
4. Right click on the new Language Settings shortcut on the Desktop and click on Properties.
5. Click on the Shortcut tab, then click on the Change Icon button. (see screenshot below)
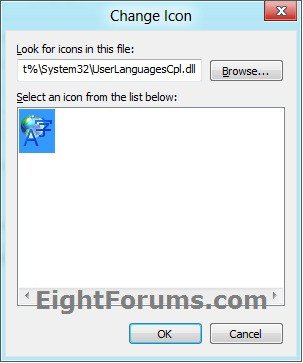
6. In the line under "Look for icons in this file", copy and paste the location below and press Enter. (see screenshot below)
%SystemRoot%\System32\UserLanguagesCpl.dll
7. Select the icon highlighted in blue above, and click on OK. (see screenshot above)
NOTE: You can use any icon that you would like instead though.
8. Click on OK. (see screenshot below step 5)
9. If you like, you can Pin to Taskbar on desktop, Pin to Start screen, add to Quick Launch, assign a keyboard shortcut to it, or move this shortcut to where you like for easy use.
That's it,
Shawn
Related Tutorials
- How to Install and Uninstall Language Packs in Windows 8 and 8.1
- How to Change the "Windows Display Language" in Windows 8 and 8.1
- How to Add or Remove Input Methods for Keyboard Layout in Windows 8 and 8.1
- How to Set a Default Input Method or Keyboard Layout Language in Windows 8 and 8.1
- How to Turn the Desktop Language Bar On or Off in Windows 8 and 8.1
- How to Add or Remove Languages in Windows 8 and 8.1
Attachments
Last edited:

