How to Enable or Disable Ability to Add or Remove Sites from Internet Explorer Security Zones
Zone security in Internet Explorer is a system that enables you to divide online content into categories, or zones. You can add or remove websites from the zones, depending on your level of trust in a website. Users can set default or custom level settings per security zone.
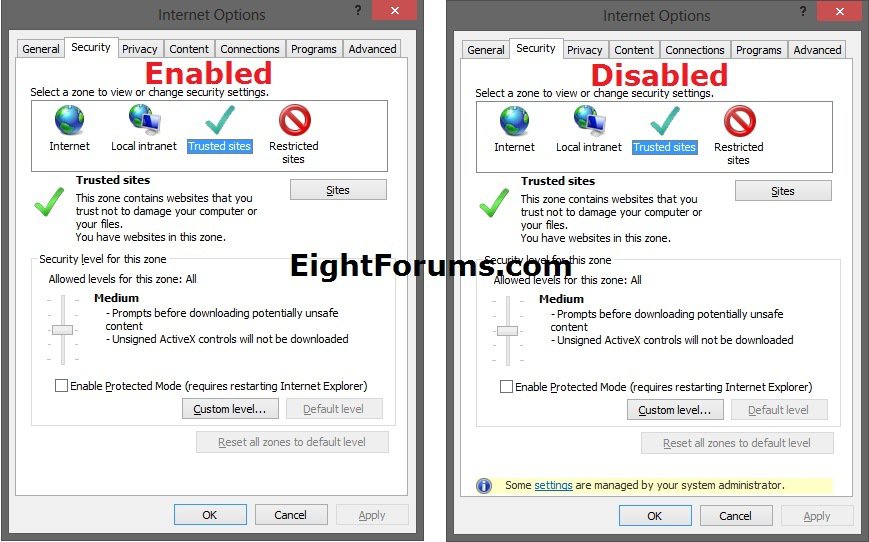
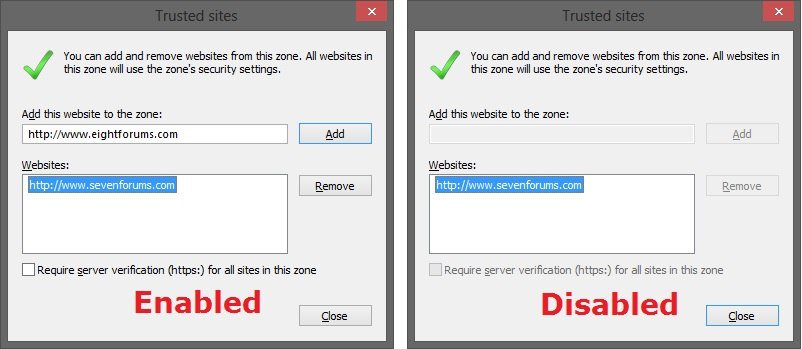
This tutorial will show you how to enable or disable the ability of all users to add or remove sites from the advanced "Local intranet", "Trusted sites", and "Restricted sites" security zones list in Internet Explorer.
You must be signed in as an administrator to be able to do the steps in this tutorial.
This could be handy to add or remove what sites you like to the security zones, then disable it to prevent any changes by users.
EXAMPLE: Add/Remove Sites to IE Security Zones Enabled and Disabled
OPTION ONE
Enable/Disable Add/Remove Sites in Security Zones using REG File
1. Do step 2 or 3 below for what you would like to do.
2. To Enable Add/Remove Sites in IE Security Zones
NOTE: This is the default setting.
A) Click/tap on the Download button below to download the file below, and go to step 4 below.
Enable_Add_Remove_Sites_IE_Security_Zones.reg
3. To Disable Add/Remove Sites in IE Security Zones
A) Click/tap on the Download button below to download the file below, and go to step 4 below.
Disable_Add_Remove_Sites_IE_Security_Zones.reg
4. Save the .reg file to your desktop.
5. Double click/tap on the downloaded .reg file to merge it.
6. If prompted, click/tap on Run, Yes (UAC Windows 7/8) or Continue (UAC Vista), Yes, and OK.
7. When finished, you can delete the downloaded .reg file if you like.
OPTION TWO
Enable/Disable Add/Remove Sites in Security Zones using Group Policy
NOTE: This option for using group policy is only available in the Vista Business, Vista Ultimate, Vista Enterpise Windows 7 Professional, Windows 7 Ultimate, Windows 7 Enterprise, Windows 8 Pro, and Windows 8 Enterprise editions.
1. Press Windows+R to open the Run dialog, type gpedit.msc, and click/tap on OK.
2. If prompted by UAC, then click/tap on Yes (Windows 7/8) or Continue (Vista).
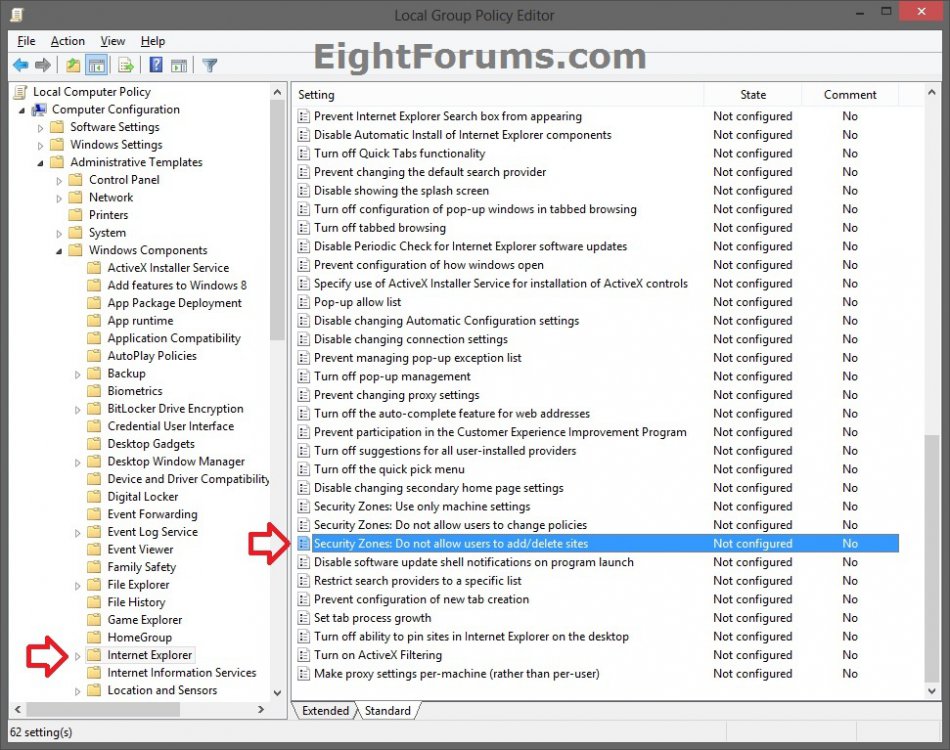
3. In the left pane, click/tap on to expand Computer Configuration, Administrative Templates, Windows Components, and open Internet Explorer. (see screenshot below)
4. In the right pane of Internet Explorer, double click/tap on Security Zones: Do not allow users to add/delete sites. (see screenshot above)
5. Do step 6 or 7 below for what you would like to do.
6. To Enable Add/Remove Sites in IE Security Zones
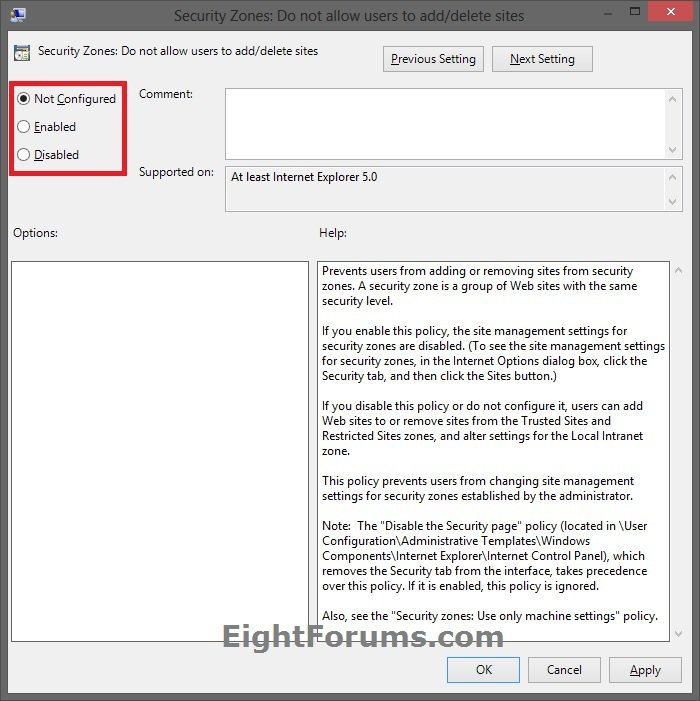
A) Select (dot) Disabled or Not Configured, click/tap on OK, and go to step 8 below. (see screenshot below step 7A)
NOTE: Not Configured is the default setting.
7. To Disable Add/Remove Sites in IE Security Zones
A) Select (dot) Enabled, click/tap on OK, and go to step 8 below. (see screenshot below)
8. You can now close the Local Group Policy Editor window if you like.
That's it,
Shawn
Attachments
Last edited:


