How to Change the Language for Non-Unicode Programs in Windows
The display language is the language that Windows uses in wizards, dialog boxes, menus, Help and Support topics, and other items in the user interface. Some display languages are installed by default, and others require you to install additional language files. When you change the display language, it is changed for your user account and is not changed on the Welcome screen.
When you change the display language, the text in menus and dialog boxes for some programs might not be in the language that you want. This happens because the program might not support Unicode.
This tutorial will show you how to change which language (system locale) to use when displaying text in programs that do not support Unicode for all users in Windows 7, Windows 8, and Windows 8.1.
You must be signed in as an administrator to be able to do the steps in this tutorial.
Here's How:
1. Open the Control Panel (icons view) in Windows 7 or Windows 8, and click/tap on the Region and Language (Windows 7) or Region (Windows 8) icon.
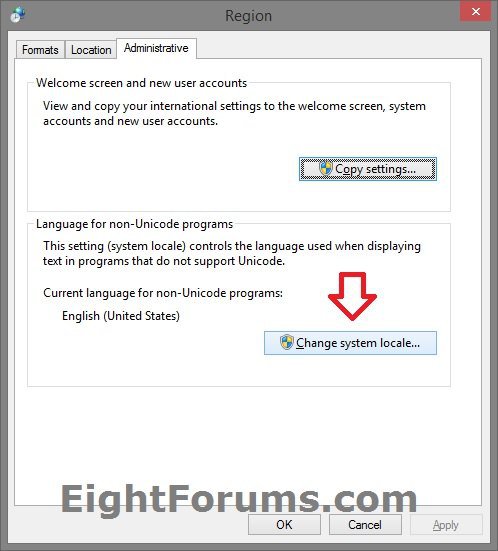
2. Click/tap on the Administrative tab, then click/tap on the Change system locale button. (see screenshot below)
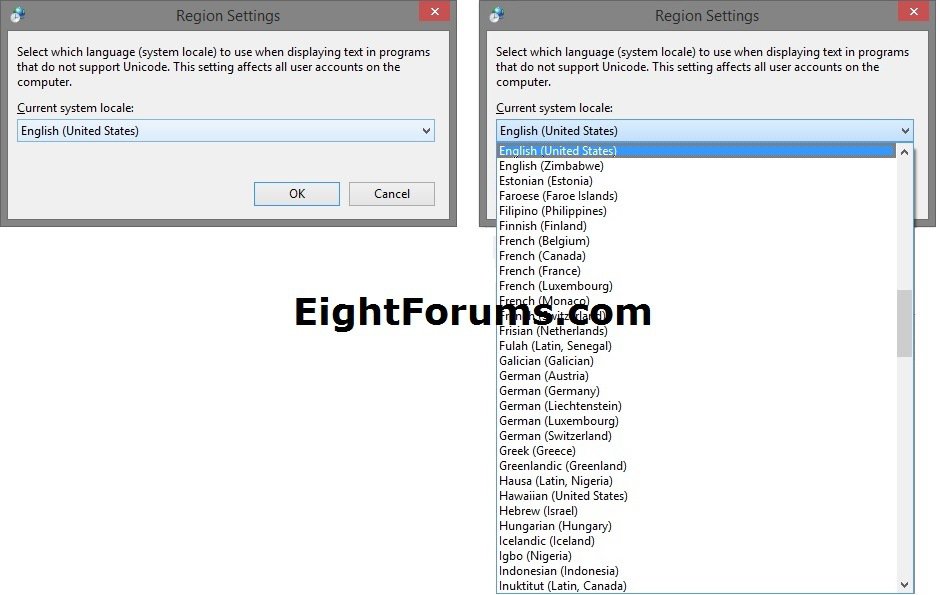
3. Select which language to use when displaying text in programs that do not support Unicode, and click/tap on OK. (see screenshots below)
4. Click/tap on OK. (see screenshot below step 2)
That's it,
Shawn
Related Tutorials
- How to Change Your Display Language in Windows 8 and 8.1
- How to Change Display Language in Vista and Windows 7 Ultimate and Enterprise
- How to Change the Regional Format Language in Windows 7 and Windows 8
- How to Copy Your Region and Language Settings to New Users and Welcome Screen
- How to Add or Remove Input Methods for Keyboard Layout in Windows 8
- How to Set a Default Input Method or Keyboard Layout Language in Windows 8
- How to Change the Text Size of Items in Windows 8 Advanced Appearance Settings
- How to Add or Remove the "Administrative" Tab in Region and Language
Attachments
Last edited:


