
How to Change your User Account Picture in Windows 8 and 8.1
This tutorial will show you how to change the account picture on your user tile to be any image or video you like in Windows 8, Windows RT, Windows 8.1, and Windows RT 8.1.
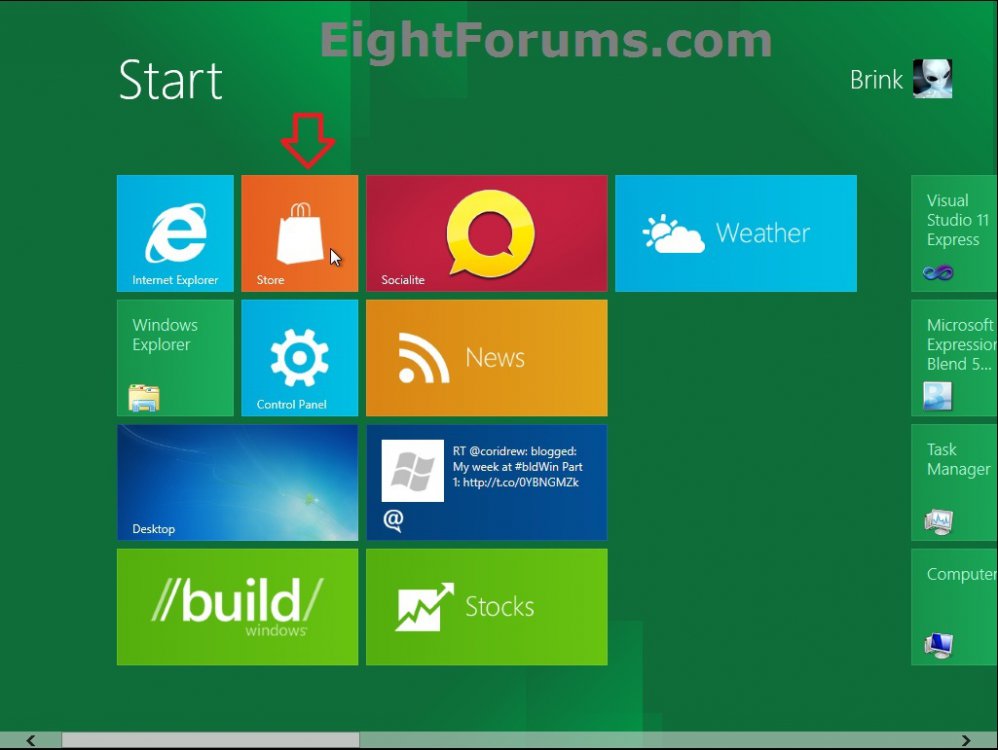
For example, on the sign in and Start screen.
If you are using a Microsoft account and have the Personalize setting turned on to sync, then the user account picture you currently have set will also be displayed on any PC that you sign in to with the same Microsoft account.
For example, on the sign in and Start screen.
If you are using a Microsoft account and have the Personalize setting turned on to sync, then the user account picture you currently have set will also be displayed on any PC that you sign in to with the same Microsoft account.
The default user account picture images are in the hidden system folder below.
The current user account picture (tile image) is stored in the hidden folder below.
The recent user account pictures used for your account are stored in the hidden folder below.
C:\ProgramData\Microsoft\Default Account Pictures
The current user account picture (tile image) is stored in the hidden folder below.
C:\Users\Public\Public Account Pictures\S-1-5-21.......(GUID for user account)
The recent user account pictures used for your account are stored in the hidden folder below.
C:\Users\(user-name)\AppData\Roaming\Microsoft\Windows\AccountPictures
EXAMPLE: "Account picture" on Sign in Screen

Here's How:
1. Do either step 2, 3, or 4 below for what you would like to do.
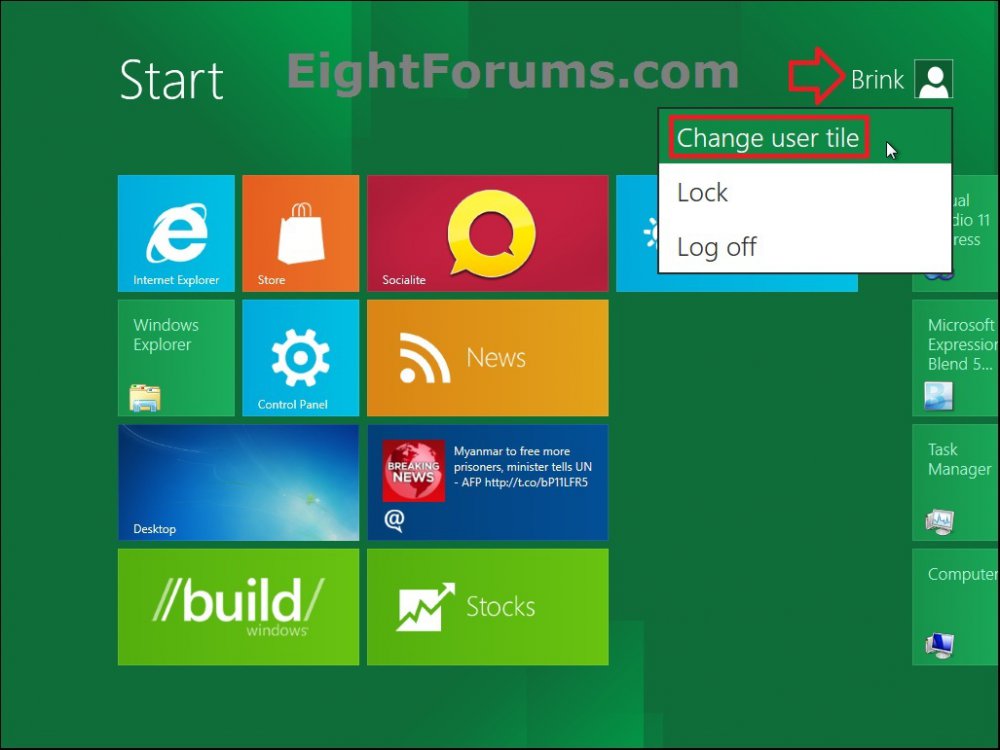
2. On your Start screen, click/tap on your user tile at the top right corner, click/tap on Change account picture, and go to step 4 below. (see screenshot below)
NOTE: If you are not in the Start screen as below, you can press the Windows key to go to it.

3. Open PC settings, and go to step 4 or 5 below for what Windows 8 you have.
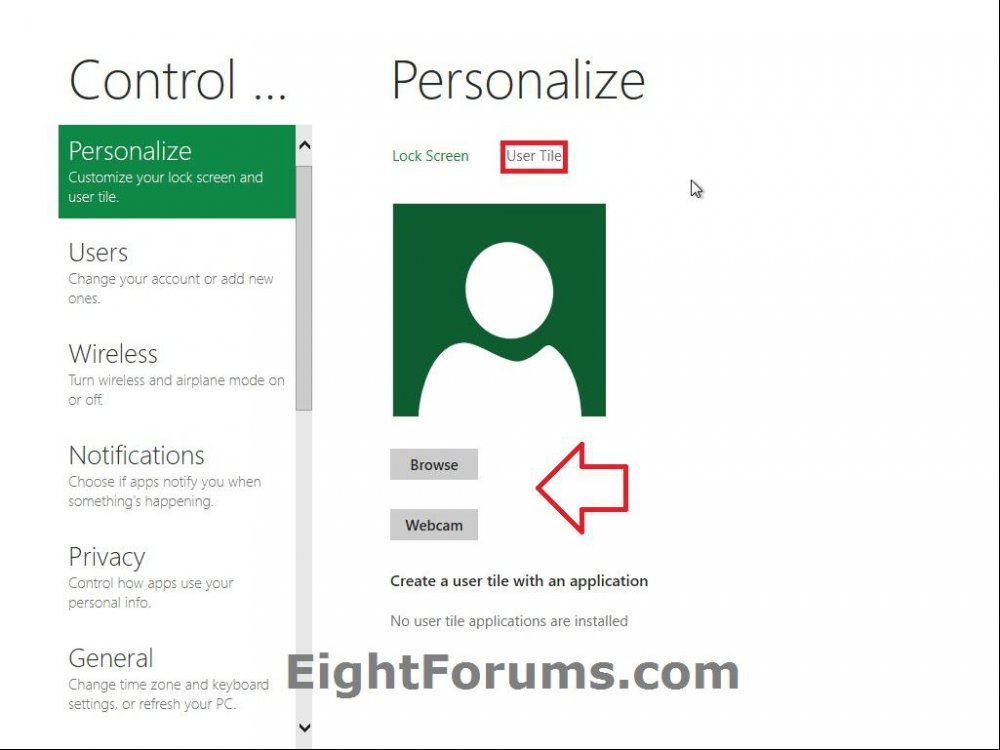
4. In Windows 8 or Windows RT, click/tap on Personalize, then click/tap on the Account picture option if not already selected, and go to step 6 below. (see screenshot below)

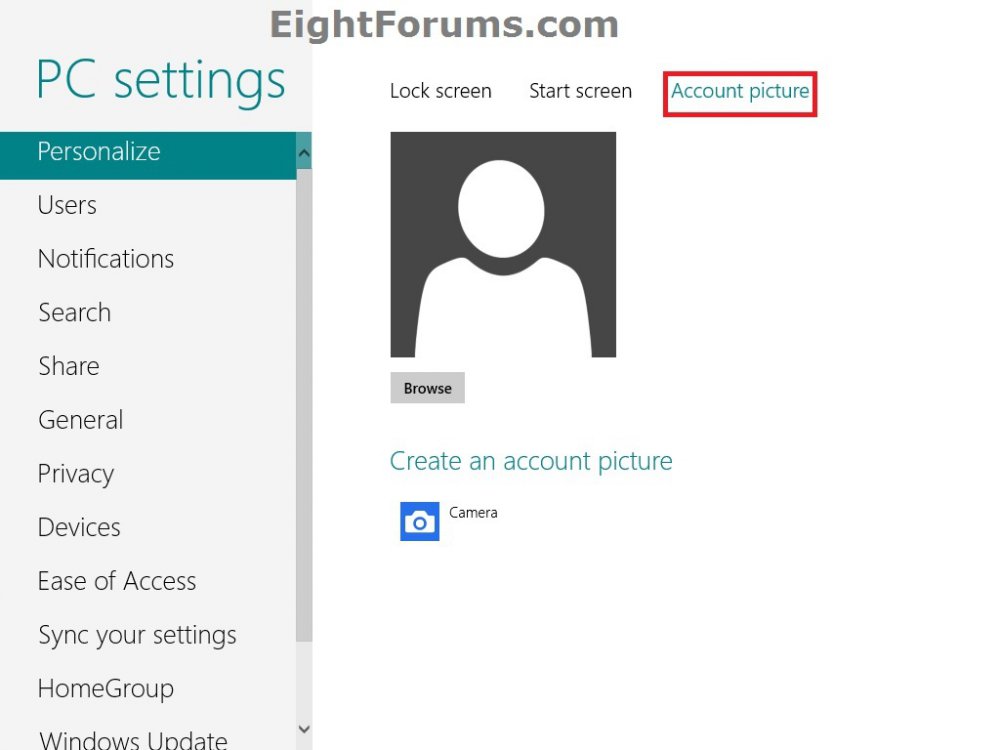
5. In Windows 8.1 or Windows RT 8.1, click/tap on the Account picture option on the right side. (see screenshot below)

A) Go to step 6 below. (see screenshot below)

6. Do either step 7, 8 9, or 10 below for how you would like to select or create your user tile with.
7. To Use a Last Used Image for your Account Picture
NOTE: When you change your account picture, the one you used last will be displayed next to your current account picture.
A) Click/tap on one of the displayed recently last used images to use it as your account picture again, and go to step 11 below. (see screenshot below step 4 or 5A)
8. To "Browse" and Select an Image for your Account Picture
A) Click/tap on Browse in the right pane. (see screenshot below step 4 or 5A)
B) Navigate to and select the folder that contains the image you want to select, select (check) the image by clicking/tapping on it, then click/tap on the Choose image button at the bottom right corner. (see screenshot below)

How to Navigate:


A) Click/tap on Files (Windows 8) or This PC (Windows 8.1) to open a root folder to have it's subfolders open in the main window.
B) Click/tap on a folder in the main window to open it's subfolders in the main window.
C) During this, you can click/tap on Go up to go up one folder level in the main window.
D) You can click/tap on Sort by name or Sort by date to toggle sorting the files in the selected folder that way.
E) Hovering the pointer over a image will have it's details pop-up.
C) Go to step 11 below.
9. To Create and Use an Image with a"Webcam" for your Account Picture
NOTE:This requires that you have a webcam connected to your Windows 8 computer.
A) Click/tap on Camera under Create an account picture. (see screenshot below step 4 or 5A)
B) If you like click/tap on Camera options to make any adjustments to the video settings. (see screenshot below)

B) When ready to create an account picture, click/tap on the live video to capture a snapshot, drag the corners to crop the snapshot how you like. If you like it, then click/tap on OK to set the captured snapshot as your account picture.
(see screenshot below)
NOTE: If you don't like the snapshot, then you could click/tap on Retake to start this step over to take another one.

C) When finished, go to step 11 below.
10. To Create and Use a Video with a"Webcam" for your Account Picture
NOTE:This requires that you have a webcam connected to your Windows 8 computer.
A) Click/tap on Camera under Create an account picture. (see screenshot below step 4 or 5A)
B) If you like click/tap on Camera options to make any adjustments to the video settings. (see screenshot below step 7B)
C) Click/tap on Video mode. (see screenshot below step 8B)
D) When ready to create a video for your account picture, click/tap on the video to start recording the video. Click/tap on the video again to stop recording. (see screenshot below)
NOTE: You will notice the time counter running while recording.

E) The recorded video will now play to let you see a preview of it. You can click/tap on the Play button to see the video again. If you like it, then click/tap on OK to set the video as your account picture. (see screenshot below)
NOTE: If you don't like the recoded video, then you could click/tap on Retake to start step 8C over to take record another one.

F) When finished, go to step 11 below.
11. You can now close PC settings if you like.
That's it,
Shawn
Related Tutorials
- How to Delete Recent Account Pictures in Windows 8 and 8.1
- How to Create an "Account Picture" Shortcut in Windows 8.1
- Set a Default User Logon Picture for All Users in Vista, Windows 7, and Windows 8
- How to Create and Add a New User Account in Windows 8 and 8.1
- How to Enable or Disable the Built-in Elevated "Administrator" Account Windows 8
- Allow or Prevent Apps from Using your "Name and Account Picture" in Windows 8 and 8.1
Attachments

Last edited by a moderator:


 Silly me!


