
How to Do a Clean Install of Windows 8 or Windows 8.1
This tutorial will show you how to do a clean install of Windows 8 (ex: System Builder copy) or Windows 8.1 on your PC.
Windows 8 and Windows 8.1 System Requirements
Windows 8 works great on the same hardware that powers Windows 7.
Processor: 1 gigahertz (GHz) or faster
RAM: 1 gigabyte (GB) (32-bit) or 2 GB (64-bit)
Hard disk space: 16 GB (32-bit) or 20 GB (64-bit)
Graphics card: MicrosoftDirectX 9 graphics device or higher
Additional requirements to use certain features:
- To use touch, you need a tablet or a monitor that supports multitouch.
- To access the Windows Store and to download and run apps, you need an active Internet connection and a screen resolution of at least 1024 x 768.
- To snap apps, you need a screen resolution of at least 1366 x 768.
If you want to install Windows 8 or Windows 8.1 using UEFI instead of BIOS, then see this below first.
How to Install Windows 8 or Windows 8.1 using "Unified Extensible Firmware Interface" (UEFI)
If you wanted to do a clean install with Windows 8 upgrade media, then see the tutorial below first.
How to Do a Clean Install with Windows 8 Upgrade
How to Install Windows 8 or Windows 8.1 using "Unified Extensible Firmware Interface" (UEFI)
If you wanted to do a clean install with Windows 8 upgrade media, then see the tutorial below first.
How to Do a Clean Install with Windows 8 Upgrade
Here's How:
1. Boot the computer from your Windows 8 or Windows 8.1 installation DVD or USB flash drive.
2. Select your language preferences, and click/tap on Next. (see screenshot below)

3. Click/tap on the Install Now button to start the installation. (see screenshot below)

4. Enter your product key that matches the installed edition of Windows, and click/tap on Next. (see screenshot below)
The product key you enter must match what you are installing, or it will not work.
If this is an OEM computer that came with Windows 8 or 8.1 preinstalled, then your product key is stored in the UEFI/BIOS firmware chip and will be automatically detected instead.
You will not be able to enter a Window Media Center Pack or Windows 8 Pro Pack product key. These are considered to be an upgrade key and can't be used to install Windows 8/8.1. These can only be added after Windows 8/8.1 is installed, then use Add Features to upgrade to the Window Media Center Pack or Windows 8 Pro Pack.
If you have a retail Windows 8 product key and want to clean install Windows 8, then see How to Do a Clean Install with Windows 8 Upgrade instead.
If you have a retail Windows 8 product key and want to clean install Windows 8.1 or Windows 8.1 Update, then you would need to enter a generic key below to install unactivated with, and change the product key later on in step 22 below to activate with your Windows 8 key.
If you have a retail Windows 8.1 product key and want to clean install Windows 8.1 or Windows 8.1 Update, then you are good.
If you have an OEM Windows 8 product key and want to clean install Windows 8.1 or Windows 8.1 Update, then you would need to enter a generic key below to install unactivated with, and change the product key later on in step 22 below to activate with your OEM Windows 8 COA product key.
If you want to clean install Windows 8 Enterprise, Windows 8.1 Enterprise, or Windows 8.1 Update Enterprise, then you would need to change the product key later on in step 22 below to activate since Enterprise editions do not ask to enter a key at this step.
Generic keys to install with:
- Windows 8 (core): FB4WR-32NVD-4RW79-XQFWH-CYQG3
- Windows 8 Pro: XKY4K-2NRWR-8F6P2-448RF-CRYQH
- Windows 8 Pro with Media Center: RR3BN-3YY9P-9D7FC-7J4YF-QGJXW
- Windows 8.1 (core): 334NH-RXG76-64THK-C7CKG-D3VPT
- Windows 8.1 (core single language): Y9NXP-XT8MV-PT9TG-97CT3-9D6TC
- Windows 8.1 Pro: XHQ8N-C3MCJ-RQXB6-WCHYG-C9WKB
- Windows 8.1 Pro with Media Center: GBFNG-2X3TC-8R27F-RMKYB-JK7QT
- Windows 8.1 Enterprise: MNDGV-M6PKV-DV4DR-CYY8X-2YRXH OR FHQNR-XYXYC-8PMHT-TV4PH-DRQ3H
KMS setup keys (8/8.1): Appendix A: KMS Client Setup Keys

5. Check the I accept the license terms box, and click/tap on Next. (see screenshot below)

6. Click/tap on the Custom: Install Windows only (advanced) option. (see screenshot below)

7. Select the hard drive or partition that you want to install Windows 8 on, and click/tap on the Drive Options (advanced) link. (see screenshot below)
NOTE: If the hard drive or partition that you have selected is shown as unallocated, then you can just click on the Next button instead and go to step 8 since it is already empty.

8. Select a hard drive or partiton that you want to do a clean install of Windows 8 on, do one of the options for how you want to install Windows 8 to that drive or partition in the yellow TIP box below, then click/tap on the Next button when finished. (see screenshot below)
NOTE: If your hard drive is not displayed and it's either a SATA drive or in a RAID setup, then you need to connect a USB key or DVD disc with the RAID or SATA drivers on it, click on Load Driver, select the folder on the USB key or DVD that contains the RAID or SATA drivers to install them. Afterwards, your RAID drives will be available to select from to install Windows 8 on.
Drive options (advanced)
If you only have one partition for a disk # (hard drive) listed that you wanted to install Windows 8 on, then select the disk # and click on the Delete option if not grayed out to make it unallocated space.
If you have more than one partition for a disk # (hard drive) listed and want to install Windows 8 on only one of the partitions and keep the other partitions with that disk #, then only select the partition that you want to install Windows 8 on the Format option.
If you have more than one partition for a disk # (hard drive) listed and want to get rid of all of them to make that disk # one single partition drive again, then select a partition with that disk # and click on the Delete option for each partition with the same disk # until there is only one "unallocated space" with that disk # left as in the screenshot below.
To shrink an existing partition to create another partition to install Windows 8 on instead, select the partition that you want to shrink and click on the Extend option. Type in how much in MB (1 GB = 1024 MB) that you want to shrink it by. Now select the new extended partition.
The 350 MB System Reserved partition is used for the Boot Manager code, BCD (Boot Configuration Database), System Recovery Options (Windows RE), and start up files for BitLocker (if turned on).
If you want to have (recommended) the 350 MB System Reserved partition in addition to the Windows 8 C: partition on a HDD or SSD after installation, then you would need to make sure that all partitions on the drive have been deleted until it is only unallocated space. Next, select the unallocated drive to install Windows 8 on. If there are no partitions on the disk, you will get the 350 MB System Reserved.
If you do not want to have the 350 MB System Reserved partition and only the Windows 8 C: partition on a HDD or SSD after installation, then select a formatted partition or drive to install Windows 8 on. If there are any partitions on the disk, you won't get the 350 MB System Reserved.

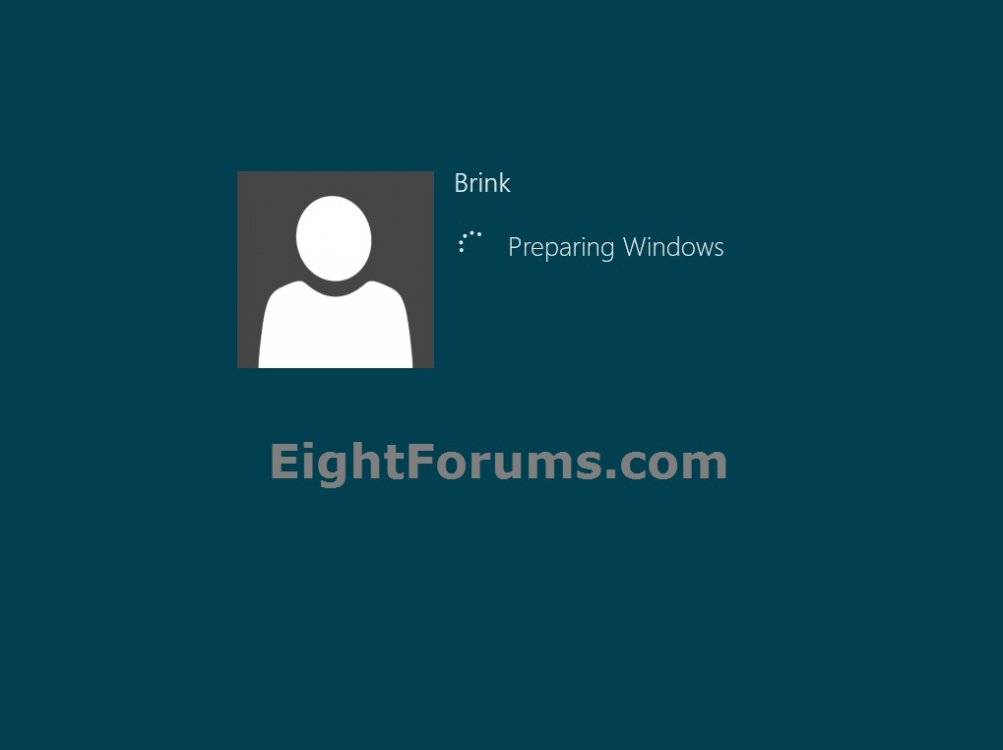
9. The installation of Windows 8 will now begin. (see screenshot below)
NOTE: During the installation process, your screen may flash and computer will restart a few times.

10. When you get to this point, type in a computer/PC name (ex: Brink-PC) that you want for this PC, then click/tap on the Next button. (see screenshot below)

11. Select either the Use express settings or Customize button depending on how you want to set these settings. (see screenshot below)
A) If you select Use express settings, then go to step 16 below.
B) If you select Customize, then continue on to step 12 below.

12. Select the share settings you would like. (see screenshot below)


13. Select the Windows Update and IE security settings that you want, and click/tap on Next. (see screenshots below)


14. Select the settings that you want, and click/tap on Next. (see screenshots below)


15. Select the settings that you want, and click/tap on Next. (see screenshots below)


16. Do either step 17 or step 18 below depending on if your would like to sign in to Windows 8 or Windows 8.1 with either a local account or Microsoft account. (see screenshots below)


17. If you want to Sign in to Windows 8 or 8.1 with a Microsoft Account
Microsoft account:
- You use your email address and password to sign in to Windows 8.
- When you sign in with a Microsoft account, your PC is connected to the cloud.
- Your friends’ contact info and statuses are automatically up to date from your Hotmail, Facebook, Twitter, LinkedIn, and other accounts.
- You can get to and share your photos, documents, and other files from SkyDrive, Facebook, Flickr, and other accounts without signing in to each one.
- Your personal settings are synced to any PC running Windows 8 that you sign in to, including your themes, language preferences, browser favorites, and apps.
- You can get apps in the Windows Store and use them on any PC running Windows 8 that you sign in to.
- Easily reacquire your Metro style apps on multiple Windows 8 PCs. The app’s settings and last-used state persist across all your Windows 8 PCs.
- You can associate the most commonly used Windows settings to your user account. In this way, the saved settings are available when you sign in to your account on any Windows 8 PC. So your PC will be set up just the way you are used to.
- You can also save time with sign-in credentials, because now the same credentials are available for the different apps and websites you use and you can easily get back into them without having to enter credentials every time.
- You can automatically sign in to apps and services that use Windows Live ID for authentication.
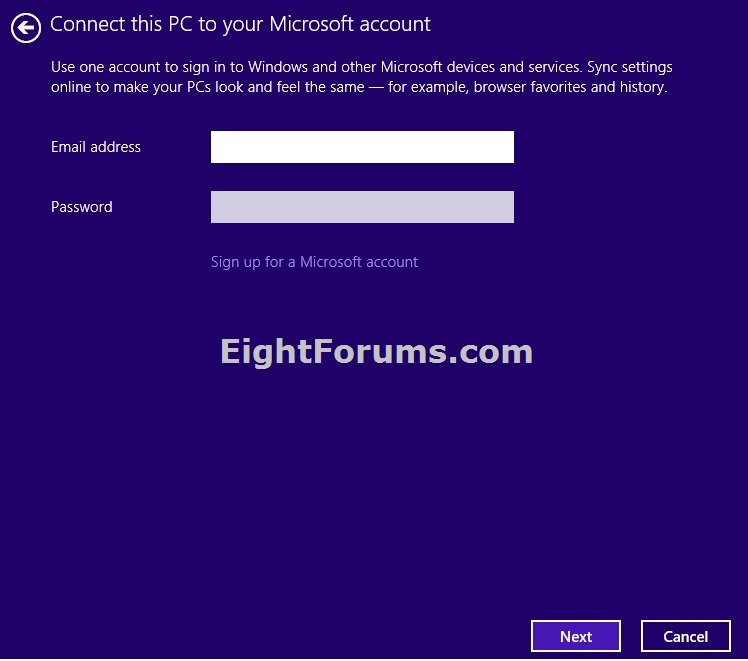
A) Type in your email address, and click/tap on Next. (see screenshot below step 16)
NOTE: If you do not have a Windows Live ID email address and would like to use one, then click/tap on Sign up for a new email address link to get one.
B) Enter the password for the email address, and click/tap on Next. (see screenshots below and below step 16)
NOTE: If you do not have a Windows Live ID email address and would like to use one, then click /tap on Sign up for a Microsoft account link to get one.


C) For Windows 8, enter security verification info if you like, click/tap on Next, and go to step 17G below. (see screenshot below)
NOTE: If you are setting up an email address, then you may have a few additional screens to fill out as well.

D) In Windows 8.1, you can use two-step verification to add this PC as a "trusted device", and click/tap on Next. (see screenshot below)

Enter the received security code, and click/tap on Next. (see screenshot below)

E) In Windows 8.1, select how to set up your PC, and click/tap on Next. (see screenshots below)
[*=1]If you select a listed PC name that you sign in to with the same Microsoft account, then your settings and apps from that PC will be synced (copied) to this PC. Afterwards, go to step 17G below.
[*=1]If you selectset this up as a new PC instead, then this PC will be set up as new PC without your settings and apps synced from another PC as above. Afterwards, continue on to step 17F below.


F) Select to either "Don't use SkyDrive" or "Use SkyDrive". (see screenshot below)

G) Windows 8 or Windows 8.1 will now prepare your PC for your Microsoft account.
H) Go to step 19 below.
18. If you want to Sign in to Windows 8 or 8.1 with a Local Account
Local account:
- You use a user name (and password if you want one) to sign in to Windows 8 just like it was in Vista and Windows 7.
- A local user account gives you access to only the PC it's on. You will need a separate user account created on each PC you use.
- None of your settings will be synced between the PCs you use, and you won't get the benefits of connecting your PC to the cloud.
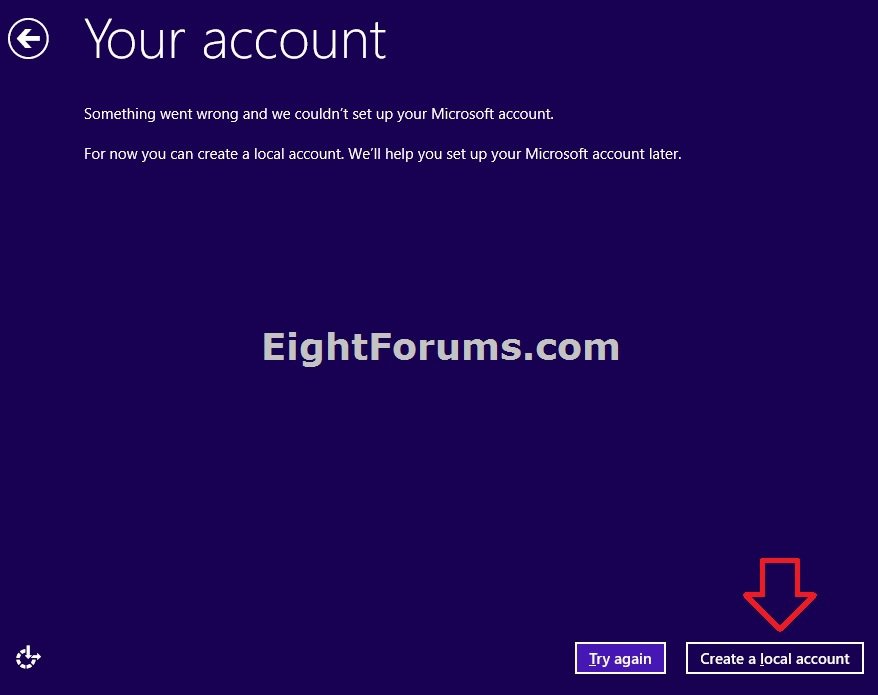
A) For Windows 8.1, click/tap on the Create a new account link. (see bottom screenshot below and below step 16)

Click/tap on the Sign in without a Microsoft account link, and go to step 18C below. (see screenshot below)

B) For Windows 8, click/tap on the Sign in without a Microsoft account link. (see top screenshot below step 16)
Click/tap on the Local account button, and go to step 18C below. (see screenshot below)

C) Type in user name, password, and password hint for your user account (administrator type), and click/tap on Finish. (see screenshot below)
NOTE: Your user name must be different than the computer name you entered at step 10 above.

D) Windows 8 or 8.1 will now prepare your PC for your local administrator user account.
E) Continue on to step 19.
19. When installation is finished, welcome to Windows 8 or Windows 8.1. (see screenshot below)

20. It is highly recommened that you create a password reset disk for your user account just in case you forget it later. You will be able to use it to reset your user account password.
21. Install any needed drivers for your devices, and update your WEI score.
22. If you have an Enterprise edition or needed to use a generic key to install with from step 4 above, then you will now need to change the product key to enter your key and activate it.
If you need to first find your OEM product key that is embedded in the UEFI firmware chip, then OPTION FIVE in the tutorial below can help show you what it is to enter in step 22.
How to Find Your Windows 8 and 8.1 Product Key Number
How to Find Your Windows 8 and 8.1 Product Key Number
That's it,
Shawn
Related Tutorials
- How to Do a Clean Install with Windows 8 Upgrade
- How to Clean Install Windows on a MSATA (SSD) Drive
- Install Windows 8 or Windows 8.1 using "Unified Extensible Firmware Interface" (UEFI)
- How to Create a Bootable USB or DVD with a Windows 8 or Windows 8.1 ISO
- How to Upgrade from Windows 8, Windows 7, Vista, or XP to Windows 8 or 8.1
- How to Update to Windows 8.1 from Windows 8
- How to Downgrade Windows 8 to Windows 7
- How to Download and Run the "Windows 8 Upgrade Assistant"
- How to Create or Download a Windows 8 Upgrade ISO
- How to Install Windows 8 on VirtualBox
- How to Install Windows 8 on VMware Player
- How to Reset Windows 8
- How to Do a Dual Boot Installation with Windows 8 and Windows 7 or Vista
- How to Create a Windows 8 VHD at Boot to Dual Boot with Windows 7 or Vista
- How to Change the Product Key Number in Windows 8
- How to Load SATA Driver During Windows 8 Setup
- How to Open Device Manager During Installation of Windows 8 and 8.1
Attachments

Last edited by a moderator:

")


