How to Create a Windows 8 VHD at Boot to Dual Boot with Windows 7 or Vista
This will show you how to create a Windows 8 VHD file at boot and be able to natively dual boot with your current Windows 7 or Vista installation with the created Windows 8 VHD.
Some Advantages of Using a VHD to Dual Boot with:
Using a VHD to dual boot with will act just as if the operating system was installed directly to a partition when ran at startup, but you will not have to have the VHD on a separate HDD or partition to do so like you would if you installed the OS. You could run the VHD as a dual boot say directly from within your Vista or Windows 7 partition. I think the biggest advantage of this would be for those that have a OEM computer where the OEM had setup 4 primary partitions on the HDD where you cannot create a new partition on the HDD to be able to install a second OS. Using this VHD method, they will be able to.
You will also be able to attach the VHD say in Windows 7 as a virtual drive, use the VHD as a virtual machine, is a lot easier to remove from a multi-boot installation, and a VHD will not mess with any of your current partitions or drives.
All Vista, Windows 7, and Windows 8 (except Windows 8 RT) editions support booting from a VHD.
You must have either Windows 7 Ultimate, Windows 7 Enterprise, Windows 8 Pro, or Windows 8 Enterprise installed on the VHD to be able to boot from the VHD natively.
You must have either Windows 7 Ultimate, Windows 7 Enterprise, Windows 8 Pro, or Windows 8 Enterprise installed on the VHD to be able to boot from the VHD natively.
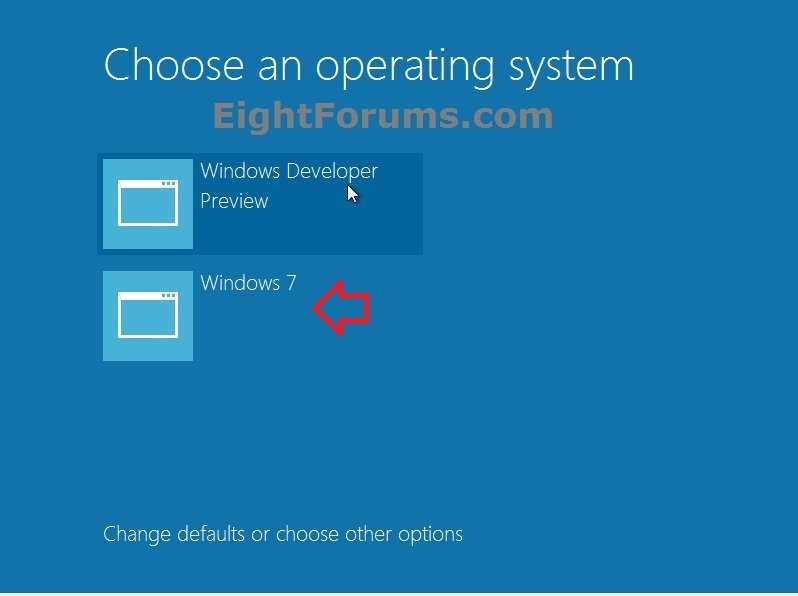
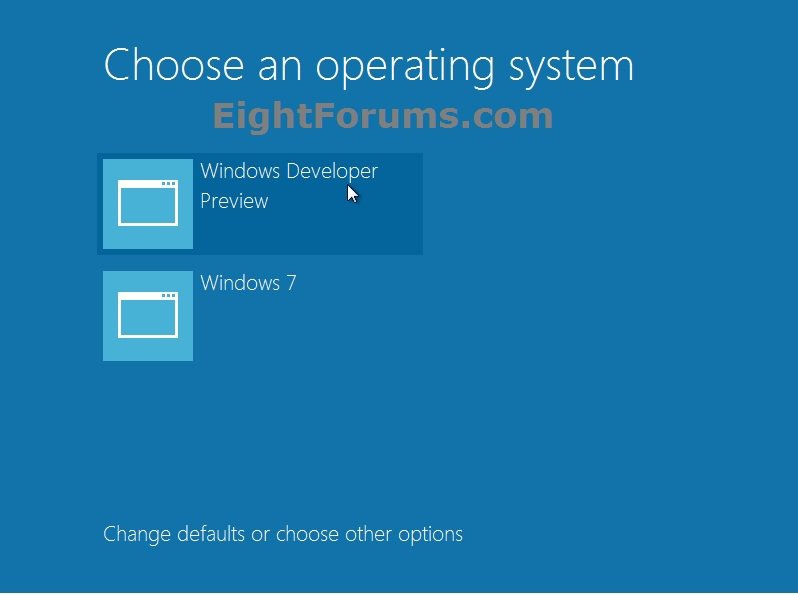
EXAMPLE: "Choose an operating system" Screen at Boot
NOTE: This is what you will see now at boot or restart instead of the Windows 7 Windows Boot Manager screen to be able to select to start either Windows 7 or the Windows 8 from the VHD file.
OPTION ONE
To Create and Add the Windows 8 VHD to Boot From
1. If you would like to create a backup of your Boot Configuration Data (BCD) to be safe, then from within your Windows 7 or Vista, open an elevated command prompt, type the command below, and press Enter. This will save your BCD backup as the MyBCDBackup.bak file in the C:\Windows\System32 folder.
bcdedit /export MyBCDBackup.bak
2. Boot or restart the computer from your Windows 8 Pro or Enterprise installation DVD or USB thumb drive.
NOTE: To have Windows 7 on VHD, see instead: How to Create a Windows 7 VHD at Boot to Start with from Boot
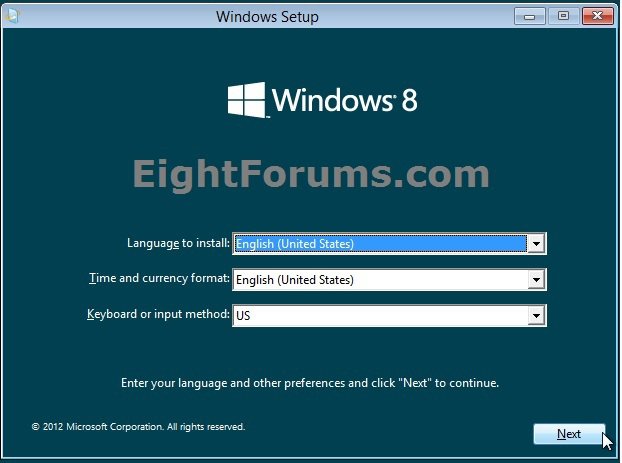
3. At the Install Windows 8 screen, press the Shift + F10 keys to open a command prompt. (see screenshot below)
WARNING: If you are using a language other than English, then see this post first.
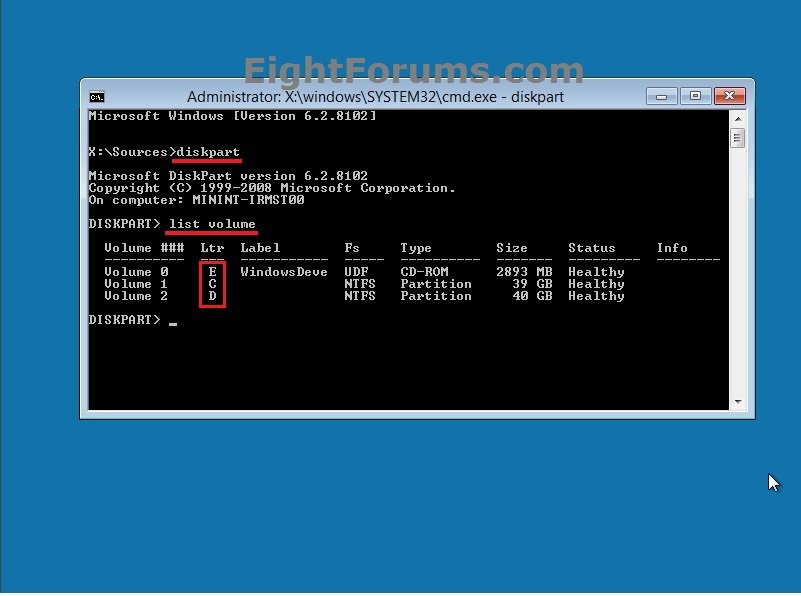
4. In the command prompt, type diskpart and press Enter, then type list volume and press Enter. Make note of the drive letter for the volume that you want to create the Windows 8 VHD file on. (see screenshot below)
NOTE: This will allow you to see what the drive letters are for each volume. They are not always the same at boot as they are in Windows.
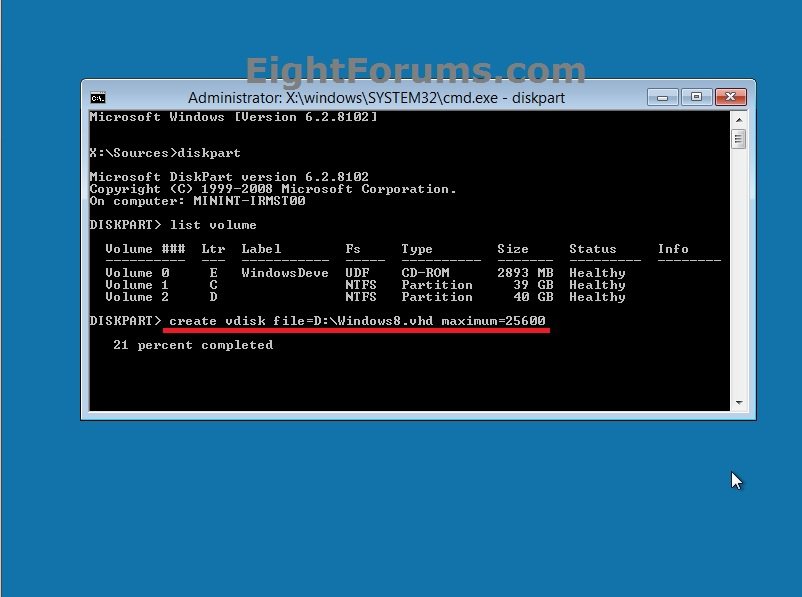
5. Do either step 6 or 7 below for what type (fixed or dynamic expanding) of VHD file you would like to create.
6. To Create a Fixed VHD File
NOTE: A fixed VHD file will allocate the entire maximum size that you set (ex: 30GB) below on the HDD to be used by the VHD file. The VHD will only use a fixed amount of space (ex: 30GB) regardless of the amount of data stored on it.
A) In the command prompt, type the command below, press Enter, and go to step 8 below.
NOTE: Substitute the D drive letter in the command below for what volume (step 3) you would like to create the VHD on. You can substitute the Windows8 name with any name you would like within quotes for the VHD file instead. You can also substitute the maximum size of 30720 MB for the VHD to the maximum size you want instead in MB (1GB = 1024MB).
create vdisk file="D:\Windows8.vhd" maximum=30720
7. To Create an Dynamically Expanding VHD File
NOTE: A dynamically expanding VHD file will only be as large on the HDD as the amount of data that is saved in the VHD file, but is able to get as large as the maximium size that you set below (ex: 30GB). The HDD space used by the VHD does not shrink (compact) automatically when data is deleted in the VHD though.
A) In the command prompt, type the command below, press Enter, and go to step 8 below.
NOTE: Substitute the D drive letter in the command below for what volume (step 3) you would like to create the VHD on. You can substitute the Windows8 name with any name you would like within quotes for the VHD file instead. You can also substitute the maximum size of 30720 MB for the VHD to the maximum size you want instead in MB (1GB = 1024MB).
create vdisk file="D:\Windows8.vhd" maximum=30720 type=expandable
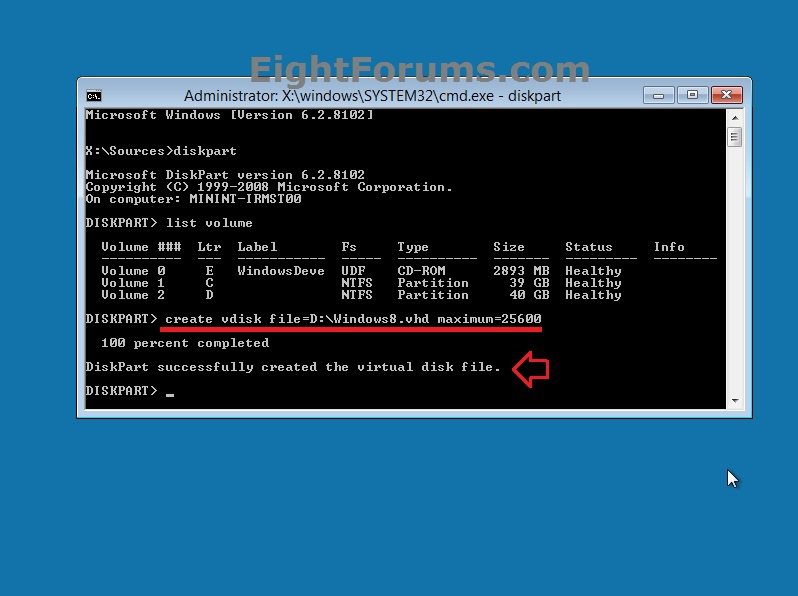
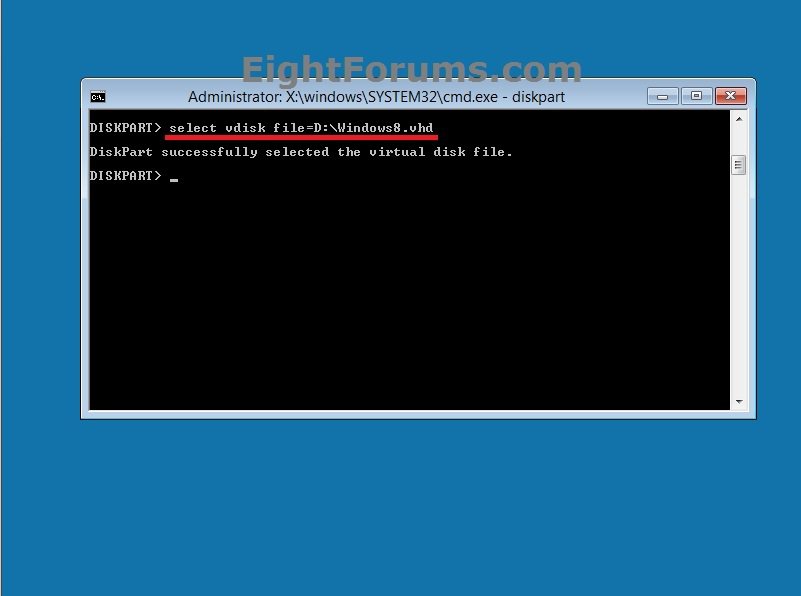
8. In the command prompt, type the command below and press Enter. (see screenshot below)
NOTE: Substitute the D drive letter and Windows8 VHD file name in the command below to the same one that you used in step 5 or 6 above.
select vdisk file="D:\Windows8.vhd"
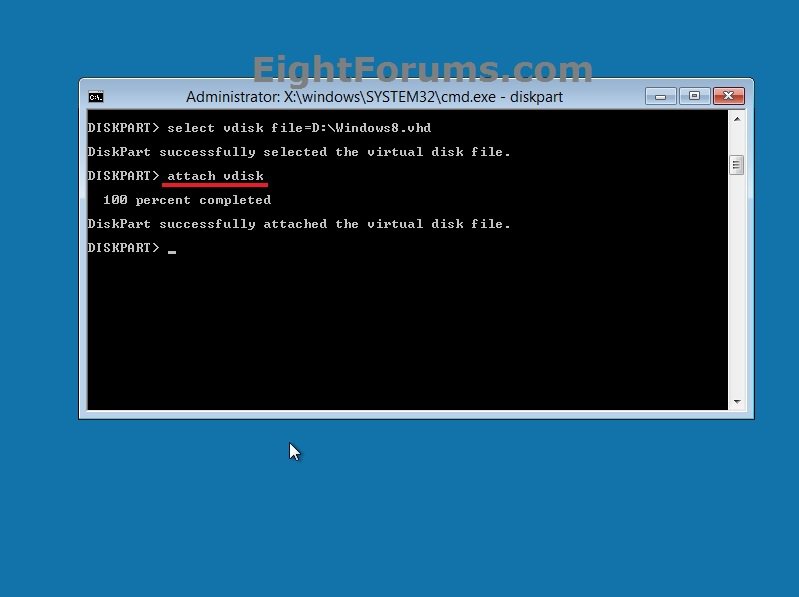
9. In the command prompt, type attach vdisk and press Enter. (see screenshot below)
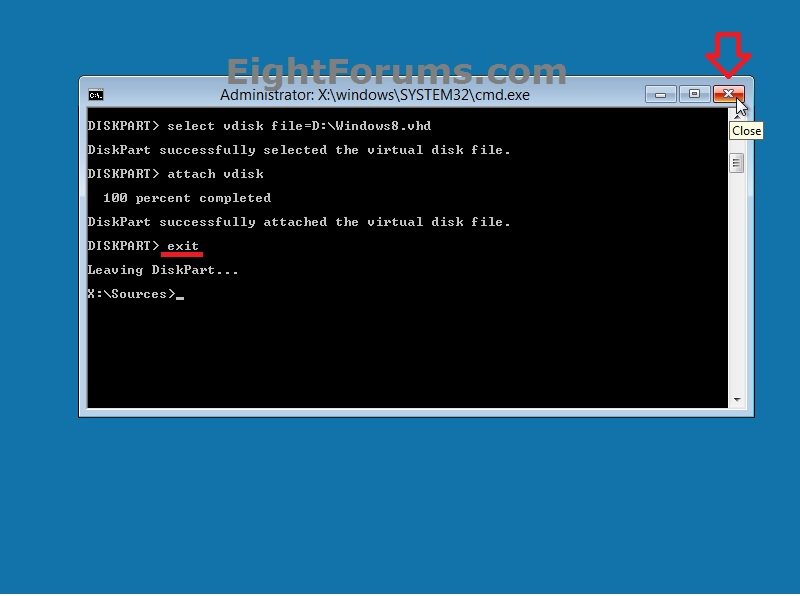
10. In the command prompt, type exit and press Enter, then close the command prompt window. (see screenshot below)
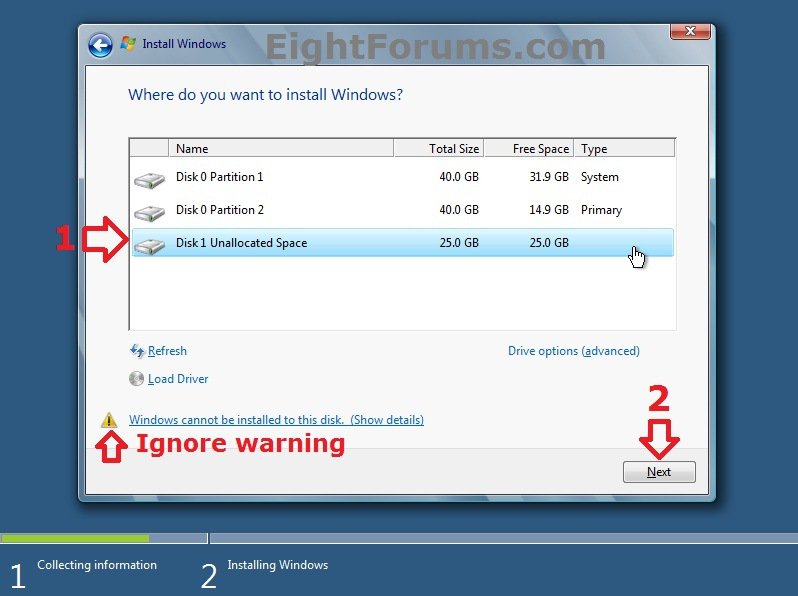
11. You can now finish doing a clean install of Windows 8, and select the unallocated space (ex: 30GB) that you created in step 6 or 7 above. (see screenshot below)
12. When finished, you will be in Windows 8 with Windows 8 set as the default OS to start automatically after the wait time. Restarting Windows 8 will allow you to be able to select what OS you would like to start with like in the example at the top of the tutorial.
OPTION TWO
To Remove the Windows 8 VHD from Boot
NOTE: This option will remove Windows 8, and leave you with only Windows 7 or Vista as an option to start.
1. Start or restart your PC, and boot into Windows 7 or Vista instead of Windows 8. (see screenshot below)
2. In Windows Explorer, navigate to the location of the Windows 8 VHD file that you created in step 6 or 7 in OPTION ONE above, then either delete or rename the VHD file.
3. If you used step 1 in OPTION ONE and would like to restore your BCD back to how it was when the backup was created to be safe, then open an elevated command prompt, type the command below, and press Enter.
bcdedit /import MyBCDBackup.bak
4. Restart the computer, and you will no longer have Windows 8.
That's it,
Shawn
Related Tutorials
- How to Boot from a VHD using Windows 7 and Windows 8
- How to Do a Dual Boot Installation with Windows 8 and Windows 7 or Vista
- How to Delete "Windows 8" in your Dual Boot with Windows 7 or Vista
- How to Delete "Windows 7" in your Dual Boot with Windows 8
- How to Delete an Operating System Listed in Windows Boot Manager
- How to Do a Clean Install of Windows 8 or Windows 8.1
- How to Do a Clean Install with Windows 8 Upgrade
- How to Create a Bootable USB or DVD with the Windows 8 ISO
- How to Upgrade from Windows 8, Windows 7, Vista, or XP to Windows 8 or 8.1
- How to Install Windows 8 on VMware Player
- How to Install Windows 8 on VirtualBox
- How to Choose a Default Operating System to Run at Startup in Windows 8
- How to Create and Attach a VHD or VHDX File in Windows 8
- How to multi boot with Partition or VHD using WIM ImageX
Attachments
Last edited by a moderator:

