How to Do a System Image Recovery in Windows 8 and 8.1
This tutorial will show you how to restore the contents of your Windows 8 or 8.1 PC back to how it was at the time a system image was created if your hard disk or entire computer ever stops working.
- You can only do a system image recovery to a HDD or SSD that is the same size or larger than the one(s) included in the system image when it was created. You will not be able to do a system image recovery to a smaller HDD/SSD. If the HDDs/SSDs are larger, then you will have "unallocated" space afterwards that is left over from the difference that you can extend into.
- When you restore your computer from a system image, it is a complete restoration. You can't choose individual items to restore, and all of your current programs, system settings, and files are replaced with those on the system image.
- If your system image is on an external or removable device (ex: USB drive), then make sure it is connected before starting. If it's a USB device, then make sure that you also have your BIOS settings (ex: Legacy USB) set to allow USB devices to be recognized at boot.
Here's How:
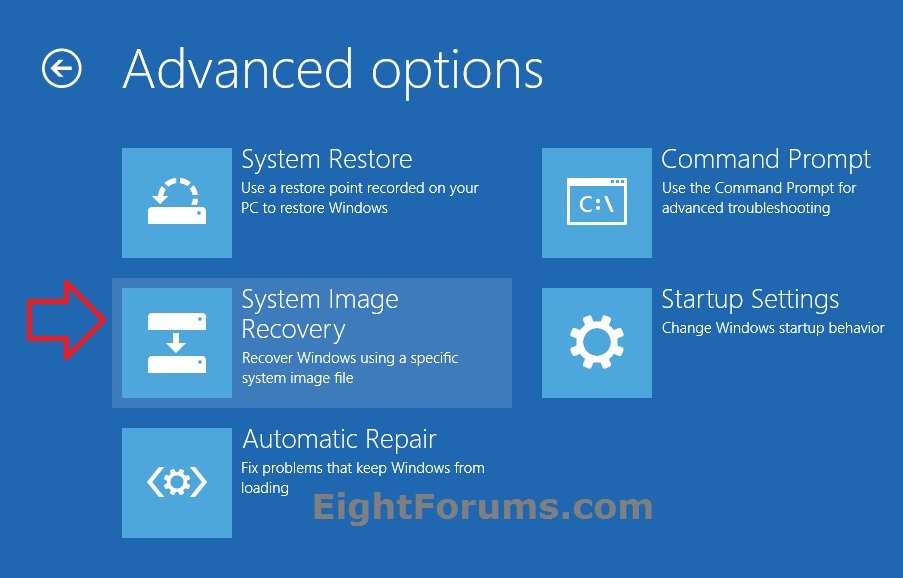
1. Boot to the System Recovery Options screen, and click/tap on the System Image Recovery option. (see screenshot below)
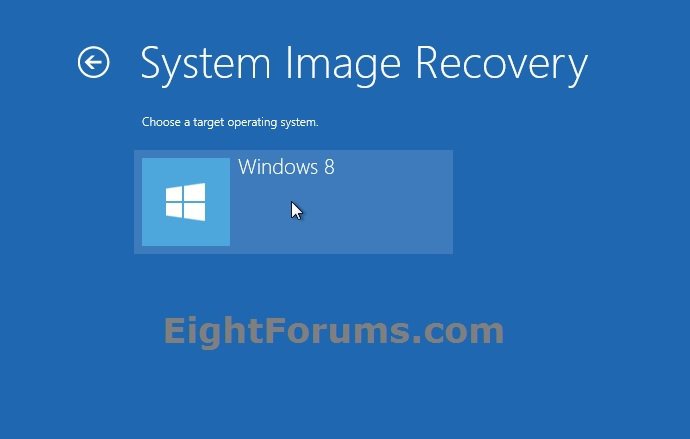
2. If prompted, choose the OS (ex: Windows 8) that you want to do a System Image Recovery with. (see screenshot below)
NOTE: You will usually only see this if you booted from a Windows 8 installation DVD or USB thumb drive, or ISO file if in a virtual machine.
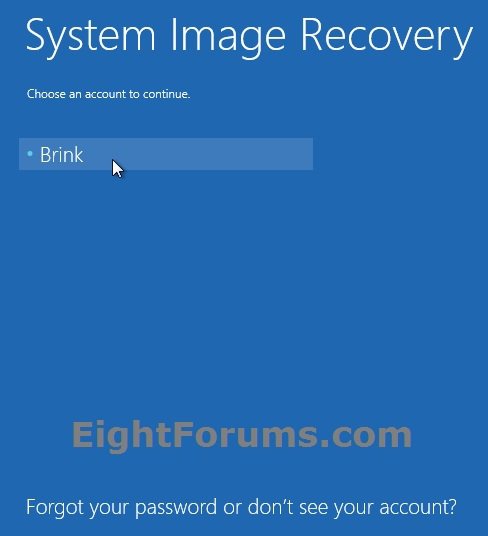
3. If prompted, select and click/tap on an administrator account on the computer that you are doing a system image recovery on. (see screenshot below)
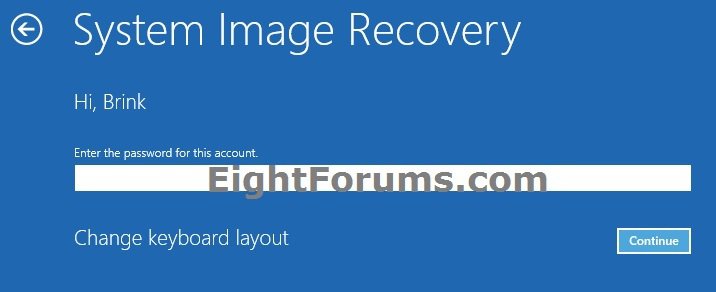
4. Type in the password for the selected administrator account, and click/tap on Continue. (see screenshot below)
5. Do step 6 or 7 below for which system image you wanted to use.
If you get a Windows cannot find a system image on this computer message, then see:
6. To Use the Latest Available System Image
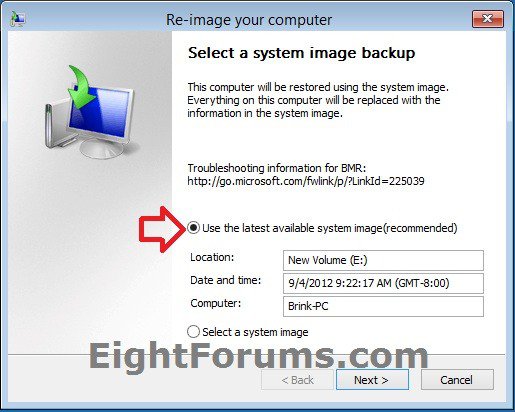
A) Select (dot) Use the latest available system image, click/tap on Next, and go to step 8 below. (see screenshot below)
7. To Select to Use Another System Image
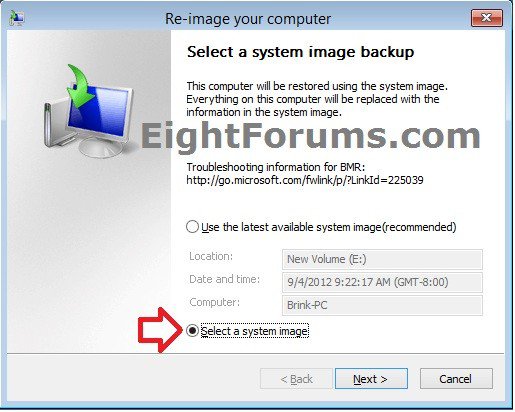
A) Select (dot) Select a system image, and click/tap on Next. (see screenshot above)
NOTE: This is if the system image that you want to use is not listed here, and/or is saved at another location that you wish to choose from instead. If you saved your system image to a set of DVDs instead of a HDD/SSD, then insert the last DVD from the image set first.
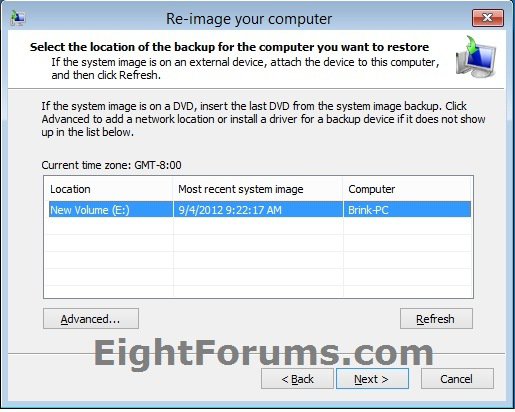
B) Select the location of the system image for the computer that you want to restore, and click/tap on Next. (see screenshots below)
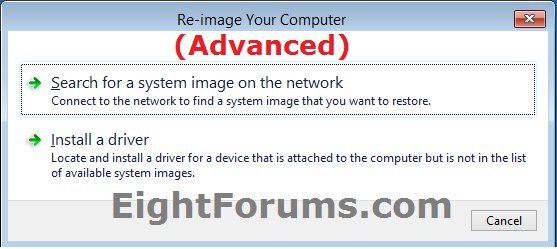
To add a image from a network location, click on the Advanced button, and on the Search for a system image on the network option.
If the drive cannot be seen to select a system image from, then you may need to use the tutorial below to load your SATA or RAID drivers before it will be seen. You would click on the Advanced button, and on the Install a driver option.
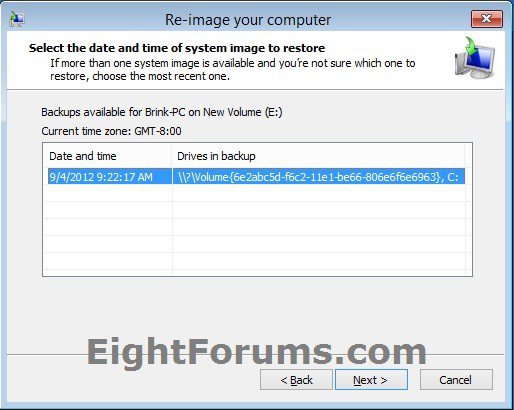
C) Select a system image with the date and time that you want to restore, click/tap on Next, and go to step 8 below. (see screenshot below)
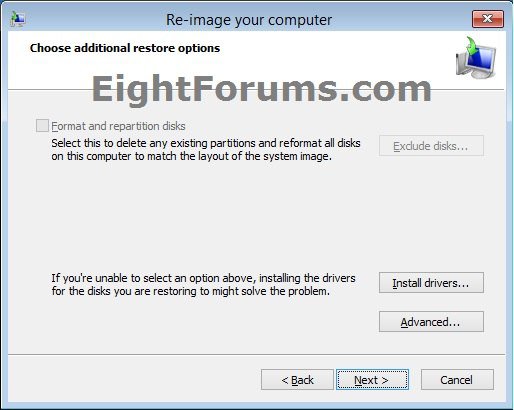
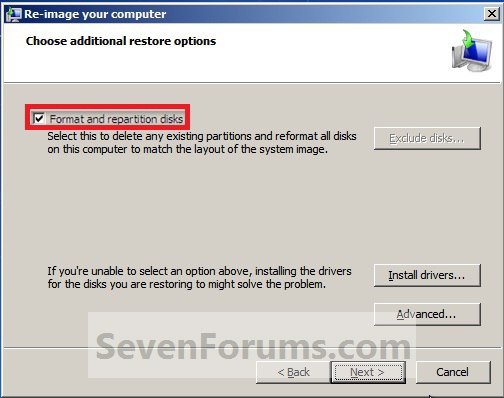
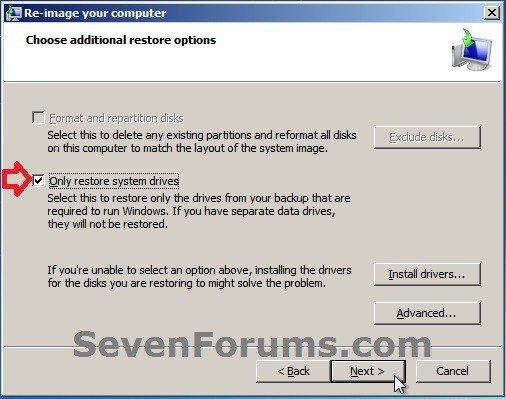
8. Do step 9, 10, or 11 below depending on what options you have and would like to do. (see screenshots below)
Format and repartition disks box:
NOTE: Special thanks to MJF for this addition.
1) Grayed out and selected
You are forced to have the whole disk formatted and repartitioned to match the partition structure of the disk the image was made from. This can occur when restoring an image to a new disk or the original disk with a modified partition structure. Data on other partitions on the disk you are restoring to will be lost.
2) Grayed out and unselected
You are not given the option to format and repartition the disk. This will occur if you are restoring Windows from a partition on the same disk.
3) Not grayed out and unselected
Here you have the option to select format the whole disk and repartition or not. In this case the disk the image was taken from has a matching partition structure to the disk you are restoring the image to. By not selecting the format and repartition option your image will be restored and other partitions untouched such as valuable data partitions.
9. To Do a Full System Image Recovery
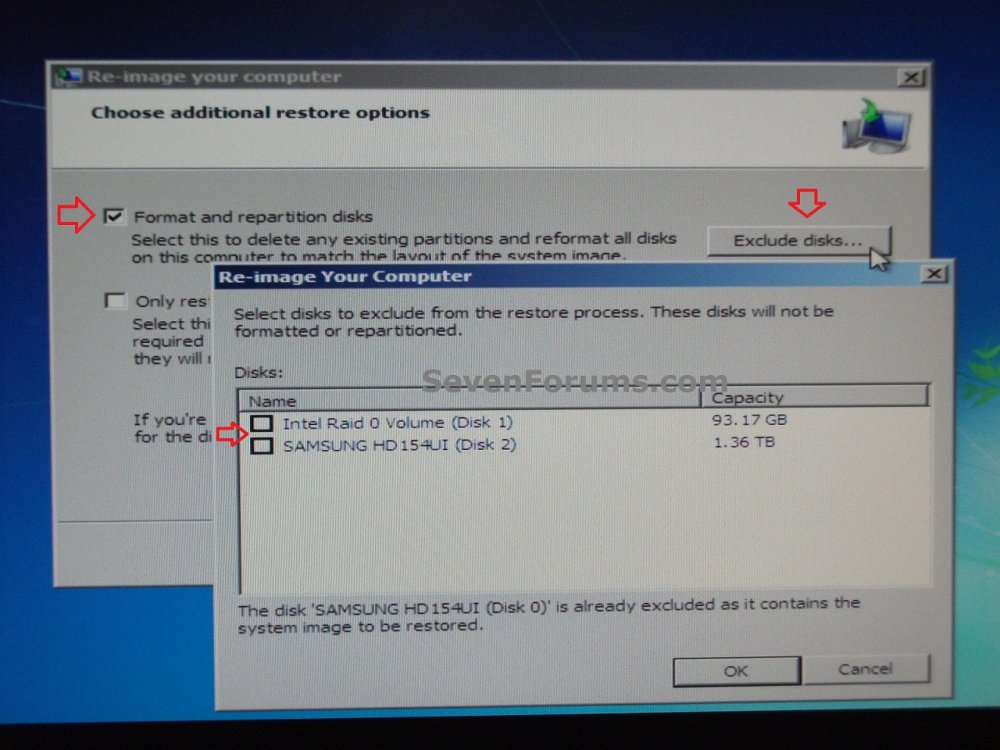
NOTE: Use this option if you want to delete any existing partitions and format all disks on this computer to match the layout of what was included in the system image when it was created.
A) Check the Format and repartition disks box (if not grayed out) and uncheck the Only restore system drives box (if available), and click/tap on Next. (see screenshots below step 8)
B) Go to step 11 or 12 below.
10. To Only Restore System Drives from System Image
NOTE: Use this option if you want to format and restore only the drives from your system image that are required to run Windows. If the system image included that you moved anything like your page file, user folders, or user profile to another drive location than the default C, then that drive location(s) will also be formated and restored to how it was in the system image. If you have separate data drives, they will not be restored.
A) If an available option, check the Only restore system drives box, click/tap on Next, and go to step 12 below. (see bottom screenshot below 8)
11. To Exclude Restoring Specific Drives when Doing a System Image Recovery
NOTE: This option will allow you to exclude specific disks from the restore process to make sure that these disks will not be formated or repartitioned.
A) Check the Format and repartition disks box (if not grayed out), and click/tap on the Exclude disks button (if not grayed out). (see screenshots below step 8)
NOTE: If the Exclude disks button is grayed out, then the HDD that you are restoring to is empty, or you do not have any disks in the system image that are able to be excluded from being restored.
B) Check the disks that you want to exclude from being restored from the system image, and click/tap on OK. (see screenshot below)
C) Click/tap on Next, and go to step 12 below. (see screenshots below step 8)
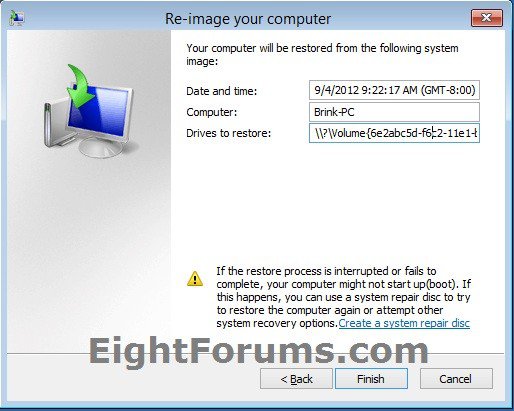
12. When finished selecting what you want to restore from the system image, click/tap on Finish. (see screenshot below)
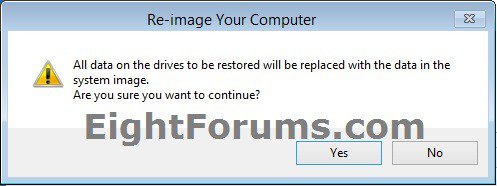
13. Click/tap on Yes. (see screenshot below)
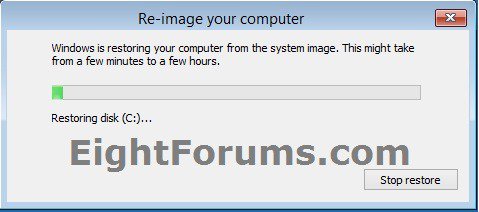
14. You will now see this screenshot below.
NOTE: If you have the system image on DVDs (step 7A), then have them ready to insert them as prompted.
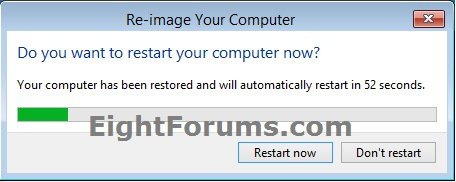
15. When it is finished, click/tap on the Restart now button. (see screenshot below)
NOTE: You will have 60 seconds before the computer restarts automatically.
That's it,
Shawn
Related Tutorials
- How to Manually Extract System Image Files Using Disk Management in Windows 8
- How to Load SATA Drivers in Windows 8 System Image Recovery
- How to Create a System Image in Windows 8 and 8.1
- How to Refresh Windows 8
- How to Refresh Windows 8 Using a Custom Recovery Image
- How to Reset Windows 8
- How to Restore Files and Folders from a Backup in Windows 8
- How to Do a System Restore in Windows 8
- How to Do a Repair Install of Windows 8 without Losing Anything
Attachments
Last edited by a moderator:

