How to Enable or Disable Automatic Maintenance in Windows 8 and 8.1
Windows depends on execution of inbox and third party maintenance activity for much of its value-add, including Windows Update, and automatic disk defragmentation, as well as antivirus updates and scans. Additionally, enterprises frequently use maintenance activity such as Network Access Protection (NAP) scanning to help enforce security standards on all enterprise workstations.
Maintenance activity in Windows is designed to run in the background with limited user interaction and minimal impact to performance and energy efficiency. However, in Windows 7 and earlier versions, performance and energy efficiency are still impacted due to the non-deterministic and widely varied schedule of the multiple maintenance activities in Windows. Responsiveness to users is reduced when maintenance activity runs while users are actively using the computer. Apps also frequently ask the user to update their software and run background maintenance, and direct users to multiple experiences, including Action Center, Control Panel, Windows Update, Task Scheduler MMC snap-in, and third-party controls.
The goal of Automatic Maintenance is to combine all background maintenance activity in Windows and help third-party developers add their maintenance activity to Windows without negatively impacting performance and energy efficiency. Additionally, Automatic Maintenance enables users as well as enterprises to be in control of maintenance activity scheduling and configuration.
For more information about "Automatic Maintenance", see: Automatic Maintenance (Windows)
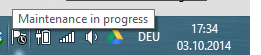
This tutorial will show you how to enable or disable Automatic Maintenance in Windows 8, Windows RT, Windows 8.1, and Windows RT 8.1.
You must be logged in as an administrator to be able to do the steps in this tutorial.
Maintenance activity in Windows is designed to run in the background with limited user interaction and minimal impact to performance and energy efficiency. However, in Windows 7 and earlier versions, performance and energy efficiency are still impacted due to the non-deterministic and widely varied schedule of the multiple maintenance activities in Windows. Responsiveness to users is reduced when maintenance activity runs while users are actively using the computer. Apps also frequently ask the user to update their software and run background maintenance, and direct users to multiple experiences, including Action Center, Control Panel, Windows Update, Task Scheduler MMC snap-in, and third-party controls.
The goal of Automatic Maintenance is to combine all background maintenance activity in Windows and help third-party developers add their maintenance activity to Windows without negatively impacting performance and energy efficiency. Additionally, Automatic Maintenance enables users as well as enterprises to be in control of maintenance activity scheduling and configuration.
For more information about "Automatic Maintenance", see: Automatic Maintenance (Windows)
This tutorial will show you how to enable or disable Automatic Maintenance in Windows 8, Windows RT, Windows 8.1, and Windows RT 8.1.
You must be logged in as an administrator to be able to do the steps in this tutorial.
It is recommended to leave Automatic Maintenance enabled to let it run automatically at a time you set when the PC is running and you're not using it.
If you disable Automatic Maintenance, then it would be recommended to manually start Automatic Maintenance at least once a week or as needed.
If you disable Automatic Maintenance, then it would be recommended to manually start Automatic Maintenance at least once a week or as needed.
Here's How:
1. Press the :winkey: + R keys to open the Run dialog, type taskschd.msc, and click/tap on OK.
2. In the left pane of Task Scheduler, click/tap on to expand Task Scheduler Library, Microsoft, Windows, and TaskScheduler. (see screenshots below)
3. In the middle pane of TaskScheduler, either right click on or select the Regular Maintenance task, and do step 4 or 5 below for what you would like to do. (see screenshots below)
4. To Enable Automatic Maintenance
NOTE: This is the default setting.
A) Click/tap on Enable, and close Task Scheduler. (see screenshot below)

B) Check the Automatic Maintenance to wake the computer to run at this time box, and set the time to what you would like it to run at. (see screenshot below)

5. To Disable Automatic Maintenance
A) Click/tap on Disable, and close Task Scheduler. (see screenshot below)

B) Uncheck the Automatic Maintenance to wake the computer to run at this time box. (see screenshot below)
That's it,
Shawn
Attachments
Last edited by a moderator: