How to Turn On or Off BitLocker To Go for Removable Data Drives in Windows 8
BitLocker Drive Encryption provides protection for operating system drives, fixed data drives, and removable data drives that are lost or stolen. BitLocker does this by encrypting the contents of drives and requiring users to authenticate their credentials to be able to access the information.
This tutorial will show you how to turn on or off BitLocker To Go to encrypt or decrypt removable data drives (ex: USB drive) in Windows 8.
This tutorial will show you how to turn on or off BitLocker To Go to encrypt or decrypt removable data drives (ex: USB drive) in Windows 8.
- This tutorial does not apply to an operating system drive.
- For a removable data drive to be BitLocker-protected, it must be formatted by using the exFAT, FAT16, FAT32, or NTFS file system. If the drive is NTFS formatted, it can only be unlocked on a computer running Windows Server 2008 R2, Windows 7, Windows Server 2012, or Windows 8. Prior versions of the Windows operating system will not recognize the drive and will prompt you to format the drive.
- The drive, volume, or partition must be least 64 MB in size.
- Any files saved to an encrypted drive will automatically be encrypted as well.
- Files remain encrypted only while they are stored on the encrypted drive. Files will be decrypted if they are copied on another drive, partition, or PC.
- Users who use BitLocker to protect the content of their personal files can also use File History as it seamlessly supports BitLocker on both source and destination drives.
- You can choose how you want to unlock an encrypted data drive: with a password or smart card. You can also set the drive to automatically unlock when you sign to the PC, if you prefer.
BitLocker Drive Encryption is only available in the Windows 8 Pro and Windows 8 Enterprise editions.
OPTION ONE
To Turn On BitLocker To Go for Removable Data Drive in Windows 8
NOTE: This option will encrypt everything on a selected unencrypted removable data drive (ex: USB drive).
1. If you have not already, choose to use either an AES 128-bit or 256-bit encryption method.
NOTE: Windows 8 uses AES 128-bit encryption by default.
2. Connect the removable drive (ex: USB flash drive) that you want to turn on BitLocker To Go for, and do step 3, 4, or 5 for how you would like to start.
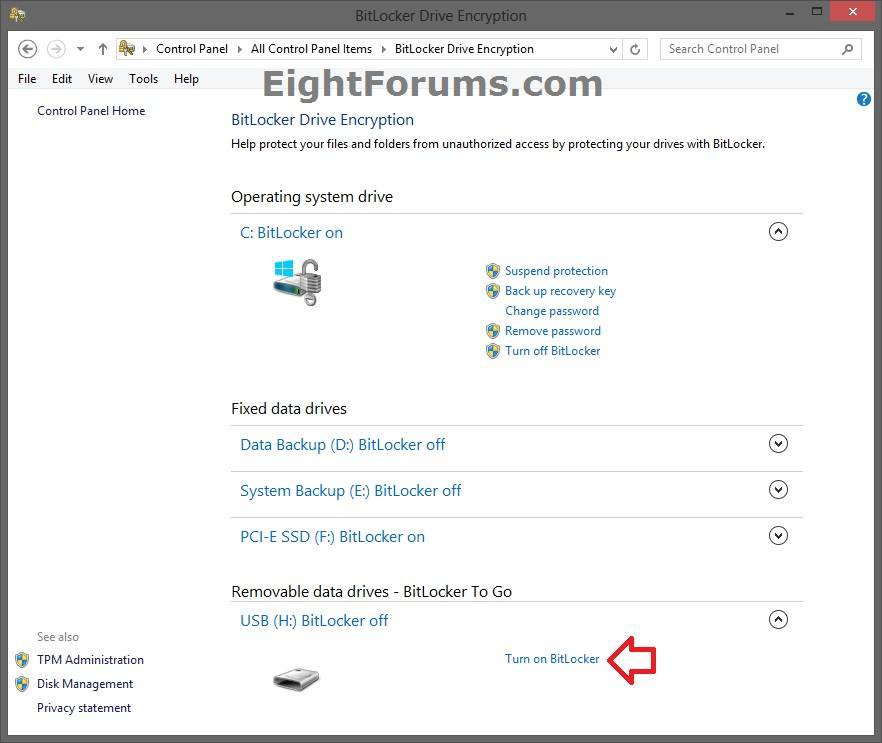
3. Open the Control Panel (icons view), click/tap on BitLocker Drive Encryption icon. Under Removable data drives - BitLocker To Go, click/tap on an arrow to expand the drive letter you want to encrypt, click/tap on the Turn on BitLocker link, and go to step 6 below. (see screenshot below)
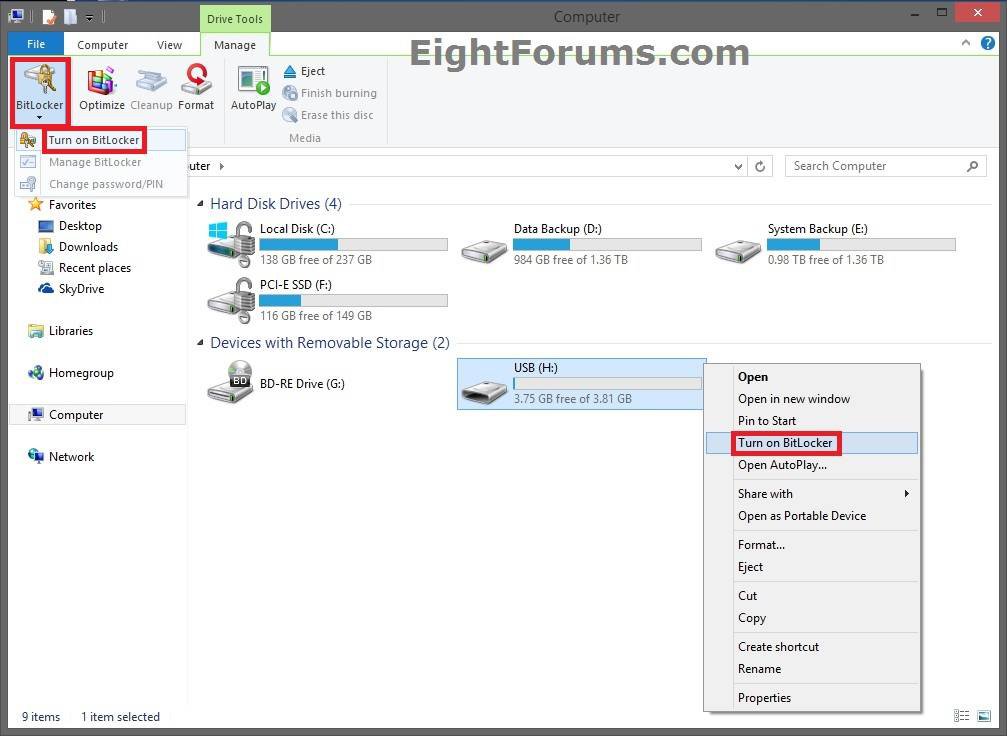
4. In File Explorer, open Computer, right click or press and hold on an unencrypted removable data drive letter you want to encrypt, click/tap on Turn on BitLocker, and go to step 6 below. (see screenshot below step 5)
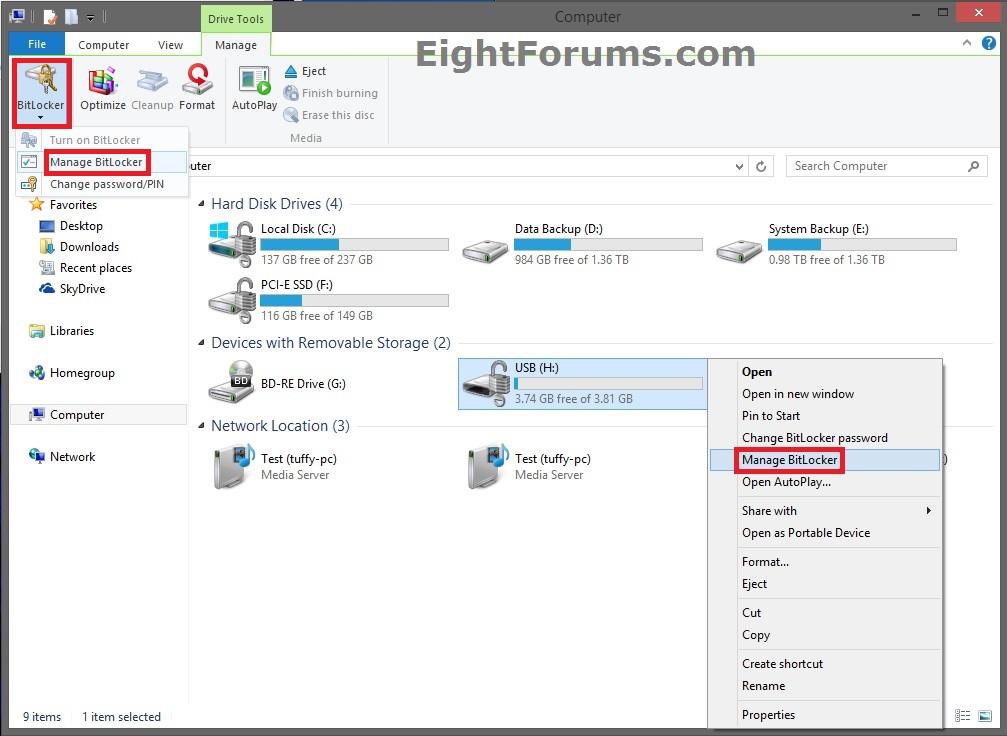
5. In File Explorer, open Computer, select (highlight) an unencrypted removable data drive letter you want to encrypt, click/tap on Manage (Drive Tools) tab, click/tap on BitLocker icon in the ribbon, click/tap Turn on BitLocker, and go to step 6 below. (see screenshot below)
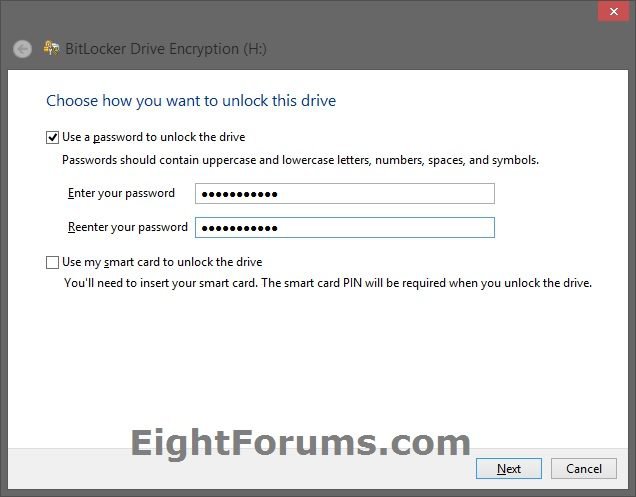
7. Check the box of option(s) you want to use to unlock the drive with, and click/tap on Next when ready. (see screenshot below)
Password = When users connect the removable drive to a PC, they are prompted to enter the password before the drive will be unlocked. Passwords will need to be at least 8 characters long to meet minimum length requirements. Be sure to write down this password, and keep it somewhere safe in case you forget the password.
Smart card = When users attempt to open a drive, they are prompted to insert their smart card and enter the smart card PIN before the drive will be unlocked. When encrypting a drive by using a smart card, a certificate-based protector is created on the drive. This protector contains some unencrypted information that is required to unlock the drive. The public key and thumbprint of the certificate that was used to encrypt the drive is stored unencrypted in the protector's metadata on the drive. This information could be used to identify the certification authority (CA) that issued the certificate.
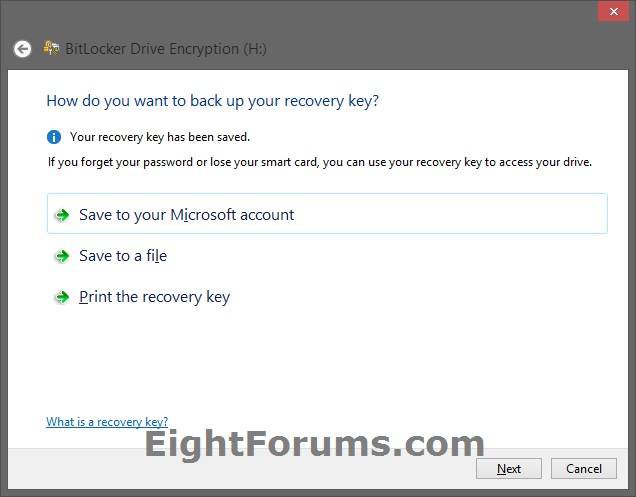
8. Select how you want to back up your BitLocker recovery key, and click/tap on Next when finished. (see screenshot below)
If you forget the password (step 7) for a drive you've encrypted with BitLocker Drive Encryption, or if something happens to your PC that prevents it from accessing the encrypted drive, you can still use a recovery key (a string of 48 random numbers) to get back into the drive.
It's essential that you store a copy of your recovery in a safe place. If you lose it, you might permanently lose access to your files on the encrypted drive.
The Save to your Microsoft account option is only available on non-domain-joined PCs.
If you saved the BitLocker recovery key to your Microsoft account, you will be able to log in to your Microsoft account online at the Microsoft's site below from any PC to view all of your saved recovery keys at anytime.
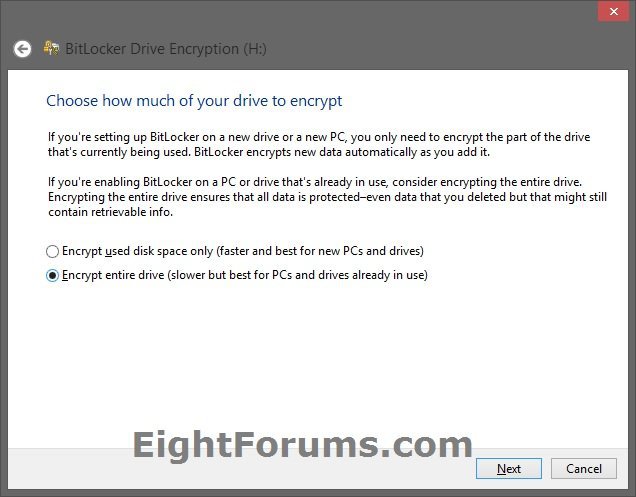
9. Select (dot) to encrypt entire drive, and click/tap on Next. (see screenshot below)
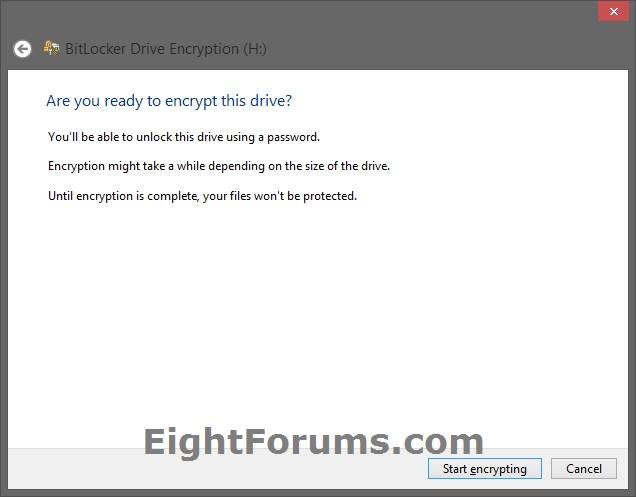
10. Click/tap on Start encrypting. (see screenshot below)
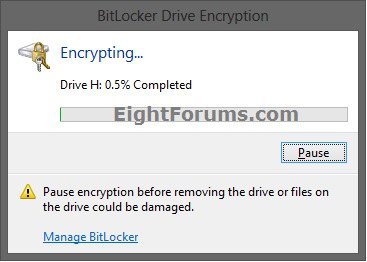
NOTE: This may take a long time to finish, but you will still be able to use your PC during the encryption process. Just do not turn off the PC until it has finished encrypting.
11. You will now see the decryption progress. (see screenshot below)
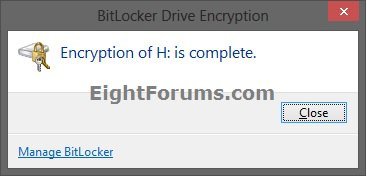
12. When encryption of the drive has finally finished, click/tap on Close. (see screenshot below)
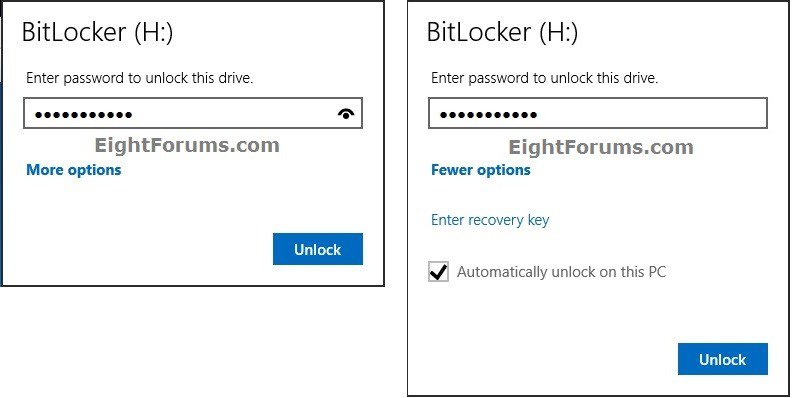
13. Unless the encrypted removable data drive is set to auto-unlock on the specific PC you are connecting it to, whenever the removable drive is connected to a PC, any local user (standard or administrator) will need to unlock the drive to be unlocked for all users on the computer. For example, by entering a password from step 7 above.
OPTION TWO
To Turn Off BitLocker To Go for Removable Data Drive in Windows 8
NOTE: This option will decrypt everything on a selected encrypted removable data drive (ex: USB drive).
1. Do step 2, 3, or 4 for how you would like to start.
2. Open the Control Panel (icons view), click/tap on BitLocker Drive Encryption icon, and go to step 5 below.
3. In File Explorer, open Computer, right click or press and hold on an encrypted removable data drive letter you want to decrypt, click/tap on Manage BitLocker, and go to step 5 below. (see screenshot below step 4)
4. In File Explorer, open Computer, select (highlight) an encrypted removable data drive letter you want to decrypt, click/tap on Manage (Drive Tools) tab, click/tap on BitLocker icon in the ribbon, click/tap Manage BitLocker, and go to step 5 below. (see screenshot below)
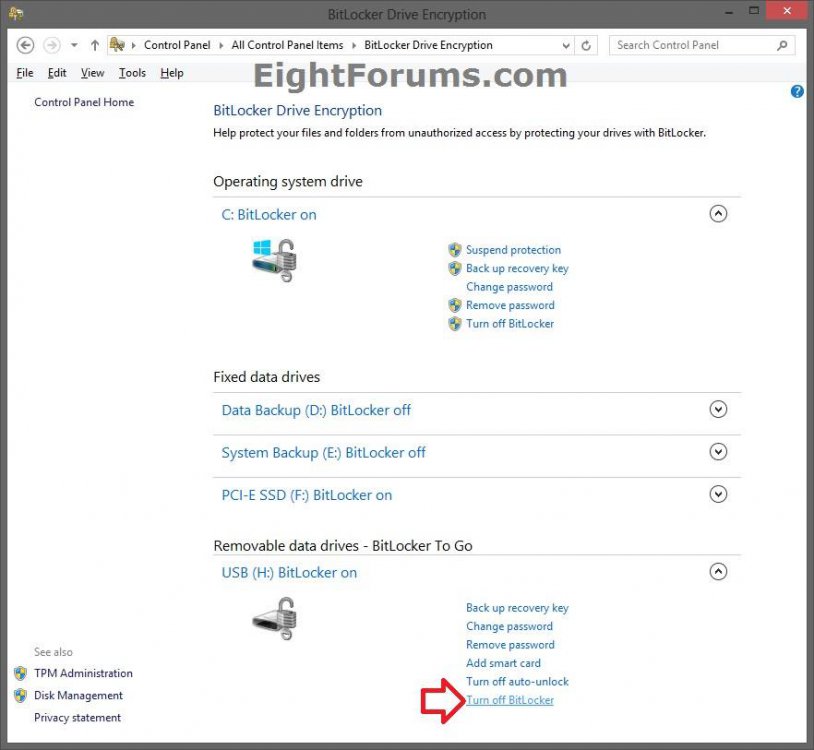
5. Under Removable data drives - BitLocker To Go, click/tap on an arrow to expand the drive letter you want to decrypt, and click/tap on the Turn off BitLocker link. (see screenshot below)
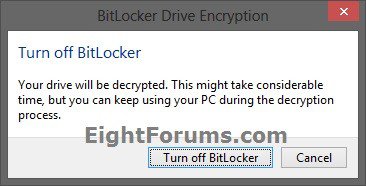
6. Click/tap on Turn off BitLocker. (see screenshot below)
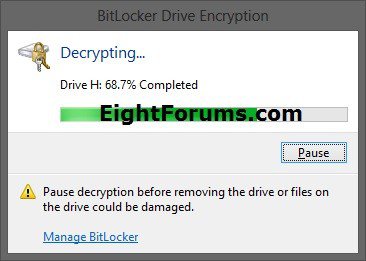
NOTE: This may take a long time to finish, but you will still be able to use your PC during the decryption process. Just do not turn off the PC until it has finished decrypting.
7. You will now see the decryption progress. (see screenshot below)
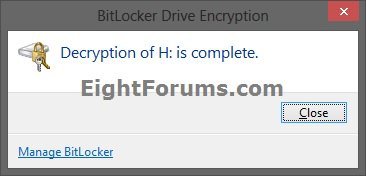
8. When decryption of the drive has finally finished, click/tap on Close. (see screenshot below)
That's it,
Shawn
Related Tutorials
- How to Turn On or Off BitLocker for Fixed Data Drives in Windows 8
- How to Turn On or Off BitLocker for Windows 8 OS Drive with or without TPM
- How to Suspend or Resume BitLocker Protection of a Drive in Windows 8
- How to Copy the BitLocker Startup Key for the OS Drive in Windows 8
- How to Turn On or Off Auto-unlock of BitLocker Encrypted Data Drives in Windows 8
- How to Choose BitLocker Drive Encryption Method and Cipher Strength in Windows 8
- How to Back Up the BitLocker Recovery Key of a Drive in Windows 8
- How to Unlock a Drive using BitLocker Recovery in Windows 8
- How to Use BitLocker Repair Tool to Recover a Drive in Windows 7 and Windows 8
- Add "Lock Drive" to Unlocked BitLocker Drives Context Menu in Windows 7 and Windows 8
- How to Change or Reset the BitLocker Password of a Drive in Windows 8
- How to Allow or Prevent Standard Users from Changing BitLocker Password or Pin in Windows 8
- How to Check BitLocker Status of Drive in Windows 7 and Windows 8
Last edited:

