Fix Microsoft Account Issues in Windows 8 with "Microsoft Accounts" Troubleshooter
This tutorial will show you how to download and run the Microsoft Accounts troubleshooter to help troubleshoot and fix common issues with Microsoft accounts automatically in Windows 8.
Microsoft Accounts troubleshooter is only available in English, but will work in all languages.
You must be signed in as an administrator to be able to run the Microsoft Accounts troubleshooter.
Microsoft Accounts troubleshooter is only available in English, but will work in all languages.
You must be signed in as an administrator to be able to run the Microsoft Accounts troubleshooter.
When you run the Microsoft Accounts troubleshooter, it will automatically check for the following common issues:
- All settings sync incomplete
- Microsoft account settings are corrupt
- Can't connect to the sync service
- Microsoft account required to sync settings
- Unable to connect due to proxy or certificate Issue
- Authentication information is incomplete
- Check for roaming GPO enabled status
- System time and date aren't correct
- Problem with system registration
- Signed in with a guest account or Roaming User Profiles enabled
- Sync settings on this PC is turned off
- You are not connected to the Internet
- Proxy Settings
- You have reached the daily sync quota
- Check system not activated
Here's How:
1. Click/tap on either download button below to download the microsoftaccounts.diagcab file from Microsoft.
2. Run the microsoftaccounts.diagcab file.
3. If prompted by UAC, then click/tap on Yes.
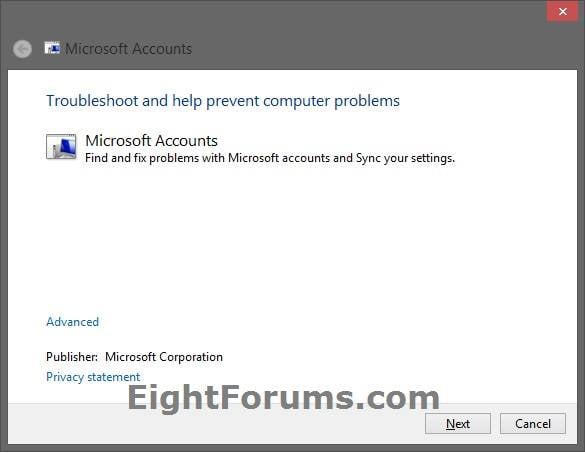
4. In the Microsoft Accounts troubleshooter, click/tap on the Advanced link. (see screenshot below)
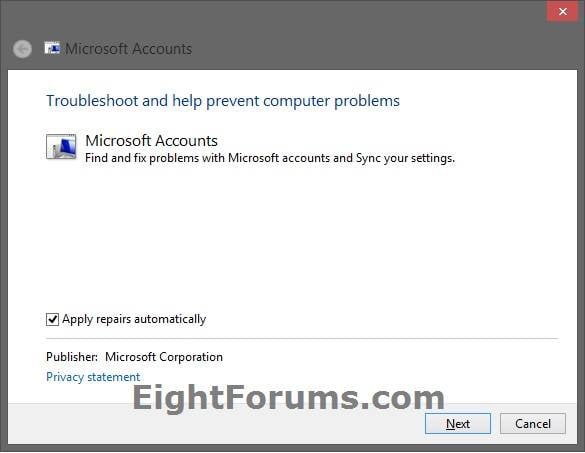
5. Do step 6 or 7 below for what you would like to do. (see screenshot below)
6. To apply repairs automatically
A) Check the Apply repairs automatically box, and click/tap on Next. (see screenshot below step 5)
B) Follow any other instructions until completed, and go to step 8 below.
7. To select repairs you want to have done
A) Uncheck the Apply repairs automatically box, and click/tap on Next. (see screenshot below step 5)
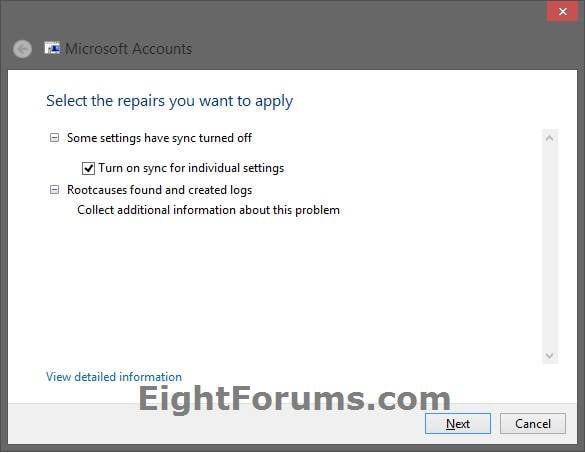
B) After the scan completes, you will be able to select (check) what you would like to be fixed, and click/tap on Next. (see screenshot below)
NOTE: If you like, you can click/tap on the View detailed information link for more details.
C) Follow any other instructions until completed, and go to step 8 below.
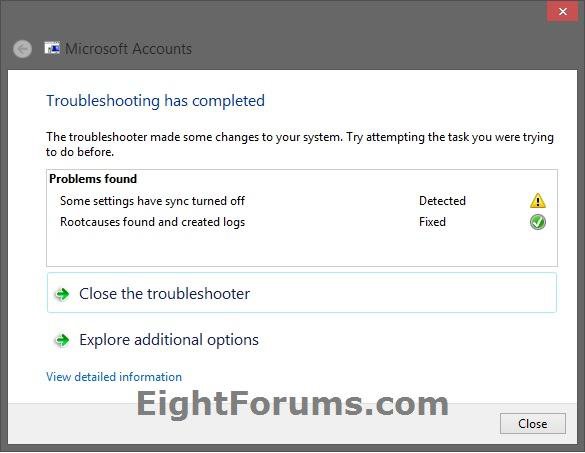
8. When finished, click/tap on Close or explorer additional troubleshooting options if you like. (see screenshot below)
NOTE: If you like, you can click/tap on the View detailed information link for more details.
That's it,
Shawn
Related Tutorials
- How to Use Troubleshooters in Windows 8
- How to Troubleshoot a Problem by Performing a Clean Boot in Windows 8
- Troubleshoot and Fix Store App Issues in Windows 8 with "Windows Store Apps" Troubleshooter
- How to Sign up for and Create a Microsoft Account
- How to Switch from a Local Account to a Microsoft Account in Windows 8 and Windows 8.1
- How to Switch from a Microsoft Account to a Local Account in Windows 8
- How to Allow to Block "Microsoft Accounts" in Windows 8
- How to Add a New User Account in Windows 8
- How to Change a User Account Name in Windows 8
- How to Change a User Account Type in Windows 8
- How to Change or Reset Password of Your Microsoft Account in Windows 8
- How to Change the Email Address of Your "Microsoft Account" in Windows 8
- How to Sync Your Settings Between PCs in Windows 8 and Windows 8.1
- How to Turn On or Off "Metered Internet Connections" for Sync Settings in Windows 8
- How to Enable or Disable "Sync Your Settings" in Windows 8
- How to Add or Remove Trusted Devices for your Microsoft Account
Attachments
Last edited:


