How to Manually Extract System Image Files Using Disk Management in Windows 8 and 8.1
When you create a system image, Windows 8 creates a Virtual Hard Disk .vhdx file that contains all of your files from the included hard drives.
This will show you how to attach (mount) this .vhdx file using Disk Management to be able to manually extract and restore specific files of your choice from the system image instead of doing a full system image recovery.
You must be signed in as an administrator to be able to do the steps in this tutorial.
System Images are saved in this format:
drive letter:\WindowsImageBackup\computer name\Backup YYYY-MM-DD HHMMSS
drive letter:\WindowsImageBackup\computer name\Backup YYYY-MM-DD HHMMSS
For example: If your computer name is Brink-PC, your backup location is on hard drive (network or local) D: , and you backed up on August 29th 2012 at 1:53:41 PM (it will use 24 hour time), then your system image would be located in the folder below.
D:\WindowsImageBackup\BRINK-PC\Backup 2012-08-29 135341
OPTION ONE
To Attach the VHDX to Extract Files from System Image
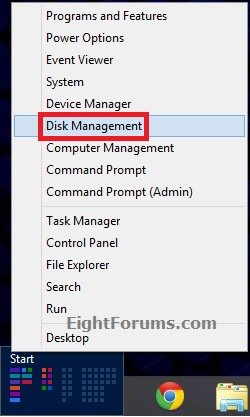
1. Open the Power Users Tasks Menu (Windows + X), and click/tap on Disk Management (diskmgmt.msc). (see screenshot below)
2. In Disk Management, click/tap on Action (menu bar) and Attach VHD. (see screenshot below)
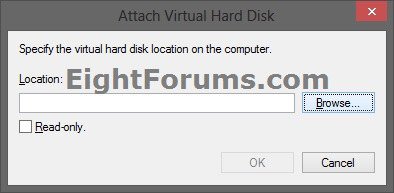
3. Click/tap on the Browse button. (see screenshot below)
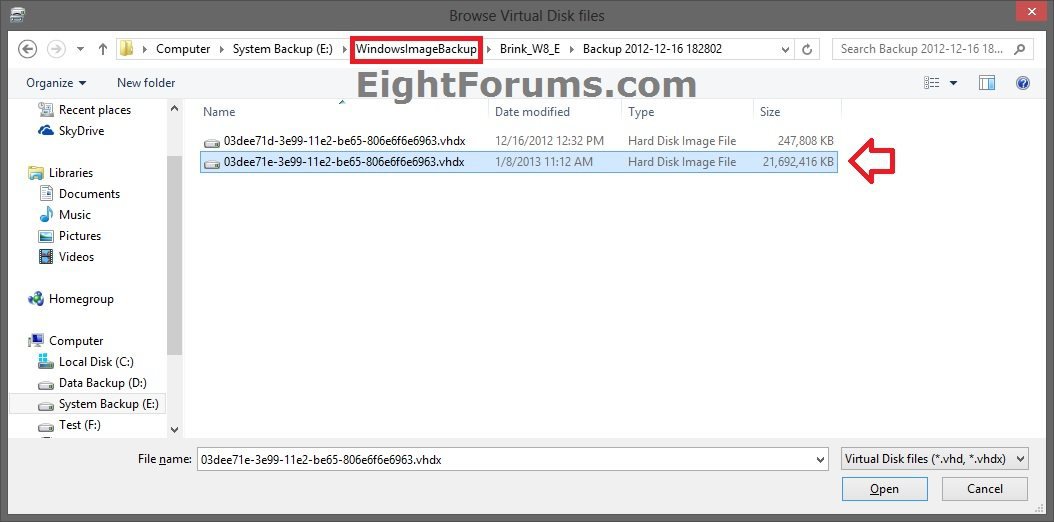
4. Navigate to the drive or partition that you selected to save the system image's WindowsImageBackup folder to, select the .vhdx file listed in it's Backup YYYY-MM-DD HHMMSS folder for the hard drive the files are in, and click/tap on Open. (see screenshot below)
There will be a .vhdx file for each hard disk that was included in the system image backup when it was created, so you may need to attach more than one .vhdx file until you find the correct one. You can use OPTION TWO below to detach the incorrect .vhdx files.
See the NOTE box at the top of the tutorial to see where to find the .vhdx file at.
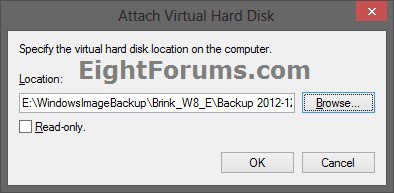
5. Click/tap on OK. (see screenshot below)
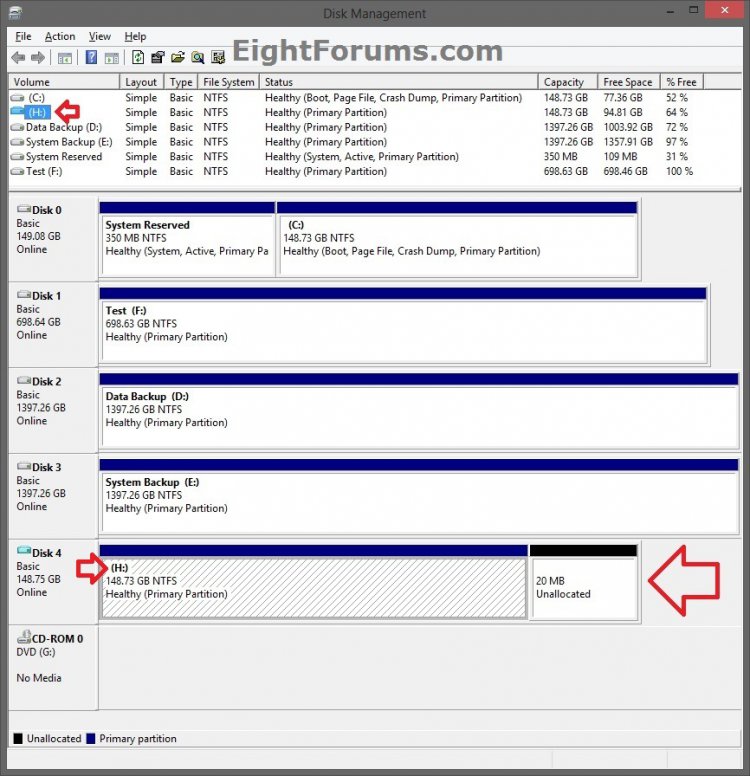
6. You will now notice that the .vhdx file has been attached (mounted) as a separate virtual disk with it's own drive letter (ex: H: ) in Disk Management and the Computer windows. (see screenshot below)
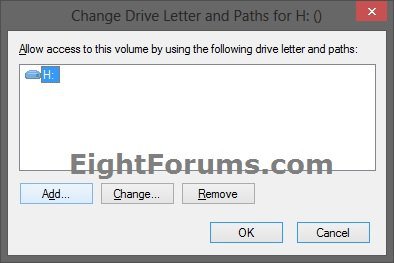
If the now attached .vhdx file was not automatically assigned a drive letter, then you will need to manually assign a drive letter to it.
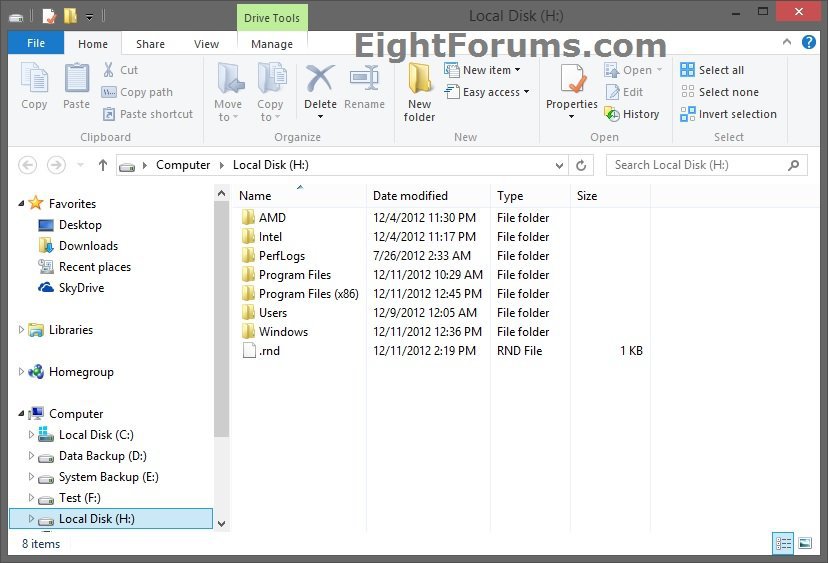
7. You will now open the attached .vhdx file (ex: H: drive) in File Explorer to copy and paste whatever files and folders you want back. (see screenshot below)
OPTION TWO
To Detach the VHDX in Disk Management
NOTE: This will show you to detach the .vhdx file in Disk Management from OPTION ONE above to remove it from This PC without affecting the system image.
1. Do step 2, 3, or 4 below for how you would like to detach the.vhd or .vhdx file.
2. Restart the computer, and go to step 5 below.
NOTE: This will detach all attached (mounted) .vhd and .vhdx files.
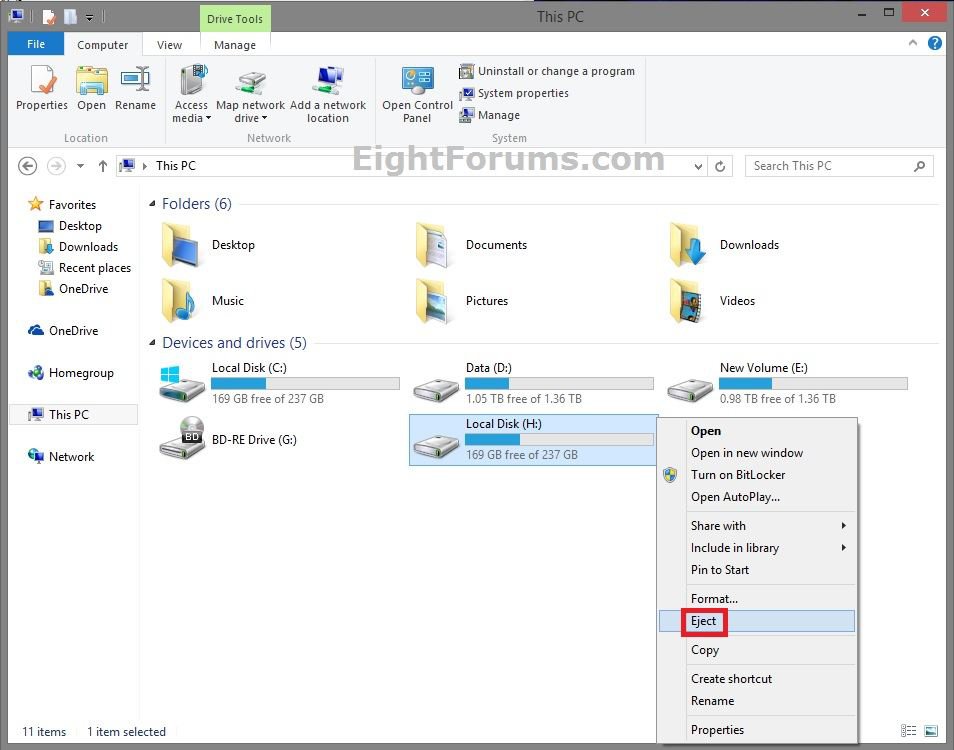
3. Open Computer (Windows 8) or This PC (Windows 8.1) in File Explorer, right click or press and hold on the mounted .vhdx drive (ex: H: ), click/tap on Eject, and go to step 5 below. (see screenshot below)
4. Open the Power Users Tasks Menu (Windows + X), and click/tap on Disk Management (diskmgmt.msc). (see screenshot below)
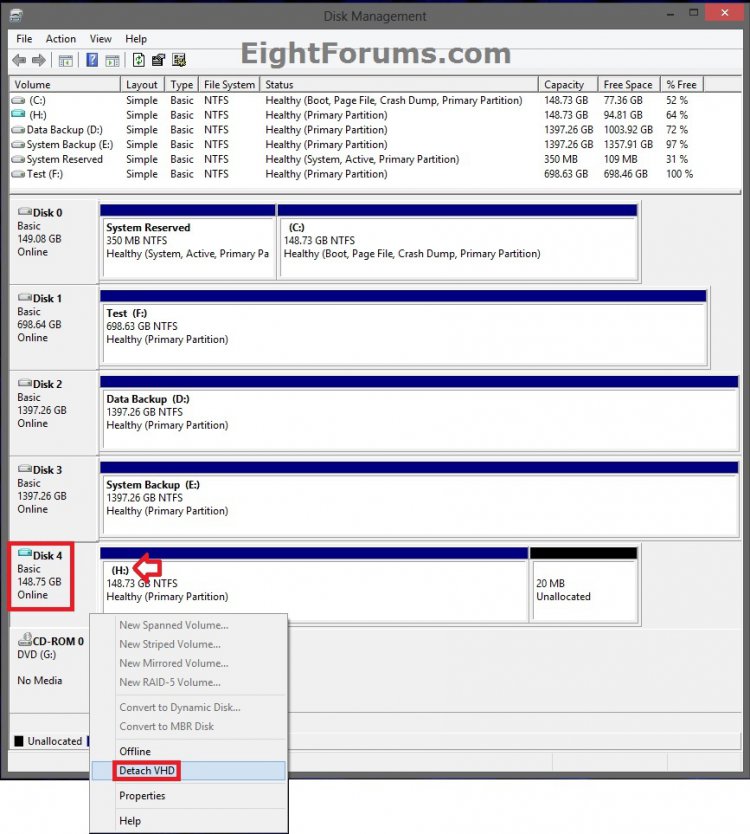
A) In Disk Management, right click on the Disk # of the attached .vhdx file (ex: H: ), and click/tap on Detach VHD. (see screenshot below)
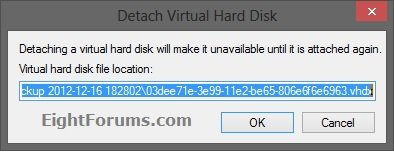
B) Click/tap on OK, and go to step 5 below. (see screenshot below)
5. The .vhdx file will now be detached (unmounted) and no longer display in Disk Management and This PC.
That's it,
Shawn
Related Tutorials
- How to Create a System Image in Windows 8 and 8.1
- How to Do a System Image Recovery in Windows 8 and 8.1
- How to Restore Files and Folders from a Backup in Windows 8
- How to Do a System Restore in Windows 8
- How to Set up and Use File History in Windows 8
- How to Restore Previous Versions of your Files with File History in Windows 8
Attachments
Last edited by a moderator:

