How to "Sign in" or "Log in" to Windows 8 and 8.1
There have been many reports of how the sign in process for Windows 8 is not very intuitive, so I decided to create this tutorial to help with that. Once you sign in for the first time, you will be fine. It's just a matter of getting use to logging in being different than previous versions of Windows.
"Log in" is now called "Sign in" in Windows 8. Windows 8 starts up to the lock screen by default now instead of the traditional log on screen as in previous versions of Windows.
This tutorial will help show you the new method of how to sign in (log in) to a user account in Windows 8.
"Log in" is now called "Sign in" in Windows 8. Windows 8 starts up to the lock screen by default now instead of the traditional log on screen as in previous versions of Windows.
This tutorial will help show you the new method of how to sign in (log in) to a user account in Windows 8.
Here's How:
1. From the lock screen, do either one of the actions below to go to the sign in (log on) screen. (see screenshots below)
- Press any key.
- Click/tap on the lock screen.
- Click/tap and hold on the lock screen, drag (swipe) the lock screen all the way up, and release.
- If you have Secure sign-in enabled, then press Ctrl+Alt+Delete.


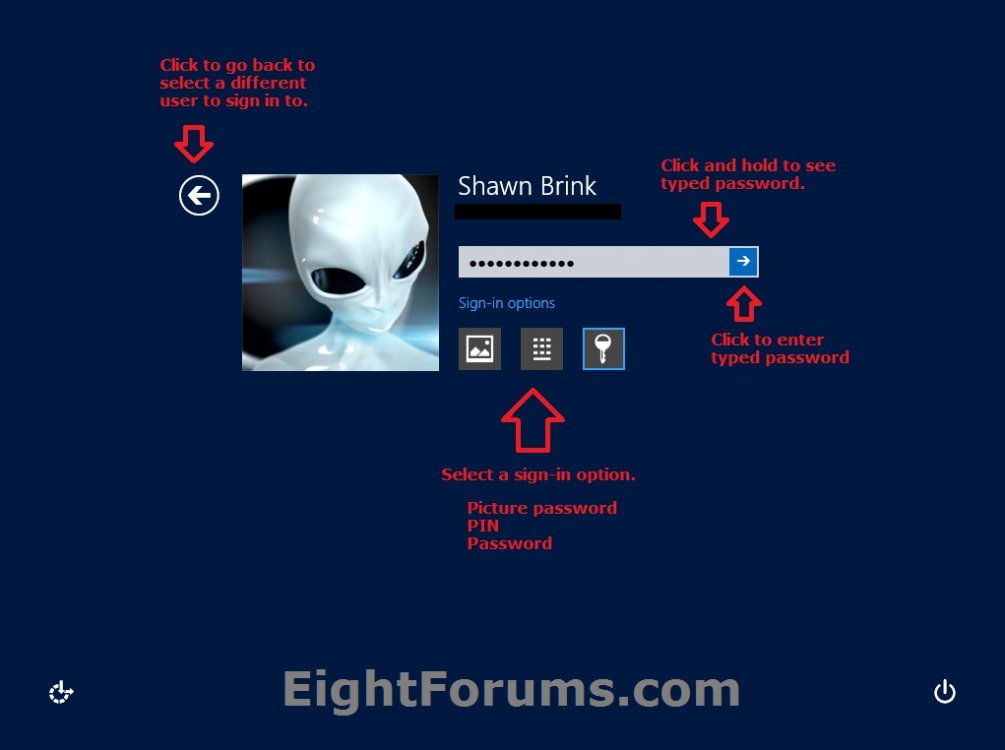
3. Click/tap on the sign-in options link (not needed for password), and do step 4, 5, or 6 below depending on if you want to sign in to your user account with a password, fingerprint, picture password, or a PIN.
4. Type in the password of the selected local account or Microsoft account, press Enter or click/tap on the enter arrow
NOTE: If you wish to sign in to another user account instead, then click/tap on the back arrow at the top left to go back to step 2 to do so.
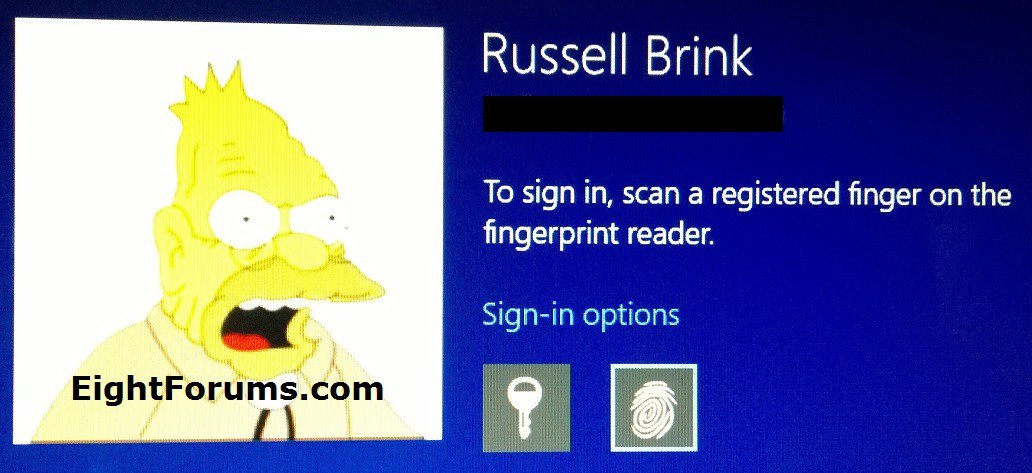
5. Click/tap on the fingerprint icon, scan a registered finger on the fingerprint reader, and go to step 8 below. (see screenshots below)
If you like, you could also just swipe your finger over the fingerprint reader from the lock or sign in screen to automatically sign in to your user account without having to do step 2 or 3 above.
6. Click/tap on the picture password icon, draw the picture password of the selected user account, and go to step 8 below. (see screenshot below)
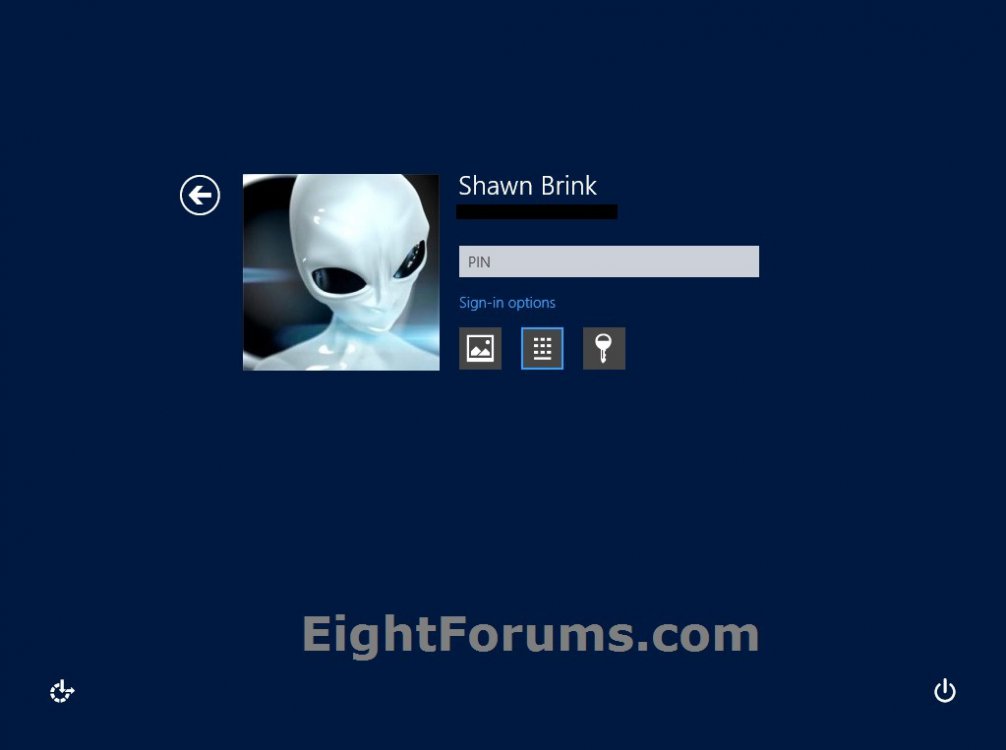
7. Click/tap on the PIN icon, enter the PIN number of the selected user account, and go to step 8 below. (see screenshot below)
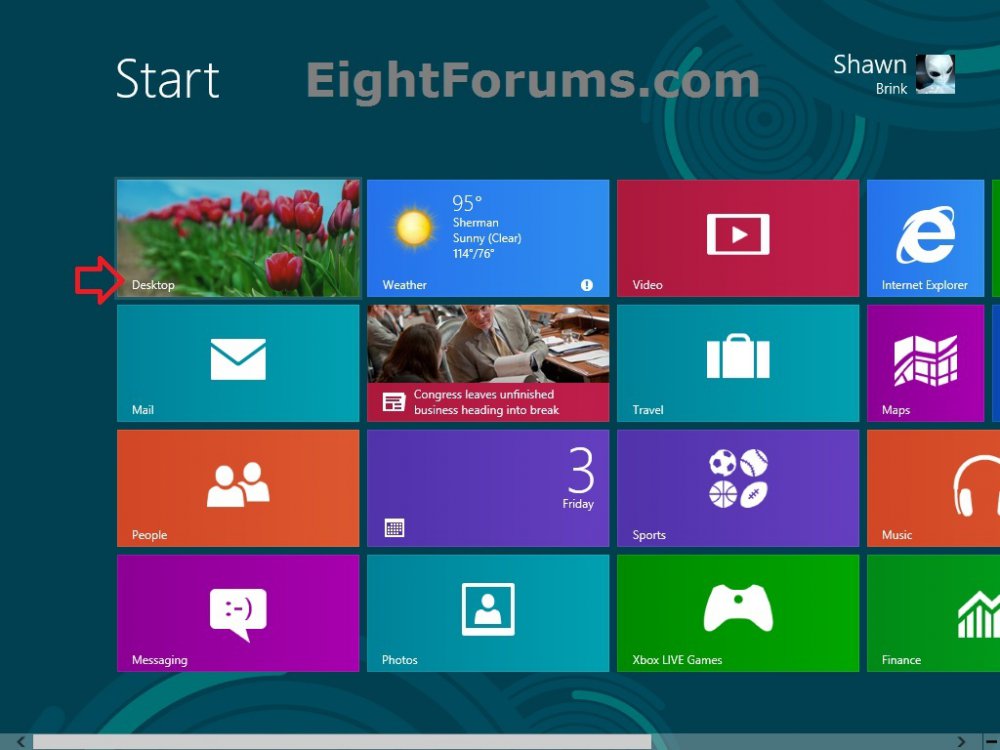
8. You will now be signed in, and open to the Start screen in Windows 8. (see screenshot below)
NOTE: If you like, you can click/tap on the Desktop app tile to go to your desktop.
That's it,
Shawn
Related Tutorials
- How to Go to Desktop or Start when You Sign in or Close Apps in Windows 8 and 8.1
- How to Always Show "All Users" or "Last User" on Sign-in Screen in Windows 8 and 8.1
- How to Require Users to Sign in with User Name and Password in Windows 8 and 8.1
- How to Require Users to Sign in with User Name and Password on Lock Screen in Windows 8 and 8.1
- How to Change Background Color of Default Sign-in Screen in Windows 8 and 8.1
- How to Change Start and Sign in Screen Background and Color in Windows 8 and 8.1
- How to Have Windows 8 Log On to a User Account Automatically at Startup
- How to Enable or Disable Password Protection on Wakeup in Windows 8 and 8.1
- How to Create a Password for a User Account in Windows 8 and 8.1
- How to Create, Change, or Remove a Picture Password in Windows 8 and 8.1
- How to Enable or Disable Picture Password Sign-in in Windows 8 and 8.1
- How to Create, Change, or Remove a PIN for Your Account in Windows 8 and 8.1
- How to Enable or Disable PIN Sign-in for Domain Users in Windows 8 and 8.1
- How to Add a New User Account in Windows 8 and 8.1
- How to Change Lock Screen Background Image in Windows 8 and 8.1
- How Enable or Disable Secure Sign-in with Ctrl+Alt+Delete in Windows 8 and 8.1
- How to Enable or Disable Lock Screen in Windows 8 and 8.1
- How to Display Information about Previous Logons during User Sign-in to Windows 8 and 8.1
- How to Enable or Disable to Display Highly Detailed Status Messages in Windows 8 and 8.1
Attachments
Last edited:


