How to Create a Shared Folders Shortcut in Vista, Windows 7, and Windows 8
You can use the Shared Folders Microsoft Management Console (MMC) snap-in to centrally manage file shares on a computer. Shared Folders enables you to create file shares and set permissions, as well as view and manage open files and users connected to file shares on the computer.
For more information, see: Shared Folders
This tutorial will show you how to download or create an "Shared Folders" MMC shortcut in Vista, Windows 7, and Windows 8.
For more information, see: Shared Folders
This tutorial will show you how to download or create an "Shared Folders" MMC shortcut in Vista, Windows 7, and Windows 8.
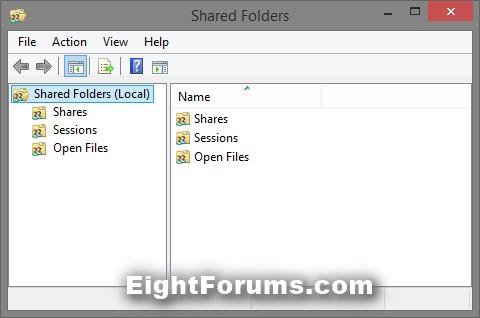
EXAMPLE: Shared Folders MMC
OPTION ONE
To Download a "Shared Folders" Shortcut
1. Click/tap on the download button below to download the file below.
Shared_Folders_Shortcut.zip
2. Save the .zip file to your desktop.
3. Open the .zip file, and extract (drag and drop) the shortcut to your desktop.
4. Unblock the Shared Folders shortcut.
5. In Vista and Windows 7, you can now Pin to Taskbar (Windows 7 only) or Pin to Start Menu, add to Quick Launch, assign a keyboard shortcut to it, or move this shortcut to where you like for easy use.
6. In Windows 8and 8.1, you can Pin to Taskbar on desktop, Pin to Start screen, add to Quick Launch, assign a keyboard shortcut to it, or move this shortcut to where you like for easy use.
7. When finished, you can delete the downloaded .zip file if you like.
OPTION TWO
To Manually Create a "Shared Folders" Shortcut
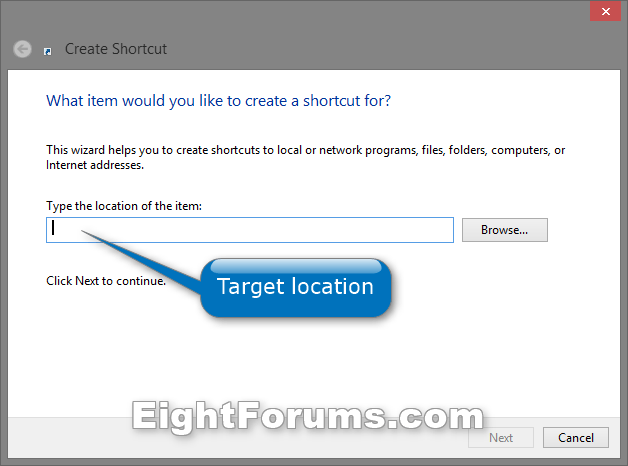
1. Right click or press and hold on an empty area on your desktop, and click/tap on New and Shortcut.
2. Copy and paste the location below into the location area, and click/tap on the Next button. (see screenshot below)
%windir%\System32\fsmgmt.msc
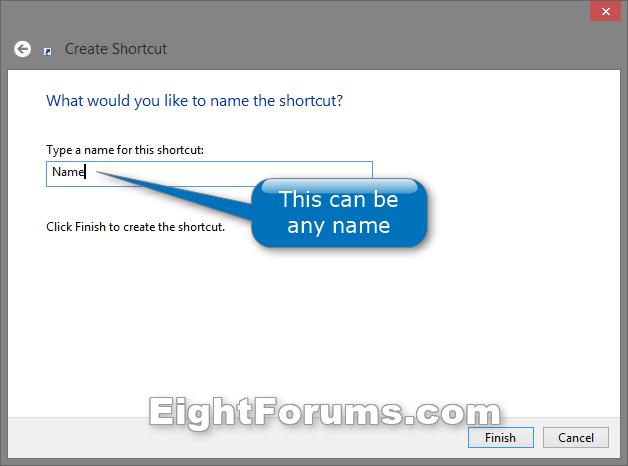
3. Type Shared Folders for the name, and click/tap on the Finish button. (see screenshot below)
NOTE: You can name this anything you would like though.
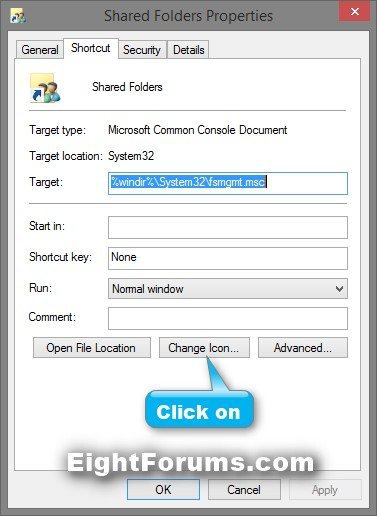
4. Right click or press and hold on the new shortcut, and click/tap on Properties.
5. Click/tap on the Shortcut tab, then click/tap on the Change Icon button. (see screenshot below)
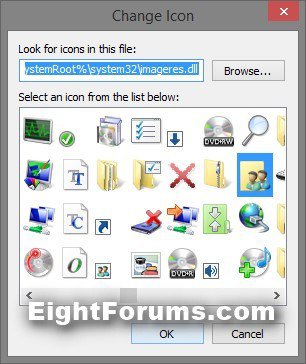
6. In the line under "Look for icons in this file", copy and paste the path below and press Enter. (see screenshot below)
%SystemRoot%\System32\imageres.dll
7. Select the icon highlighted in blue above, and click/tap on OK. (see screenshot above)
NOTE: You can use any icon that you would like instead though.
8. Click/tap on OK. (see screenshot below step 5)
9. In Vista and Windows 7, you can now Pin to Taskbar (Windows 7 only) or Pin to Start Menu, add to Quick Launch, assign a keyboard shortcut to it, or move this shortcut to where you like for easy use.
10. In Windows 8 and 8.1, you can Pin to Taskbar on desktop, Pin to Start screen, add to Quick Launch, assign a keyboard shortcut to it, or move this shortcut to where you like for easy use.
That's it,
Shawn
Related Tutorials
- Create a "Shared Folder Creation Wizard" Shortcut in Windows 7 and Windows 8
- How to "Share with" and "Stop Sharing" Files and Folders on Network or Shared PC in Windows 8
- How to Create a "Shared Folders Troubleshoot" Shortcut in Windows 7
- How to Audit User Access to Shared Folders on Your Computer
- Add or Remove "Share with" Context Menu Item in Windows 7 and Windows 8
- How to Turn "Password Protected Sharing" On or Off in Windows 8
- How to Turn "File and Printer Sharing" On or Off for Networks in Windows 8
- How to Turn "Public Folder Sharing" On or Off for Networks in Windows 8
- How to Change Homegroup Sharing Settings in Windows 8 and 8.1
Attachments
Last edited:

