How to Add or Remove Recycle Bin on Navigation Pane in Windows 8 and 8.1
The Recycle Bin provides a safety net when deleting files or folders. When you delete any of these items from your hard disk, Windows places it in the Recycle Bin and the Recycle Bin icon changes from empty to full.
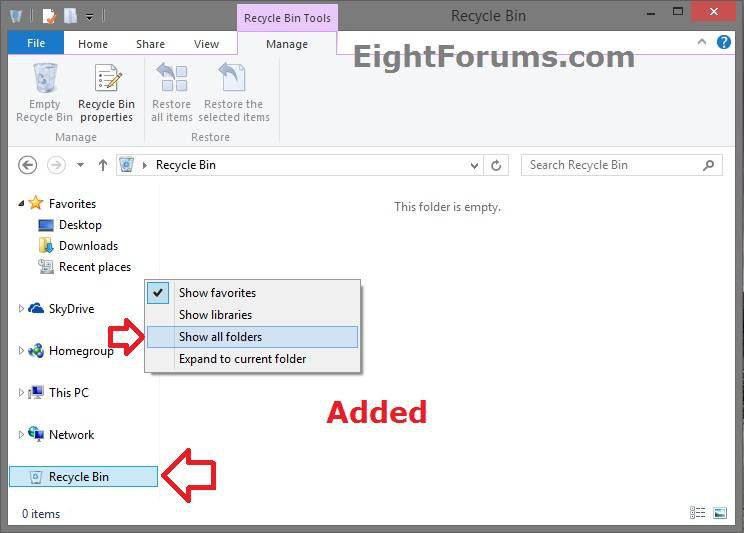
This tutorial will show you how to add or remove the Recycle Bin as a separate item on the navigation pane of File Explorer in Windows 8, Windows RT, Windows 8.1, and Windows RT 8.1.
This will only add or remove the Recycle Bin as a separate item when Show all folders is unchecked. The Recycle Bin will still always show when Show all folders is checked.
This tutorial is only applied to your (current) user account, and not all users.
EXAMPLE: Recycle Bin added to navigation pane
Here's How:
1. Do step 2 or 3 below for what you would like to do.
2. To Add Recycle Bin to Navigation Pane
A) Click/tap on the Download button below to download the file below, and go to step 4 below.
Add_Recycle_Bin_to_Navigation_Pane.reg
3. To Remove Recycle Bin from Navigation Pane
NOTE: This is the default setting.
A) Click/tap on the Download button below to download the file below, and go to step 4 below.
Remove_Recycle_Bin_from_Navigation_Pane.reg
4. Save the .reg file to your desktop.
5. Double click/tap on the downloaded .reg file to Merge it.
6. If prompted, click/tap on Run, Yes (UAC), Yes, and OK to approve the merge.
7. If open, close and reopen File Explorer to apply.
8. If you like, you can delete the downloaded .reg file if you like.
That's it,
Shawn
Related Tutorials
- How to Pin Recycle Bin to Taskbar in Windows 8 and 8.1
- Add or Remove "Favorites" from Navigation Pane in Windows 8 and 8.1
- How to Add or Remove Homegroup from Navigation Pane in Windows 8 and 8.1
- Add or Remove "Libraries" from Navigation Pane in Windows 8 and 8.1
- Add or Remove "Network" from Navigation Pane in Windows 8 and 8.1
- Add or Remove "SkyDrive" from Navigation Pane of File Explorer in 8.1
- How to Add or Remove Your User Folder on Navigation Pane in Windows 8 and 8.1
- How to Empty Recycle Bin in Windows 8 and 8.1
- How to Add or Remove Recycle Bin from Favorites in Navigation Pane in Windows
- How to Fix Corrupted Recycle Bin in Windows
Attachments
Last edited:


