How to Change the Network Connection Priority in Vista, Windows 7, and Windows 8
A network connection is a set of information that enables your computer to connect to the Internet, a network, or another computer. When you install a network adapter in your computer, Windows creates a connection for it in the Network Connections folder. A local area connection is created for an Ethernet network adapter. A wireless network connection is created for a wireless network adapter.
This tutorial will show you how to change the priority of network connections in Vista, Windows 7, or Windows 8 so that they follow a specific connection order set by you for all users.
You must be signed in as an administrator to be able to do the steps in this tutorial.
This tutorial will show you how to change the priority of network connections in Vista, Windows 7, or Windows 8 so that they follow a specific connection order set by you for all users.
You must be signed in as an administrator to be able to do the steps in this tutorial.
Windows usually connects to networks in this order:
Mobile broadband networks are treated differently. If you manually connect to a mobile broadband network when there is a Wi‑Fi network in range, the mobile broadband network is preferred just for that session. The next time you’re in range of both networks, the Wi‑Fi network is preferred. This is because mobile broadband networks typically are metered.
- Ethernet
- Wi‑Fi
- Mobile broadband
Mobile broadband networks are treated differently. If you manually connect to a mobile broadband network when there is a Wi‑Fi network in range, the mobile broadband network is preferred just for that session. The next time you’re in range of both networks, the Wi‑Fi network is preferred. This is because mobile broadband networks typically are metered.
Here's How:
1. Do step 2 or 3 below for how you would like to open the Network and Sharing Center.
2. Open the Control Panel in Vista (classic view), Windows 7 (icons view), or Windows 8 (icons view), click/tap on the Network and Sharing Center icon, and go to step 4 below.
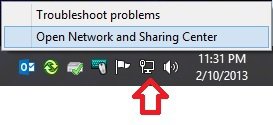
3. On your desktop, right click or press and hold on the Network icon in the taskbar notification area, click/tap on Open Network and Sharing Center, and go to step 4 below. (see screenshot below)
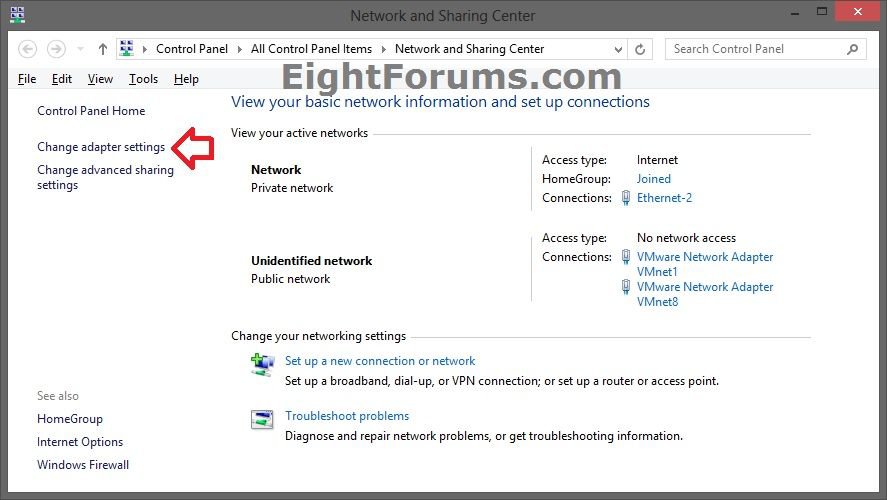
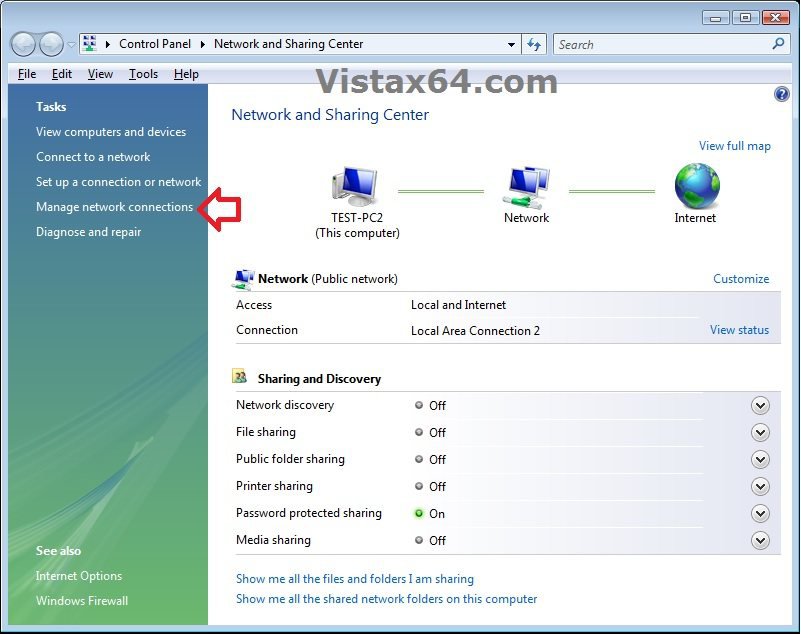
4. Click/tap on the Change adapter settings (Windows 7/8) or Manage network connections (Vista) link on the left side in Network and Sharing Center. (see screenshots below)
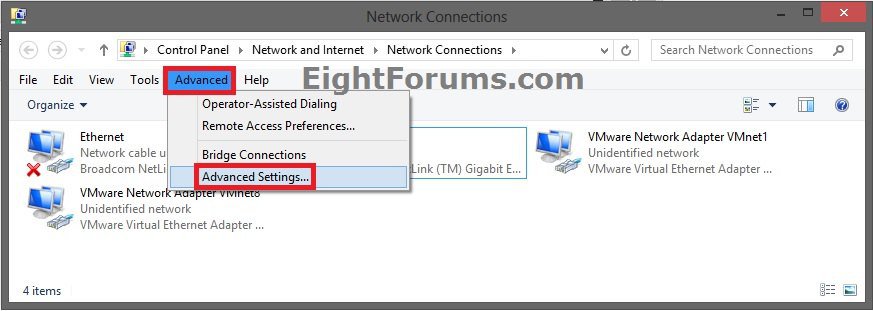
5. Press the Alt key to see the menu bar, then click/tap on Advanced and Advanced Settings. (see screenshot below)
6. If prompted by UAC, then click/tap on Continue (Vista) or Yes (Windows 7/8).
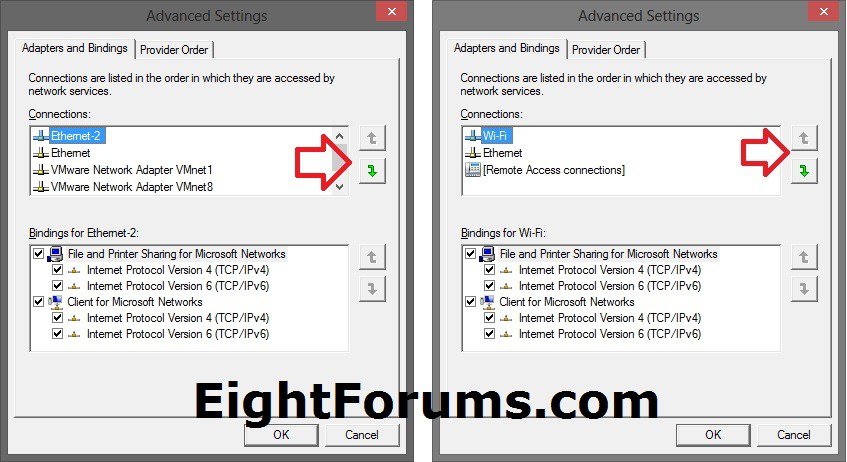
7. In the Connections box, select a network connection, and click/tap on the up or down green arrows until it's set in the priority order you wanted. When finished changing the order of all network connections to how you like, click/tap on OK. (see screenshots below)
8. You can now close the "Network Connections" and "Network and Sharing Center" windows if you like.
That's it,
Shawn
Related Tutorials
- How to Change Connection Priority of Wireless Networks in Windows 8 and 8.1
- How to Create a "Network Connections" Shortcut in Windows 7 and Windows 8
- How to Rename a Network Connection in Vista, Windows 7, and Windows 8
- How to Turn Network Discovery On or Off in Windows 8 and 8.1
- How to Delete a Wireless Network Profile in Windows 8 and 8.1
- How to Change Connection Priority of Wireless Networks in Vista and Windows 7
- How to Enable or Disable a Network Adapter (NIC) in Windows
- Backup and Restore Wireless Network Profiles in Windows 8 and 8.1
- How to Add or Remove Wireless Networks from Allowed or Blocked Filter List in Windows
Attachments
Last edited:

