How to Create an "Assigned Access" Shortcut in Windows 8.1
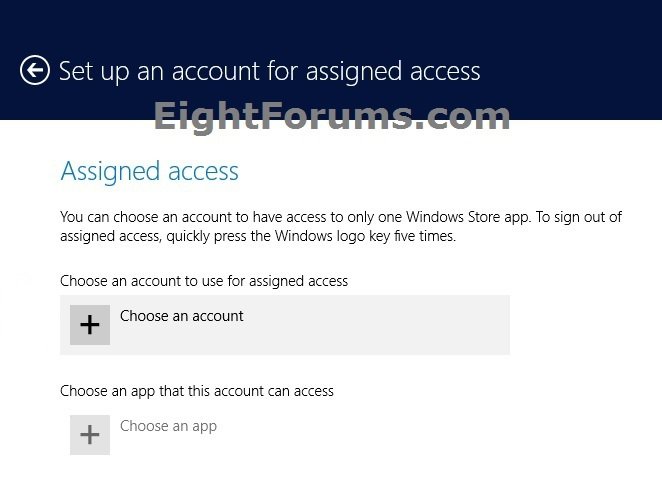
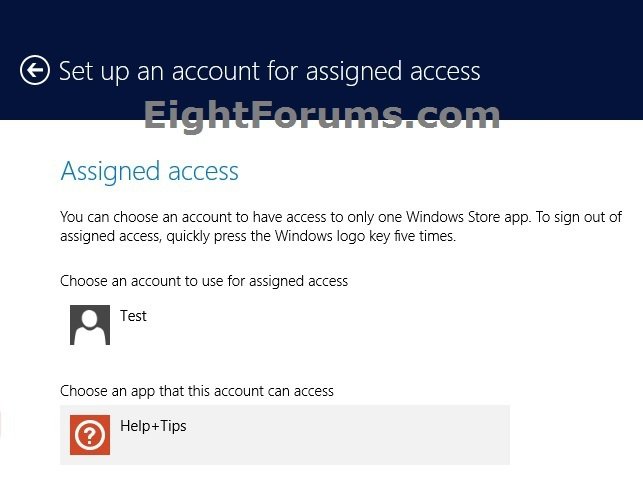
In Windows 8.1 and Windows RT 8.1, Kiosk Mode has been renamed to "Assigned Access". Assigned access sets a local standard user account to only run a single Windows Store app when signed in to, and the account not able to do anything else on the PC or device. This can be used for things like a learning application for kids in an educational setting, a customer service application at a boutique, or having an account that your kids can only use say the Xbox Games app in.
This tutorial will show you how to create or download an Assigned Access shortcut that opens directly to it's PC settings location in Windows 8.1 and Windows RT 8.1.
This tutorial will show you how to create or download an Assigned Access shortcut that opens directly to it's PC settings location in Windows 8.1 and Windows RT 8.1.
EXAMPLE: Assigned Access
OPTION ONE
To Download an "Assigned Access" Shortcut
1. Click/tap on the Download button below to download the ZIP file below.
Assigned_Access_Shortcut.zip
2. Save the .zip file to your desktop.
3. Open the .zip file and extract (drag and drop) theshortcut to your desktop.
4. Unblock the extracted shortcut.
5. If you like, you can Pin to Taskbar on desktop, Pin to Start screen, add to Quick Launch, assign a keyboard shortcut to it, or move this shortcut to where you like for easy use.
6. When finished, you can delete the downloaded .zip file if you like.
OPTION TWO
To Manually Create an "Assigned Access" Shortcut
1. Right click or press and hold on an empty area of your desktop, and click/tap on New and Shortcut.
2. Copy and paste the command below into the location area, and click/tap on the Next button. (see screenshot below)
If you are not have a US English Windows 8.1 installed, then you will need to change the en-US folder name in the command below for the folder name with your language instead for this to work.
Code:
%windir%\explorer.exe %localappdata%\Packages\windows.immersivecontrolpanel_cw5n1h2txyewy\LocalState\Indexed\Settings\[B][COLOR=#FF0000]en-US[/COLOR][/B]\AAA_SystemSettings_Users_AssignedAccess.settingcontent-ms
3. Type Assigned Access for the name, and click/tap on the Finish button. (see screenshot below)
NOTE: You can name this shortcut anything you would like though.
4. Right click or swipe down on the new Assigned Access shortcut, and click/tap on Properties.
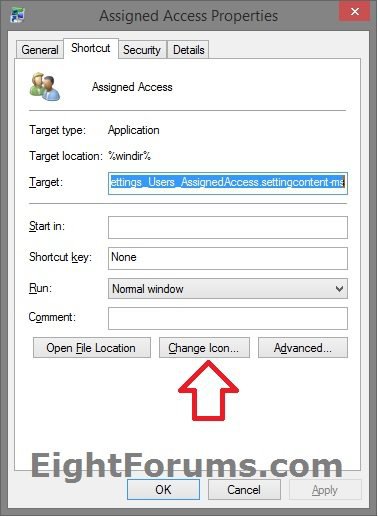
5. Click/tap on the Shortcut tab, then click/tap on the Change Icon button. (see screenshot below)
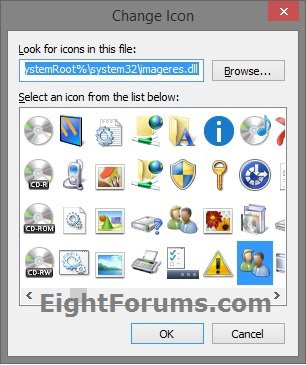
6. In the line under "Look for icons in this file", copy and paste the location below, and press Enter. (see screenshot below)
%SystemRoot%\system32\imageres.dll
7. Select the icon highlighted in blue above, and click/tap on OK. (see screenshot above)
NOTE: You can use any icon that you would like instead though.
8. Click/tap on OK. (see screenshot below step 5)
9. If you like, you can Pin to Taskbar on desktop, Pin to Start screen, add to Quick Launch, assign a keyboard shortcut to it, or move this shortcut to where you like for easy use.
That's it,
Shawn
Attachments
Last edited:


