UEFI Bootable USB Flash Drive - Create in Windows

How to Create a Bootable UEFI USB Flash Drive for Installing Windows 7, Windows 8, or Windows 8.1

This tutorial will show you how to create a Windows 7 or Windows 8 or 8.1 installation bootable USB flash drive for UEFIfrom either a Windows 7 or Windows 8/8.1 installation ISO or DVD.

Requirements:
  • At least a 4GB USB flash drive
  • 64-bit Windows 7 ISO or DVD (If you want to install Windows 7)
  • 64-bit Windows 8 ISO or DVD (If you want to install Windows 8)
  • 64-bit Windows 8.1 ISO or DVD (If you want to install Windows 8.1)
  • 32-bit is not supported.
  • Set the boot mode to use UEFI and not CSM (Compatibility Support Module) in your UEFI firmware settings.
  • Temporarily disable Secure Boot in your UEFI firmware settings. Some motherboards will not boot from a USB unless you do this first. When the Windows installation is finished, you can enable secure boot if you like.
  • If you have fast boot or ultra-fast boot enabled in your UEFI firmware (if supported), then you may need to temporarily disable it until Windows has finished installing to be able to boot from a USB flash drive at boot.

EXAMPLE: UEFI Bootable USB Flash Drive
NOTE: This is it listed in the motherboard's boot menu.

UEFI_USB_Boot_Menu.jpg


OPTION ONE

To Create a Bootable UEFI USB Flash Drive using Free Program "Rufus"


1. Download the latest version of Rufus at the link below, and save it's .exe file to your desktop.

Note   Note
This is a standalone exe file that doesn't install anything to your PC
For Rufus FAQs, see: FAQ · pbatard/rufus Wiki · GitHub


Rufus - Create bootable USB drives the easy way


2. Connect your USB flash drive if you have not already.

3. Run the rufus_v###.exe file, and click/tap on Yes if prompted by UAC.
NOTE: ### = latest version number.

4. Set Rufus with the settings below: (see screenshot below step 5)


  • Under Device, select the USB flash drive you want to format and use.
  • Under Format Options, check Create a bootable disk using, click/tap on the browse icon icon.jpg to navigate to and select your 64-bit Windows 7 or Windows 8 or Windows 8.1 ISO file, and then make sure that Standard Windows installation is selected (dotted).
  • Under Partition scheme and target system type, select GPT partition scheme for UEFI computer.
  • Under File system, select FAT32.
  • Under Cluster size, select the (Default) (ex: 16 kilobytes or 4096 bytes) it has listed.
  • Under Format Options, check Quick format.
  • Under Format Options, check Create extended label and icon files.
  • Under New volume label, you can enter any name you like for the USB flash drive, or leave the default name.

5. When ready, click/tap on Start. (see screenshot below)


Rufus_UEFI.png


6. Click/tap on OK to confirm. (see screenshot below)

Rufus-confirm.jpg


7. Rufus will now start creating the bootable UEFI USB flash drive. (see screenshot below)

Rufus_working.jpg


8. When Rufus is "DONE", you can close Rufus. (see screenshot below)
NOTE: It could take a little while to finish.

Rufus_Done.jpg


9. You are now ready to do a clean install of Windows 7 or Windows 8/8.1 using UEFI with your bootable UEFI USB flash drive.


OPTION TWO

To Manually Create a Bootable UEFI USB Flash Drive


1. Connect the USB flash drive.

2. Open an elevated command prompt in Windows 7 or Windows 8/8.1.

3. In the elevated command prompt, type the commands below one at a time and press Enter after each one. (see screenshot below step 5)

  • diskpart
  • list disk

4. Make note of the Disk # (ex: Disk 4) for the USB flash drive. (see screenshot below step 5)

It is critical that you use the correct disk #. If you do not, then you could delete the wrong drive below and lose everything on it


5. In the elevated command prompt, type the commands below one at a time and press Enter after each one. (see screenshot below)
NOTE: Substitute # in the first command with the actual disk # from step 4 above. For example: select disk 4


  • select disk #
  • detail disk (this is to verify that you selected the correct disk before using "clean" below)
  • clean
  • create partition primary
  • format fs=fat32 quick
  • active
  • assign
  • list volume
  • exit

Create_UEFI_USB-1.jpg


6. Make note of the volume letter (ex: K) for the USB flash drive in the command prompt. (see screenshot above)

7. Do step 8, step 9, or step 10 below depending on if you are using a Windows 7/8/8.1 ISO or DVD.

warning   Warning
It has been reported that using the downloaded Windows 8 upgrade ISO does not always give you an UEFI bootable USB option in the boot menu.

If this happens to you, then use the ESD-TO-ISO.exe program created by our member Simon (SIW2) below to create an ISO that will work with UEFI. Afterwards, start this tutorial over using this new ISO instead.

See OPTION TWO here: Windows 8 and Windows 8.1 ISO - Download or Create

download


8. If Using a Windows 7 or Windows 8/8.1 ISO File in Windows 8
NOTE: For a Windows 7 ISO or Windows 8/8.1 ISO file.


A) Open File Explorer, navigate to the .iso file, right click or press and hold on the .iso file, then click/tap on Mount. (see screenshot below)


W8_ISO.jpg


B) The mounted .iso file will now automatically open. Select all files in it, right click or press and hold on the selected files, click/tap on Send to and the Removable Disk for your USB flash drive letter (ex: K) from step 6 above. (see screenshot below)


Copy.jpg


C) This could take a bit to copy the ISO contents to the USB.

D) When finished, go to step 11 below.

9. If Using a Windows 7 or Windows 8/8.1 ISO File in Windows 7
NOTE: For a Windows 7 ISO or Windows 8/8.1 ISO file.


A) If you have not already, you will need to download and install the latest alpha version of the free program 7-Zip.
NOTE: You can use any program that performs the same function to extract or mount an ISO, but I just find 7-Zip easier to use.

B) Open Windows Explorer, navigate to the .iso file, right click on the .iso file, then click on 7-Zip and Extract files. (see screenshot below)


W7_ISO-1.jpg


C) In the Extract dialog, click on the browse button, select the Removable Disk for your USB flash drive letter (ex: K) from step 6 above, and click on OK, and OK. (see screenshots below)


W7_ISO-2.jpg


D) This could take a bit to copy the ISO contents to the USB.

E) When finished, go to step 11 below.

10. If Using a Windows 7 or Windows 8/8.1 Installation DVD


A) Insert the Windows 7 or Windows 8 installation DVD into the CD/DVD drive.

B) In the Computer window, open the DVD. (see screenshot below)


DVD.jpg


C) Select all files in it, right click or press and hold on the selected files, click/tap on Send to and the Removable Disk for your USB flash drive letter (ex: K) from step 6 above. (see screenshot below)


Copy.jpg


D) This could take a bit to copy the DVD contents to the USB.

E) When finished, go to step 11 below.


11. If Using 64-bit Windows 7
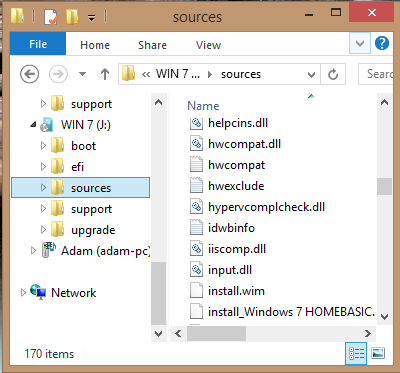
Note   Note
Thanks to theog for this step

You do not need to do this step unless you are creating a 64-bit Windows 7 UEFI USB flash drive.

If you are not, then go to step 12 below instead.


A) On the USB flash drive, "copy" the efi\microsoft\boot folder up one level into the efi folder as efi\boot. (see screenshot below)


11A.jpg


B) If you have not already, download and install the latest alpha version of the free program 7-Zip, then run 7-Zip.

C) In 7-Zip, navigate to the sources\install.wim\1\Windows\Boot\EFI\bootmgfw.efi on the USB flash drive, select the bootmgfw.efi file, copy it to your desktop, click/tap on OK, and close 7-Zip. (see screenshot below)


7-Zip.jpg


D) Rename the bootmgfw.efi file on your desktop to bootx64.efi.


E) Copy/Move the renamed bootx64.efi file into the efi/boot folder (step 11A) on the USB flash drive.


efi-boot.PNG


F) Go to step 12 below.

12. You are now ready to do a clean install of Windows 7 or Windows 8/8.1 using UEFI with your bootable UEFI USB flash drive.


That's it,
Shawn


Attachments

  • ESD-TO-ISO.zip
    341.8 KB · Views: 34,430
  • install.wim.png
    install.wim.png
    10.2 KB · Views: 103,124
  • USB_Drive.png
    USB_Drive.png
    10.2 KB · Views: 834
Last edited by a moderator:
Is it odd that after I load up my Windows 7 ISO and check the box "Create a bootable disk using" that I don't have the option to select dots for neither Standard Windows Installation or Window's to Go?

These options don't appear at all -> Untitled-1.jpg

Thanks for your help.
 

My Computer

System One

  • OS
    Windows 7
Is it odd that after I load up my Windows 7 ISO and check the box "Create a bootable disk using" that I don't have the option to select dots for neither Standard Windows Installation or Window's to Go?

Not at all. As explained in the FAQ, as well as the release notes for version 2.0, Windows To Go is only available if you run Rufus on Windows 8 or later. If you run Windows 7, you won't see the To Go creation option.

If you want to know more, see here.

Maybe that will change in the future, but I don't promise anything.
 

My Computer

System One

  • OS
    Windows 7 x64
    Computer type
    PC/Desktop
    System Manufacturer/Model
    Home built
    CPU
    Intel Core 2 Duo
    Motherboard
    ASUS P5B Deluxe
    Memory
    Corsair 4 GB DDR2 :(
    Graphics Card(s)
    Geforce GT610 1 GB
    Sound Card
    Embedded HD Audio
    Monitor(s) Displays
    Dell 2005FPW
    Screen Resolution
    1680x1050
    Hard Drives
    1x Intel SSD 330 180 GB
    2x Samsung HD103UJ in RAID1
    PSU
    Corsair 400W
Is it odd that after I load up my Windows 7 ISO and check the box "Create a bootable disk using" that I don't have the option to select dots for neither Standard Windows Installation or Window's to Go?

Not at all. As explained in the FAQ, as well as the release notes for version 2.0, Windows To Go is only available if you run Rufus on Windows 8 or later. If you run Windows 7, you won't see the To Go creation option.

If you want to know more, see here.

Ah! Thank you very much :)
 

My Computer

System One

  • OS
    Windows 7
With the new version of Rufus, it is possible to create a bootable USB stick multiboot with some customized editions of Windows 8.x whose iso are greater than 4096MB? If so, how do I do this?

This USB stick must be able to boot on the computer with the BIOS or UEFI.

Thanks

Bye
 

My Computer

System One

  • OS
    Windows 8

My Computer

System One

  • OS
    64-bit Windows 10
    Computer type
    PC/Desktop
    System Manufacturer/Model
    Custom self built
    CPU
    Intel i7-8700K OC'd to 5 GHz
    Motherboard
    ASUS ROG Maximus XI Formula Z390
    Memory
    64 GB (4x16GB) G.SKILL TridentZ RGB DDR4 3600 MHz (F4-3600C18D-32GTZR)
    Graphics Card(s)
    ASUS ROG-STRIX-GTX1080TI-O11G-GAMING
    Sound Card
    Integrated Digital Audio (S/PDIF)
    Monitor(s) Displays
    2 x Samsung Odyssey G7 27"
    Screen Resolution
    2560x1440
    Hard Drives
    1TB Samsung 990 PRO M.2,
    4TB Samsung 990 PRO PRO M.2,
    8TB WD MyCloudEX2Ultra NAS
    PSU
    OCZ Series Gold OCZZ1000M 1000W
    Case
    Thermaltake Core P3
    Cooling
    Corsair Hydro H115i
    Keyboard
    Logitech wireless K800
    Mouse
    Logitech MX Master 3
    Internet Speed
    1 Gb/s Download and 35 Mb/s Upload
    Browser
    Internet Explorer 11
    Antivirus
    Malwarebyte Anti-Malware Premium
    Other Info
    Logitech Z625 speaker system,
    Logitech BRIO 4K Pro webcam,
    HP Color LaserJet Pro MFP M477fdn,
    APC SMART-UPS RT 1000 XL - SURT1000XLI,
    Galaxy S23 Plus phone
Actually, the FAQ entry pointed above indicates that the default of Rufus is not to allow dual BIOS + UEFI on Windows installation, and the entry explains precisely why it's done. However, the entry also explains that, if you know what you're doing and want to have dual BIOS + UEFI, you can use the Alt-E cheat mode to do that. So you can have dual BIOS + UEFI bootable Windows USB installers with Rufus. It's just not enabled by default.

As to multiboot, I'm not planning to support it, ever, in part because I have doubts that most of the people asking for Windows multiboot have the legal licensing from Microsoft to do that many installations. I also expect those who do to have access to the MSDN and the skills level that usually goes with it (since MSDN is usually something that only power users would have access to) so that they can create multiboot Windows ISO using the Windows AIK.
That's not to say that there aren't some people out there who have legitimate reasons to want multiboot from Rufus, and also have the legal entitlement to do so. However, it really looks to me like most of the requests I get for Windows multiboot are unlikely to be entirely legal, and thus I'd rather not spent time on something that will add A LOT of complexity as well as encourage software piracy... Besides, it always looks to me like people eager on multibooting actually spend a lot more time fine tuning their multiboot options (there's always a new version of the OS to insert, etc), than they would simply recreating the USB according to their need. Considering that, if you have a fast USB 3.0 drive, creating a new Windows installer with Rufus will only take a couple minutes or less, you will definitely save compared to trying to keep an existing multiboot USB up to date.
Then again, there are other tools that are designed to handle multiboot, so if you really want this feature, you should be able to find what you need.

Finally, Rufus 2.1 (which I am planning to release later on today -- there's a BETA here) does allow the creation of EFI bootable Windows USB drives that contain files larger than 4GB, as it offers the ability to seamlessly boot NTFS in EFI mode (as a matter of fact, this is a feature that was introduced with Rufus 2.0, but it had a bug, which has been fixed in 2.1).
 

My Computer

System One

  • OS
    Windows 7 x64
    Computer type
    PC/Desktop
    System Manufacturer/Model
    Home built
    CPU
    Intel Core 2 Duo
    Motherboard
    ASUS P5B Deluxe
    Memory
    Corsair 4 GB DDR2 :(
    Graphics Card(s)
    Geforce GT610 1 GB
    Sound Card
    Embedded HD Audio
    Monitor(s) Displays
    Dell 2005FPW
    Screen Resolution
    1680x1050
    Hard Drives
    1x Intel SSD 330 180 GB
    2x Samsung HD103UJ in RAID1
    PSU
    Corsair 400W
Actually, the FAQ entry pointed above indicates that the default of Rufus is not to allow dual BIOS + UEFI on Windows installation, and the entry explains precisely why it's done. However, the entry also explains that, if you know what you're doing and want to have dual BIOS + UEFI, you can use the Alt-E cheat mode to do that. So you can have dual BIOS + UEFI bootable Windows USB installers with Rufus. It's just not enabled by default.

As to multiboot, I'm not planning to support it, ever, in part because I have doubts that most of the people asking for Windows multiboot have the legal licensing from Microsoft to do that many installations. I also expect those who do to have access to the MSDN and the skills level that usually goes with it (since MSDN is usually something that only power users would have access to) so that they can create multiboot Windows ISO using the Windows AIK.
That's not to say that there aren't some people out there who have legitimate reasons to want multiboot from Rufus, and also have the legal entitlement to do so. However, it really looks to me like most of the requests I get for Windows multiboot are unlikely to be entirely legal, and thus I'd rather not spent time on something that will add A LOT of complexity as well as encourage software piracy... Besides, it always looks to me like people eager on multibooting actually spend a lot more time fine tuning their multiboot options (there's always a new version of the OS to insert, etc), than they would simply recreating the USB according to their need. Considering that, if you have a fast USB 3.0 drive, creating a new Windows installer with Rufus will only take a couple minutes or less, you will definitely save compared to trying to keep an existing multiboot USB up to date.
Then again, there are other tools that are designed to handle multiboot, so if you really want this feature, you should be able to find what you need.

Finally, Rufus 2.1 (which I am planning to release later on today -- there's a BETA here) does allow the creation of EFI bootable Windows USB drives that contain files larger than 4GB, as it offers the ability to seamlessly boot NTFS in EFI mode (as a matter of fact, this is a feature that was introduced with Rufus 2.0, but it had a bug, which has been fixed in 2.1).

So, for you, with Rufus 2.1 Beta, I could reach my goal?

Thanks

Bye
 

My Computer

System One

  • OS
    Windows 8
With the new version of Rufus, it is possible to create a bootable USB stick multiboot with some customized editions of Windows 8.x whose iso are greater than 4096MB? If so, how do I do this?

This USB stick must be able to boot on the computer with the BIOS or UEFI.

I have to question why one would want to multi-boot custom ISO file(s)?

For instance the > The Setup Media ISO = contains all the boot files and setup files needed to run windows setup.. The ISO is just one large file or Container Package of all those setup files.. So why boot into a multi-option boot manager that lists multiple bootable ISO's??

One could create a WinPE bootable USB and then copy the different widows setup versions into folders.
Then run from command line ?:\windows 8.1 pro\setup.exe > ?:\windows 8.1\setup.exe > ?:\windows 7\setup.exe

The overall size would be less - because the PC has already been Booted - and there is no need for all the addintional boot files contained in every ISO...

If one wanted to boot multi-version of 7 or 8 for a usb (windows to go) one could create a multiboot VHD USB
 

My Computer

System One

  • OS
    Windows 3.1 > Windows 10
    Computer type
    PC/Desktop
    System Manufacturer/Model
    Dell XPS 8700
    CPU
    I7
    Memory
    24 GB
So, for you, with Rufus 2.1 Beta, I could reach my goal?

With Rufus 2.1 (that was released yeterday), you will be able to do everything, except multiboot.
 

My Computer

System One

  • OS
    Windows 7 x64
    Computer type
    PC/Desktop
    System Manufacturer/Model
    Home built
    CPU
    Intel Core 2 Duo
    Motherboard
    ASUS P5B Deluxe
    Memory
    Corsair 4 GB DDR2 :(
    Graphics Card(s)
    Geforce GT610 1 GB
    Sound Card
    Embedded HD Audio
    Monitor(s) Displays
    Dell 2005FPW
    Screen Resolution
    1680x1050
    Hard Drives
    1x Intel SSD 330 180 GB
    2x Samsung HD103UJ in RAID1
    PSU
    Corsair 400W


Rufus Fat32 size limit limitation.jpg

I found a guide similar to this one Installing Windows 7 in native EFI mode from USB - bit-tech.net Forums

Problem is that I made "install.wim" file inside the ISO which is greater than 4Gb and fat32's file size limit is surpassed ( the reason is because I've collected all updates from windows updates downloader ).

Because I could not get it to work I made a DVDR and installed a second windows 7 SP1 x64 with most of the update, and it worked (although not flawlessly).

I believe I already tried the trick found in step 11 with a USB formatted to NTFS and although I could select a GPT partition to install windows 7 sp1 x64 from a UEFI bios there was another error at which point I gave up and went to make a DVDR media.

There is obviously an install size limitation with DVDRW 4.37Gb and DVDR 4.7Gb but one of the advantages of USB is that they are usually nowadays at least 8Gb, but using the fat32 install method throws a spanner in the works.

Are there any workarounds possible. Perhaps making 2 "install.wim" files or adding updates to the "boot.wim"? Or is it possible to use NTFS?

This is where I found a guide to using NTLite to update windows 7 (don't forget windows updates downloader):
[Guide] Integration of drivers into a Win7/8/10 image
 
Last edited:

My Computer

System One

  • OS
    win 7 sp1 ultimate x64
    Computer type
    PC/Desktop
    System Manufacturer/Model
    custom
    CPU
    4690k
    Motherboard
    Gigabyte Z97X Gaming 5
    Memory
    16Gb Hyper X Savage Kingston
    Graphics Card(s)
    Radeon 6850
    Sound Card
    Asus Xonar DX Uni Xonar Drivers
    Monitor(s) Displays
    Benq GW2265
    Screen Resolution
    1920x1080
    Hard Drives
    4Tb HGST HDN724040ALE6400
    Sandisk X300
    WD EARS 2Tb
    WD EACS 1Tb
    Seagate ST350064 1AS 500Gb
    Sandisk Extreme USB 3.0 Flash Drive
    Pico USB 2.0 Flash Drive
    Cooling
    Prolimatec Megahelim 5+ low rpm 120mm fans
    Keyboard
    Logitech G15 + Wolfking
    Mouse
    Gigabyte M6900
    Internet Speed
    60Mb/3Mb
    Browser
    firefox
    Antivirus
    Spybot S & D, Spyware Blaster
Are there any workarounds possible. Perhaps making 2 .wim files or adding updates to the .boot? Or is it possible to use NTFS?

Why are you using Rufus 1.3.2? This is a VERY OLD version, and if you had used the latest (version 2.1 - it might help to check Rufus' official site once in a while!), you would have found that the latest version will happily let you create an UEFI bootable NTFS drive, as long as you set the target to GPT for UEFI after selecting your ISO. No need to split or anything.

Can you please try Rufus 2.1. Oh and if Rufus asks you if you want to allow it to check for application updates, please enable that. ;)

EDIT: my bad, was looking at the right part of the screen, but I see that you are using latest. Then you should be able to select NTFS. Do you get an error when selecting NTFS instead of FAT32?
 

My Computer

System One

  • OS
    Windows 7 x64
    Computer type
    PC/Desktop
    System Manufacturer/Model
    Home built
    CPU
    Intel Core 2 Duo
    Motherboard
    ASUS P5B Deluxe
    Memory
    Corsair 4 GB DDR2 :(
    Graphics Card(s)
    Geforce GT610 1 GB
    Sound Card
    Embedded HD Audio
    Monitor(s) Displays
    Dell 2005FPW
    Screen Resolution
    1680x1050
    Hard Drives
    1x Intel SSD 330 180 GB
    2x Samsung HD103UJ in RAID1
    PSU
    Corsair 400W
As in the screenshots I am using rufus 2.1. I honestly can't remember what I've tried but one thing I know that with the USB installer I created - none of the options in my bios helped to get it past the choose partition stage.

The main point of my post was to point out the limitation of using fat32 as a basis for the install. I'm sure that the guide will work flawlessly if I didn't exceed 4Gb size for the install.wim file.
 

My Computer

System One

  • OS
    win 7 sp1 ultimate x64
    Computer type
    PC/Desktop
    System Manufacturer/Model
    custom
    CPU
    4690k
    Motherboard
    Gigabyte Z97X Gaming 5
    Memory
    16Gb Hyper X Savage Kingston
    Graphics Card(s)
    Radeon 6850
    Sound Card
    Asus Xonar DX Uni Xonar Drivers
    Monitor(s) Displays
    Benq GW2265
    Screen Resolution
    1920x1080
    Hard Drives
    4Tb HGST HDN724040ALE6400
    Sandisk X300
    WD EARS 2Tb
    WD EACS 1Tb
    Seagate ST350064 1AS 500Gb
    Sandisk Extreme USB 3.0 Flash Drive
    Pico USB 2.0 Flash Drive
    Cooling
    Prolimatec Megahelim 5+ low rpm 120mm fans
    Keyboard
    Logitech G15 + Wolfking
    Mouse
    Gigabyte M6900
    Internet Speed
    60Mb/3Mb
    Browser
    firefox
    Antivirus
    Spybot S & D, Spyware Blaster
Yeah. Until very recently FAT32 was the only option, so that's why the guide still points to using FAT32.

It's only with version 2.0 that Rufus added the ability to create UEFI bootable NTFS drives. However, this requires executing extra code at boot and loading an NTFS drive, which, even as it is done transparently by Rufus, leaves the possibility that some UEFI firmwares may not like it. So the recommended process is to prefer FAT32 if you don't have a large file, and use NTFS only if you have a >4GB file.

Anyway, please let us know if you are able to boot with GPT for UEFI and NTFS as the file system. If you are using Rufus 2.1, this should work.
 

My Computer

System One

  • OS
    Windows 7 x64
    Computer type
    PC/Desktop
    System Manufacturer/Model
    Home built
    CPU
    Intel Core 2 Duo
    Motherboard
    ASUS P5B Deluxe
    Memory
    Corsair 4 GB DDR2 :(
    Graphics Card(s)
    Geforce GT610 1 GB
    Sound Card
    Embedded HD Audio
    Monitor(s) Displays
    Dell 2005FPW
    Screen Resolution
    1680x1050
    Hard Drives
    1x Intel SSD 330 180 GB
    2x Samsung HD103UJ in RAID1
    PSU
    Corsair 400W
Some Firmware allows Booting UEFI from NTFS Media - not all.. Mine Does..
 

My Computer

System One

  • OS
    Windows 3.1 > Windows 10
    Computer type
    PC/Desktop
    System Manufacturer/Model
    Dell XPS 8700
    CPU
    I7
    Memory
    24 GB
Some Firmware allows Booting UEFI from NTFS Media - not all.. Mine Does..
You're right. In my firmware F5 for Gigabyte Z97X Gaming 5 it lists 2 separate boot options if your flash stick has fat32 file system & "GPT scheme for UEFI computer" normal and UEFI:media_name, and no UEFI options if NTFS formated with "GPT scheme for UEFI computer". That is with CSM option enabled (compatibility support module), without only UEFI options are listed. So that's why I agree its a firmware limitation.

If I chose MBR for UEFI/ MBR for BIOS or UEFI computers, I'd have to test (only tested without changing firmware options) if I could install windows 7 to a GPT formated disk in UEFI mode. I'm not sure if the Rufus options refer to the formating of the USB flash drive or the target disk.

I made an image which contains all the updates and a few options within size limits. Installed on GPT disk with UEFI firmware using a Fat32 formatted USB flash drive. It takes 1:30 to write the image. Took a while to make the image in NTLite, and took along time on "windows finalising settings" cause I'm using an old 200Gb Samsung spinpoint to test. I'll need to format my SSD to GPT to do a dual boot without entering the bios. 4Tb has to use GPT.
 

My Computer

System One

  • OS
    win 7 sp1 ultimate x64
    Computer type
    PC/Desktop
    System Manufacturer/Model
    custom
    CPU
    4690k
    Motherboard
    Gigabyte Z97X Gaming 5
    Memory
    16Gb Hyper X Savage Kingston
    Graphics Card(s)
    Radeon 6850
    Sound Card
    Asus Xonar DX Uni Xonar Drivers
    Monitor(s) Displays
    Benq GW2265
    Screen Resolution
    1920x1080
    Hard Drives
    4Tb HGST HDN724040ALE6400
    Sandisk X300
    WD EARS 2Tb
    WD EACS 1Tb
    Seagate ST350064 1AS 500Gb
    Sandisk Extreme USB 3.0 Flash Drive
    Pico USB 2.0 Flash Drive
    Cooling
    Prolimatec Megahelim 5+ low rpm 120mm fans
    Keyboard
    Logitech G15 + Wolfking
    Mouse
    Gigabyte M6900
    Internet Speed
    60Mb/3Mb
    Browser
    firefox
    Antivirus
    Spybot S & D, Spyware Blaster
@Akeo... I pre-format my 32GB thumb drive to FAT32 and then try to create an installer using your latest Rufus. It reports to me that it cannot use FAT32 with 'this type of ISO'.... referring to the Windows 10 TP ISO's....?

MS themselves suggest that the thumb drive should be FAT32 for Win 10 installer..... something doesn't add up.
 

My Computer

System One

  • OS
    8.1 pro + Ubuntu
    Computer type
    Laptop
    System Manufacturer/Model
    Samsung RV-511-S01UK
    CPU
    i3 380M @2.53Ghz
    Motherboard
    Samsung
    Memory
    6GB @1066Mhz
    Graphics Card(s)
    Nvidia 315m Discrete 1GB VRAM
    Screen Resolution
    1366 x 768
    Hard Drives
    SSD's
    Antivirus
    kaspersky on 7.... None on 8.1
@Akeo... I pre-format my 32GB thumb drive to FAT32 and then try to create an installer using your latest Rufus. It reports to me that it cannot use FAT32 with 'this type of ISO'.... referring to the Windows 10 TP ISO's....?

MS themselves suggest that the thumb drive should be FAT32 for Win 10 installer..... something doesn't add up.

1. Select the ISO in Rufus
2. Set the Partition Scheme and Target System type to GPT for UEFI computer. You must change that option, as the default of Rufus is to use MBR (in which case this will only be bootable in CSM mode on UEFI systems and Rufus will indeed use NTFS)
3. Select the filesystem you want. Rufus should have picked FAT32 by default (after you changed Partition Scheme to GPT), but you should be able to switch to NTFS if you want, or if you have a >4GB file.

You should not preformat the drive before using Rufus - Rufus will format it for you according to the filesystem you selected.

@sgtsixpack,

1. If you select the right options (see above), you should be able to boot an NTFS drive created by Rufus using UEFI. Rufus allows NTFS UEFI boot regardless of your UEFI firmware. But you must make sure you select GPT and NTFS after selecting your ISO (ISO selection should always be the first step when using Rufus).
2. The Rufus options apply only to the USB drive. The Windows installer decides the rest. However, it's easier to force the installer to use UEFI installation mode if you boot through UEFI in Rufus, in which case you really want to use GPT, as this will ensure you cannot boot in CSM mode.
 

My Computer

System One

  • OS
    Windows 7 x64
    Computer type
    PC/Desktop
    System Manufacturer/Model
    Home built
    CPU
    Intel Core 2 Duo
    Motherboard
    ASUS P5B Deluxe
    Memory
    Corsair 4 GB DDR2 :(
    Graphics Card(s)
    Geforce GT610 1 GB
    Sound Card
    Embedded HD Audio
    Monitor(s) Displays
    Dell 2005FPW
    Screen Resolution
    1680x1050
    Hard Drives
    1x Intel SSD 330 180 GB
    2x Samsung HD103UJ in RAID1
    PSU
    Corsair 400W
Hey guys,

I've followed this guide and its gotten me to the point where I can start the win 7 x64 installation, but I am prompted to load drivers, as it is a USB i think the windows installer is having a bit of a freak out??

It is loading UEFI and goes throw the language screen fine and then prompts to load driver/s. Selecting any location on the flash drive does nothing, and neither does selecting any other drive options (C:, D:, or X:,).

Any assistance is appreciated!

IMG_4669.JPG
 

My Computer

System One

  • OS
    Windows 7
    Computer type
    PC/Desktop
    System Manufacturer/Model
    Custom Rig
    CPU
    i7 920
    Motherboard
    Rampage II Extreme
    Memory
    Corsair
    Graphics Card(s)
    Asus GTX 780
    Screen Resolution
    1920 x 1080
    Keyboard
    Logitech G15 second gen
    Mouse
    Logitech G5
    Internet Speed
    ADSL2+
    Browser
    Firefox
    Antivirus
    AVG

My Computer

System One

  • OS
    64-bit Windows 10
    Computer type
    PC/Desktop
    System Manufacturer/Model
    Custom self built
    CPU
    Intel i7-8700K OC'd to 5 GHz
    Motherboard
    ASUS ROG Maximus XI Formula Z390
    Memory
    64 GB (4x16GB) G.SKILL TridentZ RGB DDR4 3600 MHz (F4-3600C18D-32GTZR)
    Graphics Card(s)
    ASUS ROG-STRIX-GTX1080TI-O11G-GAMING
    Sound Card
    Integrated Digital Audio (S/PDIF)
    Monitor(s) Displays
    2 x Samsung Odyssey G7 27"
    Screen Resolution
    2560x1440
    Hard Drives
    1TB Samsung 990 PRO M.2,
    4TB Samsung 990 PRO PRO M.2,
    8TB WD MyCloudEX2Ultra NAS
    PSU
    OCZ Series Gold OCZZ1000M 1000W
    Case
    Thermaltake Core P3
    Cooling
    Corsair Hydro H115i
    Keyboard
    Logitech wireless K800
    Mouse
    Logitech MX Master 3
    Internet Speed
    1 Gb/s Download and 35 Mb/s Upload
    Browser
    Internet Explorer 11
    Antivirus
    Malwarebyte Anti-Malware Premium
    Other Info
    Logitech Z625 speaker system,
    Logitech BRIO 4K Pro webcam,
    HP Color LaserJet Pro MFP M477fdn,
    APC SMART-UPS RT 1000 XL - SURT1000XLI,
    Galaxy S23 Plus phone
Back
Top