How to Remove "Your PCs" from the Store "Your apps" in Windows 8 and 8.1
When you install an app on a PC from the Windows Store, the name of that PC (computer name) will be added to the Store whenever you are signed in to the Store with the same Microsoft account. You can install the apps you (your Microsoft account) get from the Store on up to 5 PCs simultaneously.
For more about Windows Store, see also: Windows Store Terms of Use
This tutorial will show you how to remove Your PCs from the Windows Store in Windows 8 to no longer be able to use any of the apps you (your Microsoft account) installed from the Windows Store on the removed PC to install on any other of your PCs.
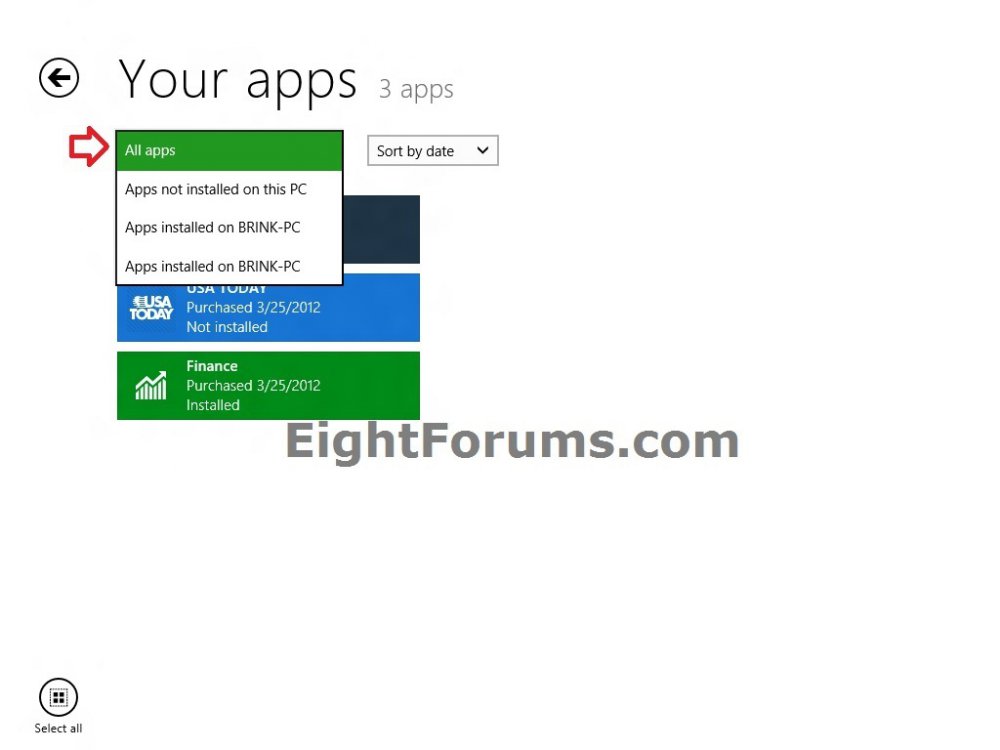
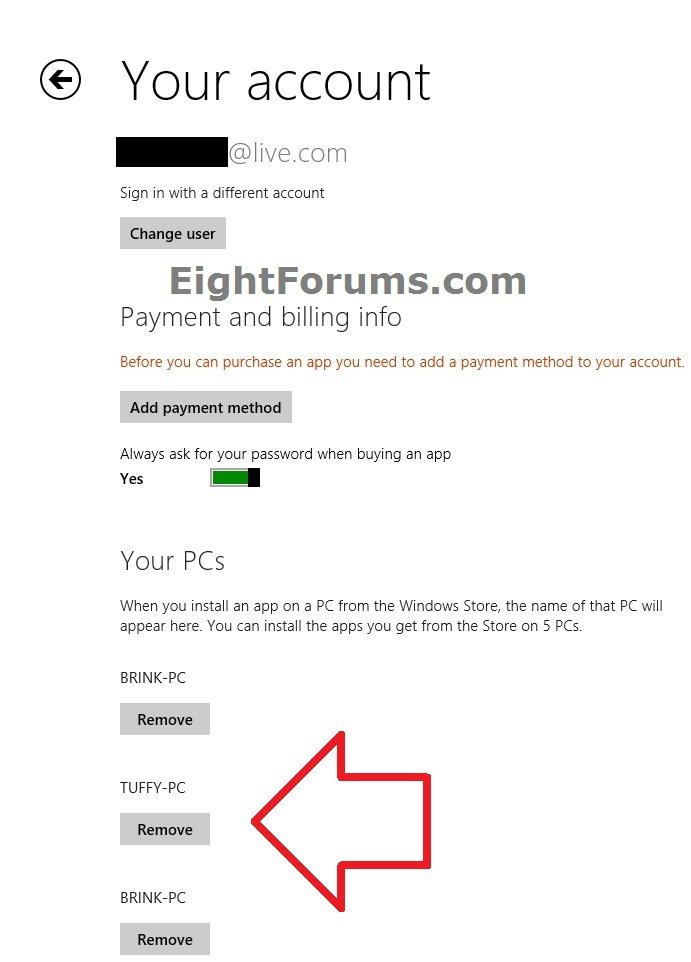
EXAMPLE: "Your PCs" Listed when Looking at "Your apps"
NOTE: You can see "Your apps" when you right click on an empty area in the Store.
Here's How:
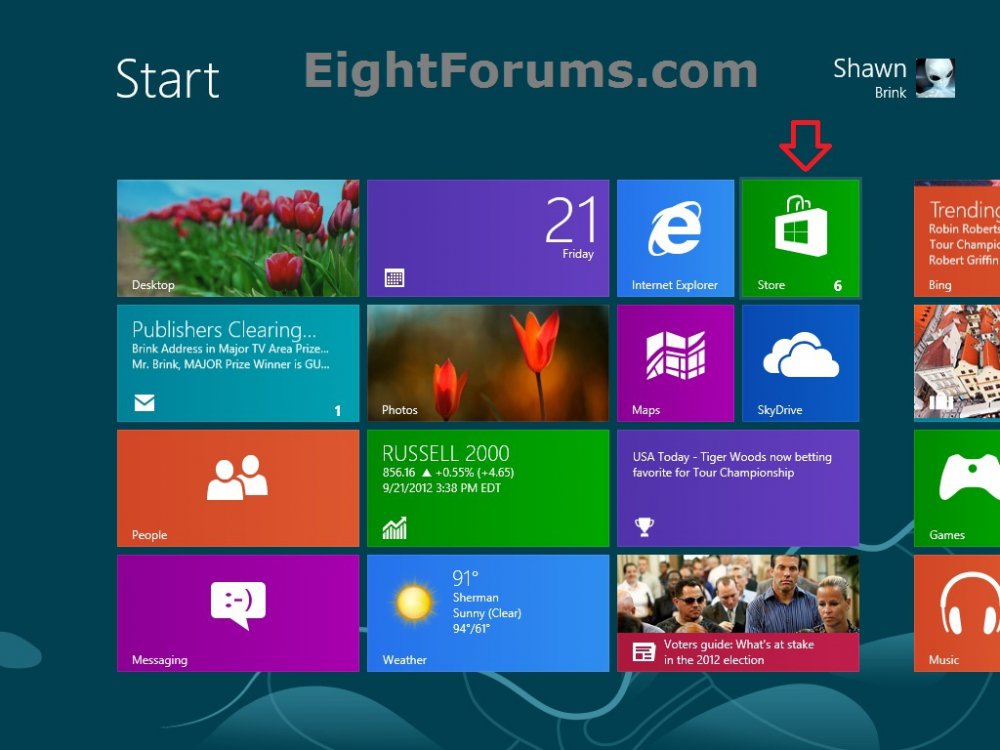
1. If you have not already, open the Store in Windows 8 from the Start screen. (see screenshot below)
2. Stay signed in to the Store with your current Microsoft account, or sign in with a different Microsoft account.
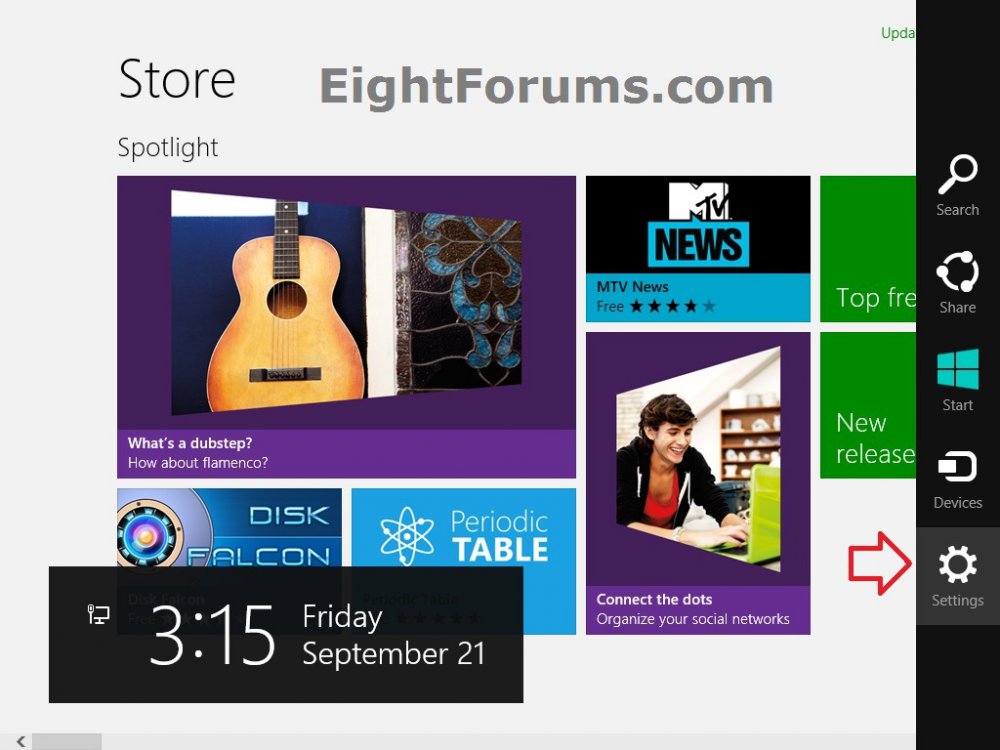
3. While in the Store, open the Charms bar, and click/tap on the Settings charm. (see screenshot below)
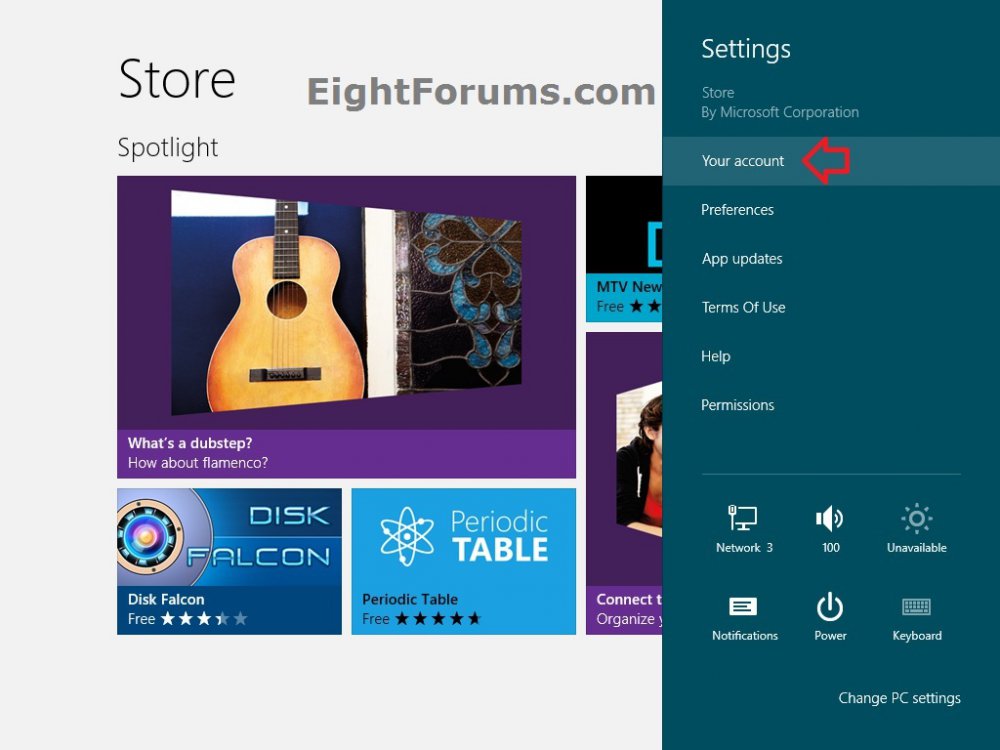
4. In the Settings flyout, click/tap on Your account. (see screenshot below)
NOTE: You could also just press the Windows + I keys to see this.
5. Under Your PCs, click/tap on the remove button for the PC's computer name (EX: TUFFY-PC) that you no longer want to be listed to be able to install apps on or from in the Store. (see screenshot below)
6. Click/tap on Confirm to remove the PC (EX: TUFFY-PC) from the list. (see screenshot below)
7. When finished, you can click/tap on the arrow at the top left corner to return to the Store. (see screenshot below step 5)
That's it,
Shawn
Related Tutorials
- How to Install Modern Apps from Store Windows 8 and 8.1
- Add, Edit, or Remove a Payment Method to your Account in Store in Windows 8 and 8.1
- How to Uninstall Modern Apps in Windows 8 and 8.1
- How to Enable or Disable Store in Windows 8 and 8.1
- How to Sign in to Store with a Different Microsoft Account to in Windows 8 and 8.1
- How to Enable or Disable App Localization in Store in Windows 8 and 8.1
- How to Clear Store Cache in Windows 8 and 8.1
- How to Remove Your Synced Windows 8.1 Personal Settings from SkyDrive
- How to Delete Your Synced Settings Backed Up on SkyDrive for Windows 8.1 PCs and Devices
Attachments
Last edited:

