
How to Open and Use Steps Recorder in Windows 8
You can use Steps Recorder to automatically capture steps you take on a PC, including a text description of what you did and a picture of the screen during each step (called a screen shot). Once you capture these steps, you can save them to a file that can be sent to other people.
Steps Recorder can be helpful if you're trying to show someone how to do a certain task or troubleshoot a problem with a support professional.
This tutorial will show you how to open and use Steps Recorder to automatically capture steps you take in Windows 8.
Steps Recorder can be helpful if you're trying to show someone how to do a certain task or troubleshoot a problem with a support professional.
This tutorial will show you how to open and use Steps Recorder to automatically capture steps you take in Windows 8.
- Steps Recorder will capture your steps in both desktop and Metro screens.
- Steps Recorder doesn't record anything you enter (type). If what you enter is an important part of the steps, you can add comments (step 5 below) while recording.
- Some apps, like a full-screen game, might not be captured accurately or provide enough details for a support professional to troubleshoot a problem.
- If you're using two monitors, Steps Recorder will capture both screens during the recording process. You might want to change your display settings to use one monitor while you're recording steps.
Here's How:
1. Press the Windows + R keys to open the Run dialog, type psr.exe, and press Enter.
2. To Adjust Settings in Steps Recorder
NOTE: When you adjust settings for Steps Recorder, they're only saved for your current session. After you close and reopen Steps Recorder, it will return to the default settings.
A) Click/tap the help down arrow, and then click/tap on Settings. (see screenshot below)

B) You can change the following settings for Problem Steps Recorder: (see screenshot below)
- Output File - If you don't want to be prompted to save a file after recording, tap or click the Browse button to set a default output file name. However, if you set the default output file name, you won't be able to preview the steps after you stop recording.
- Enable screen capture - If you don't want to capture screen shots with your recording info, select No. This might be a consideration if you're taking screen shots of an app that contains personal info, such as bank statements, and you're sharing the screen shots with someone else.
- Number of recent screen captures to store - The default is 25 screens, but you can increase or decrease the number of screen shots. Steps Recorder will still record all of your steps, but it will only store the number of screen shots defined in the settings. For example, if you took 30 screen shots during a recording but only had 25 screen shots as the default, you'd be missing the first five screen shots. In this case, you'd want to increase the number of screen shots.

3. To Start Record
A) When you're ready to record, click/tap on the Start Record button or press the Alt+A keys. (see screenshot below)

B) Start performing the steps you want to be recorded. You will notice a small red dot flash whenever you click/tap on anything to indicate that step has just been recorded.
4. To Pause and Resume Record
A) You can click/tap on Pause Record (Alt+U) to pause the recording at any time, and then click/tap on Resume Record (Alt+S) to resume it later. (see screenshots below)


5. To Add Comment
NOTE: Steps Recorder doesn't record anything you enter (type). If what you enter is an important part of the steps, you can add comments to give a text description.
A) While recording or while paused, you can click/tap on Add Comment (Alt+C). (see screenshots below step 4A)
B) Highlight (outline) the part of the screen that you want to comment on, and in the Highlight Area and Comment box, enter your text, and then tap or click/tap OK. (see screenshot below)

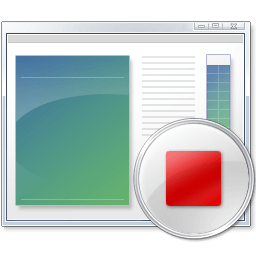
6. When finished recording your steps, click/tap on Stop Record (Alt+O). (see screenshot below)

7. You can now review the recorded steps, and do step 8, 9, or 10 below for what you would like to do. (see screenshots below)


8. To Save the Recording
A) Click/tap on Save (Alt+V) at the top. (see screenshots below step 7)
B) Navigate to where you want to save the ZIP file to, type in a name, and click/tap on Save. (see screenshot below)
NOTE: The .mht file (recorded steps) is saved in the .zip file.

9. To Email the Recording
A) Click/tap on Email (Alt+E) at the top. (see screenshots below step 7)
In some cases, clicking/tapping on Email will not open an email message. If this happens, try closing your email app before you click/tap Email or manually open a new email message and attach the .zip file from step 8.
B) A new email message window will open in your default email client program with a Recording.zip file of your recorded steps attached. Enter the contact information that you want to send the email to, enter any message you may like, then send the email. (see screenshot below)

10. To Start a New Recording
A) Click/tap on New Recording (Alt+N). (see screenshots below step 7)
B) If you have not already saved your recorded steps, then you will be prompted to do so. (see screenshot below)
- If you click/tap on Yes, then it'll take you to step 8B.
- If you click/tap on No, then it'll take you to step 3B.

11. When finished, close the Steps Recorder window. (see screenshots below step 7)
A) If you have not already saved your recorded steps, then you will be prompted to do so. (see screenshot below)
- If you click/tap on Yes, then it'll take you to step 8B.
- If you click/tap on No, then Steps Recorded will close without saving your recorded steps, and you will lose them.
12. If you like, click/tap on the Download button below to download the Steps_Recorder_Sample.zip file from step 7 to play with.
NOTE: To view the recorded steps, open the ZIP file, and double click/tap the .mht file. It will open in your default browser just how it looks in step 7 for you to review.

That's it,
Shawn
Attachments
Last edited:


 ) but...